Craft, Kids, Halloween
DIY Halloween Candy Baubles
With Halloween just around the corner, now’s the perfect time to think of fun ways to dress up that trick or treat candy. It’s a great way to get your kids involved in some Halloween crafts, plus you’ll really put a smile on the neighbourhood kids’ faces when you hand out parcels of sweets shaped as their favourite spooky critters.
![featured image for [object Object]](/_next/image?url=https%3A%2F%2Fimages.prismic.io%2Ftrs-storefront%2Fbd54fe31-f7d0-4bf6-93a0-3d8e213874f8_blog_diy-halloween-candy-baubles.jpg%3Fauto%3Dcompress%2Cformat&w=3840&q=75)
The Reject Shop
Last updated
16 Aug 2023
With Halloween just around the corner, now’s the perfect time to think of fun ways to dress up that trick or treat candy. It’s a great way to get your kids involved in some Halloween crafts, plus you’ll really put a smile on the neighbourhood kids’ faces when you hand out parcels of sweets shaped as their favourite spooky critters.
For those who love their crafts, there’s plenty of room to get creative with this project. Once you’ve made the pumpkin, witch, skull and bat, try assembling other creatures like spiders, ghosts and owls - you’ll soon have a whole collection of spooky characters to help you ring in the 31st!
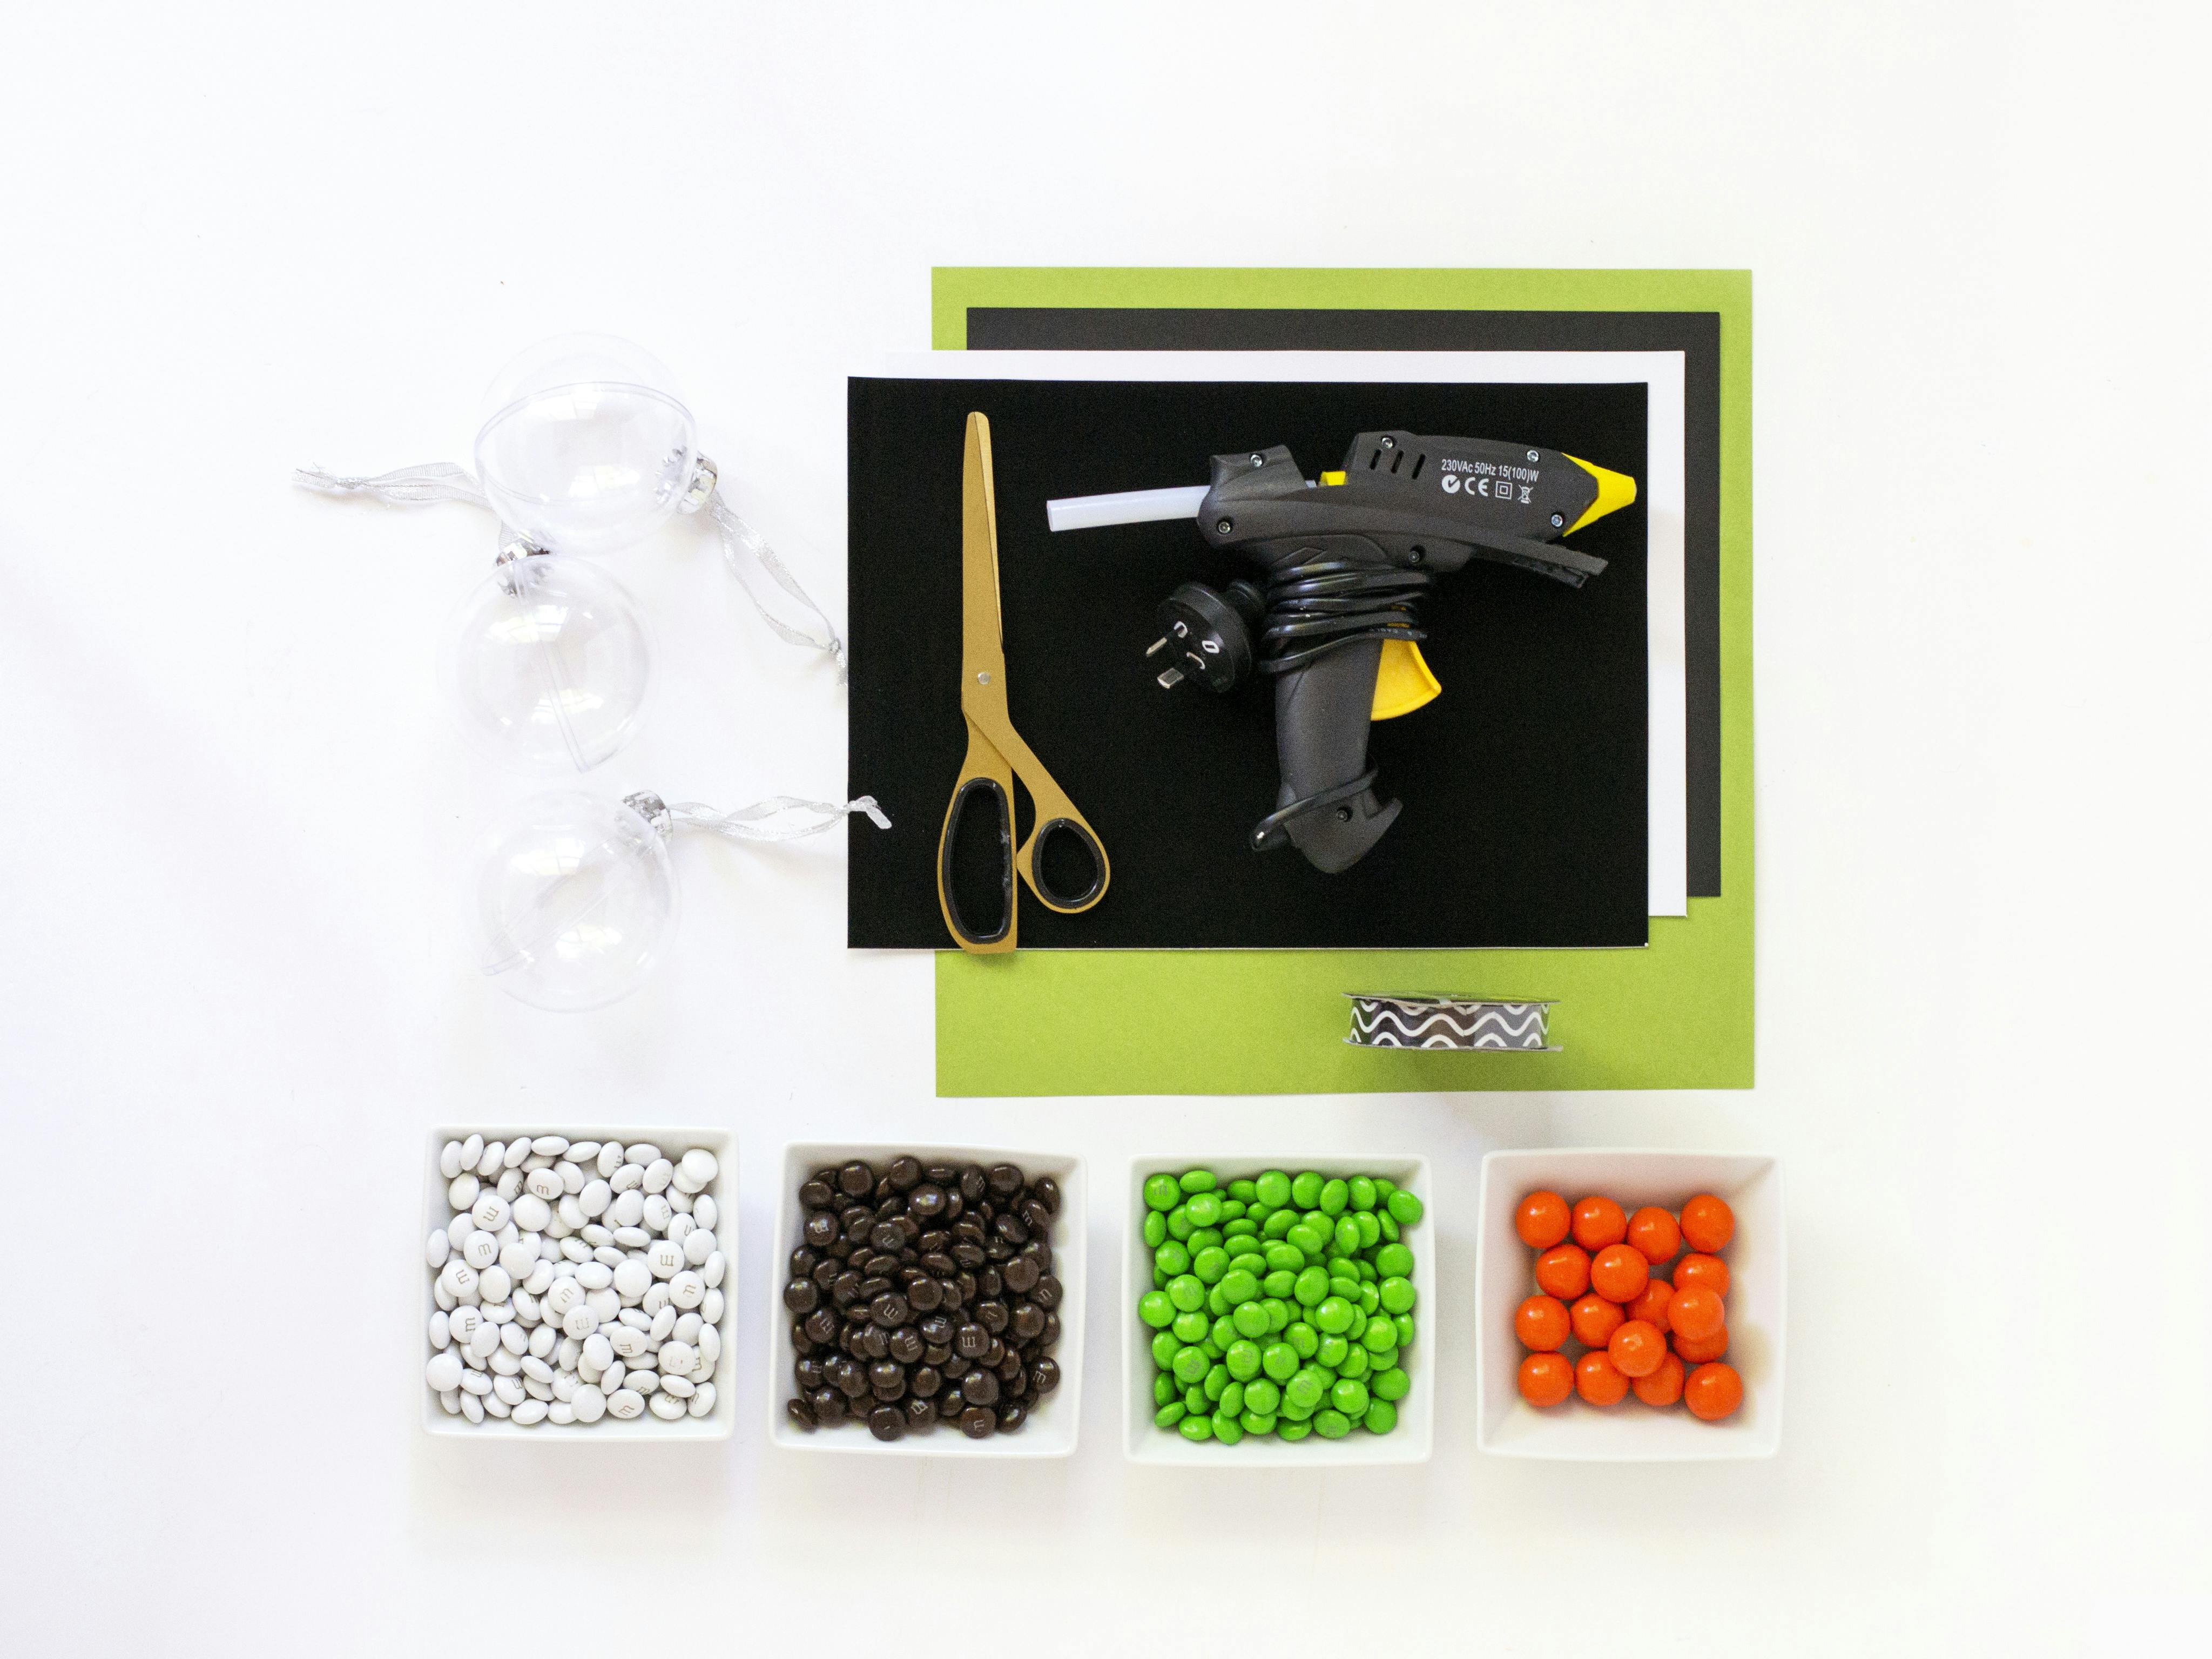
Materials
- Clear baubles from The Reject Shop
- Candy in Halloween colours from The Reject Shop (I used green, white, orange and dark brown candy)
- Black and white adhesive paper (you can also use black and white contact paper)
- Scissors
- Black cardboard
- Green cardboard
- Hot glue gun and glue sticks from The Reject Shop
- Ribbon from The Reject Shop
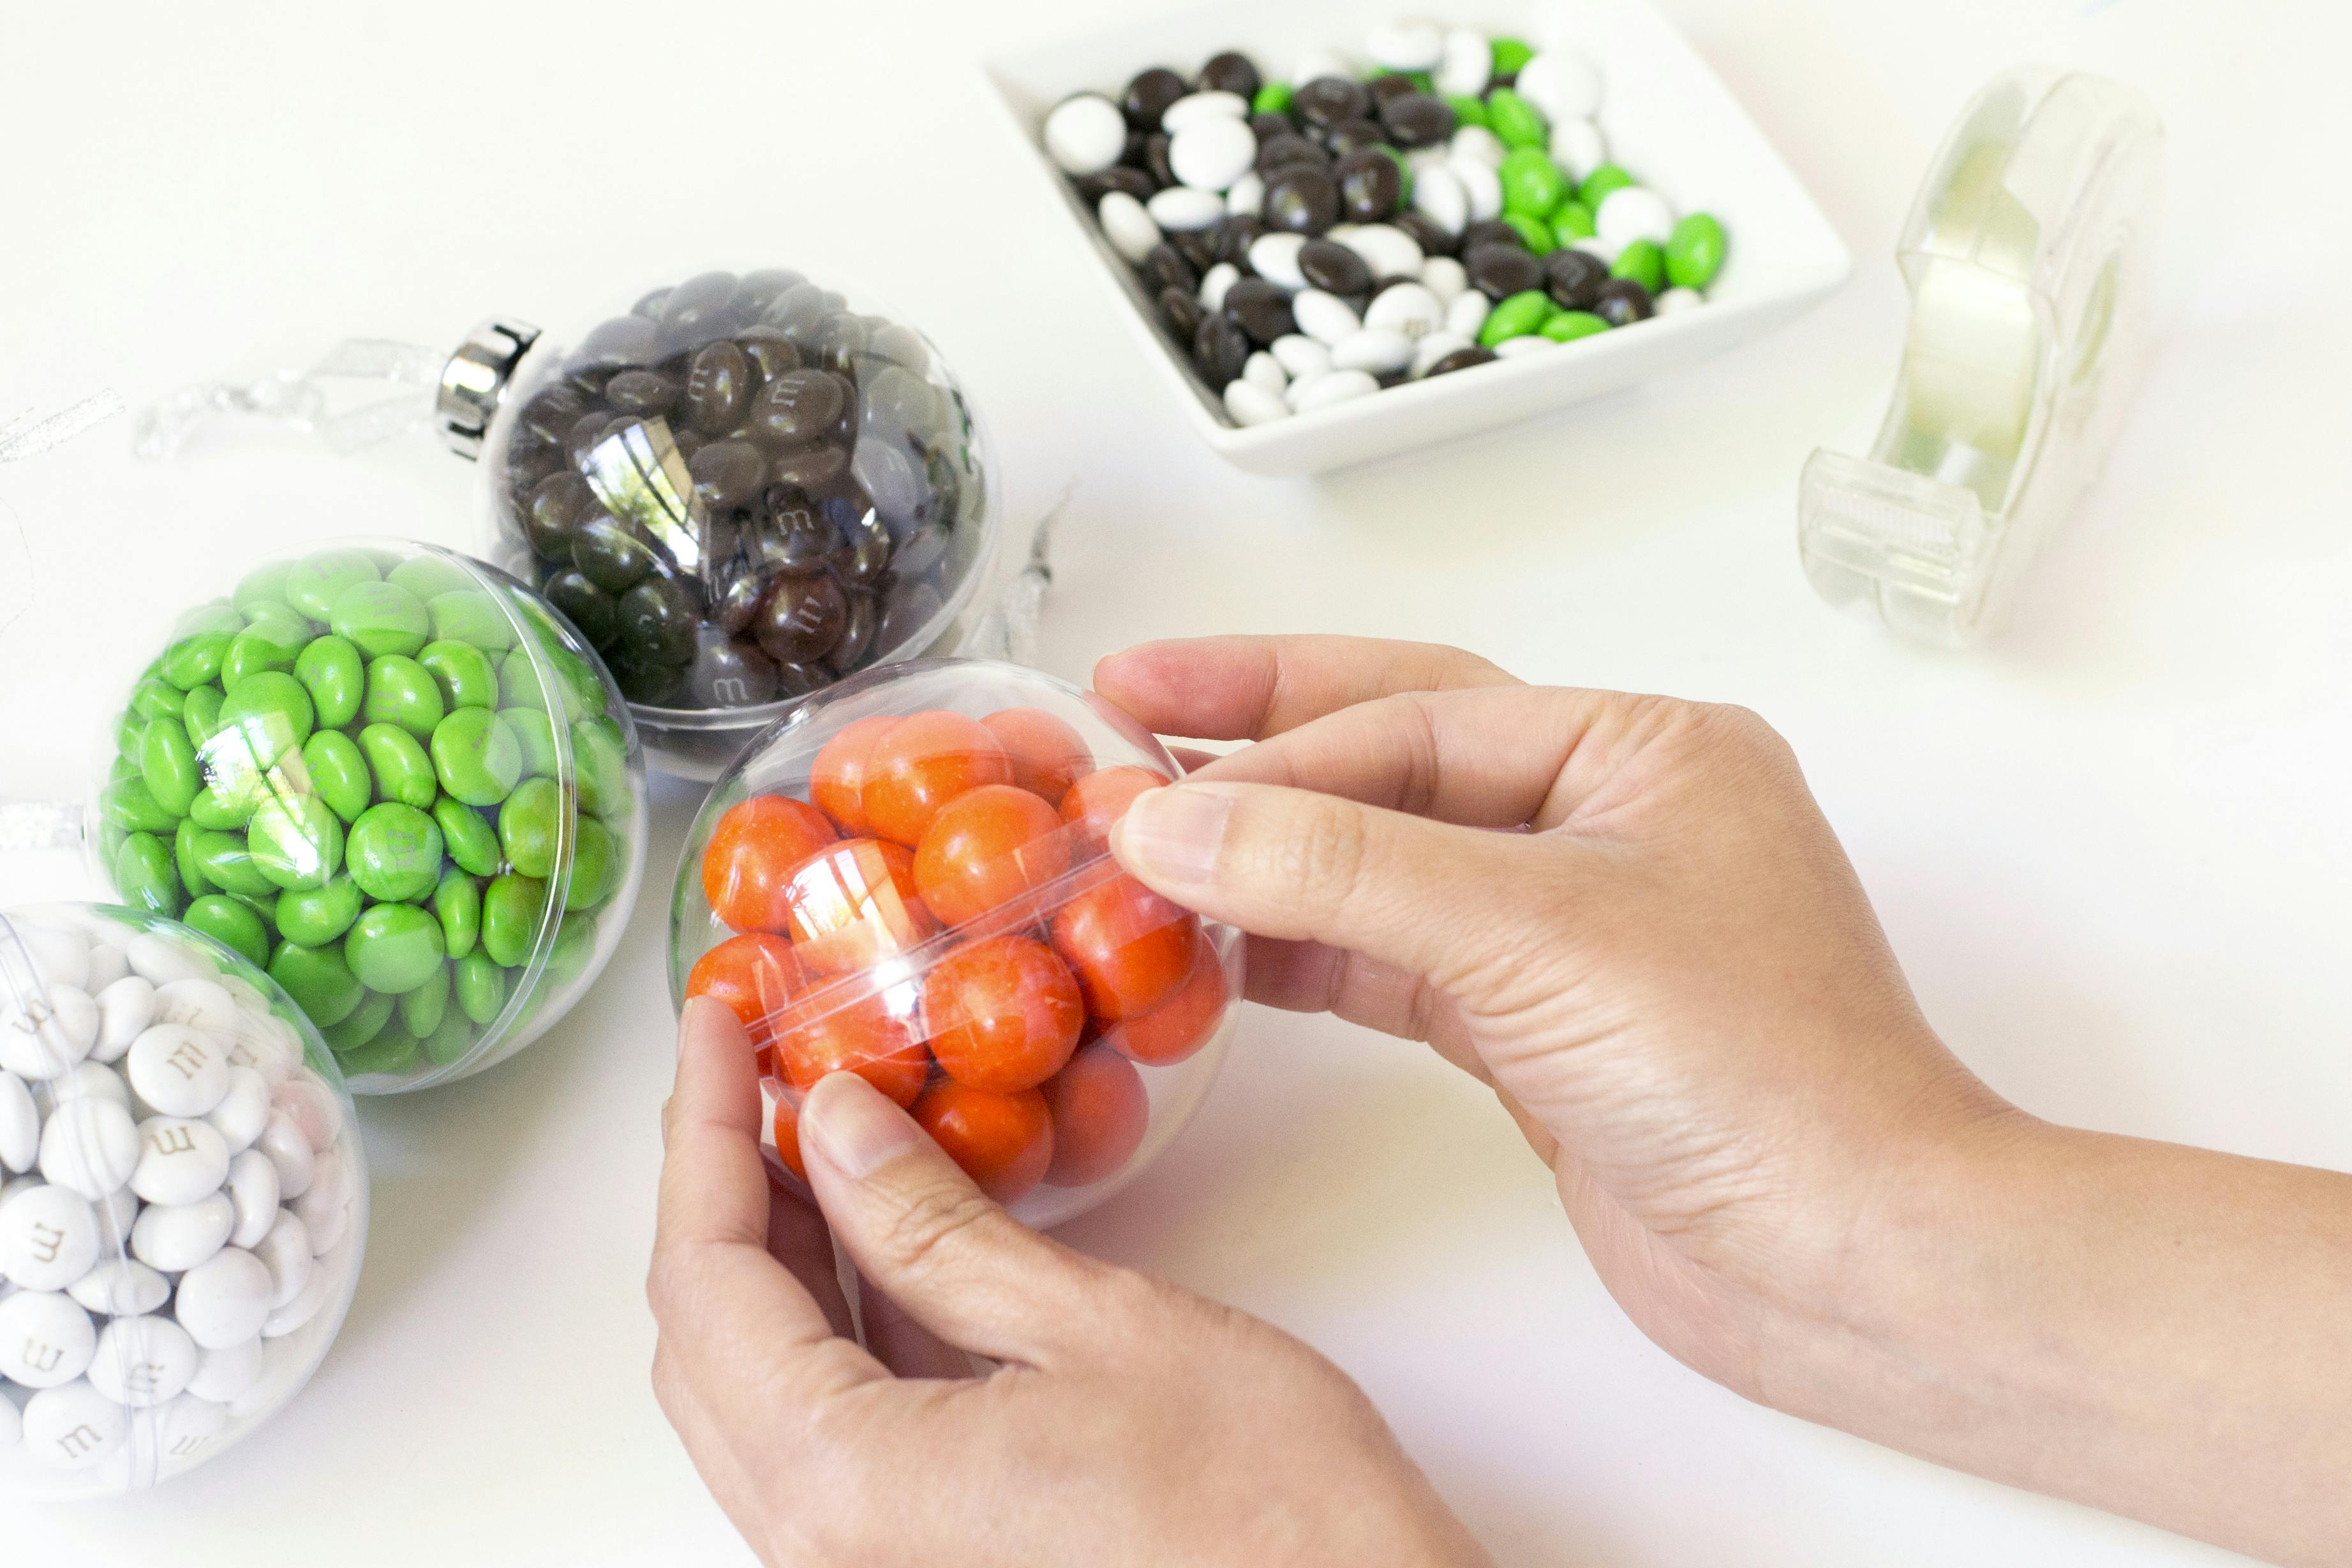
Step 1
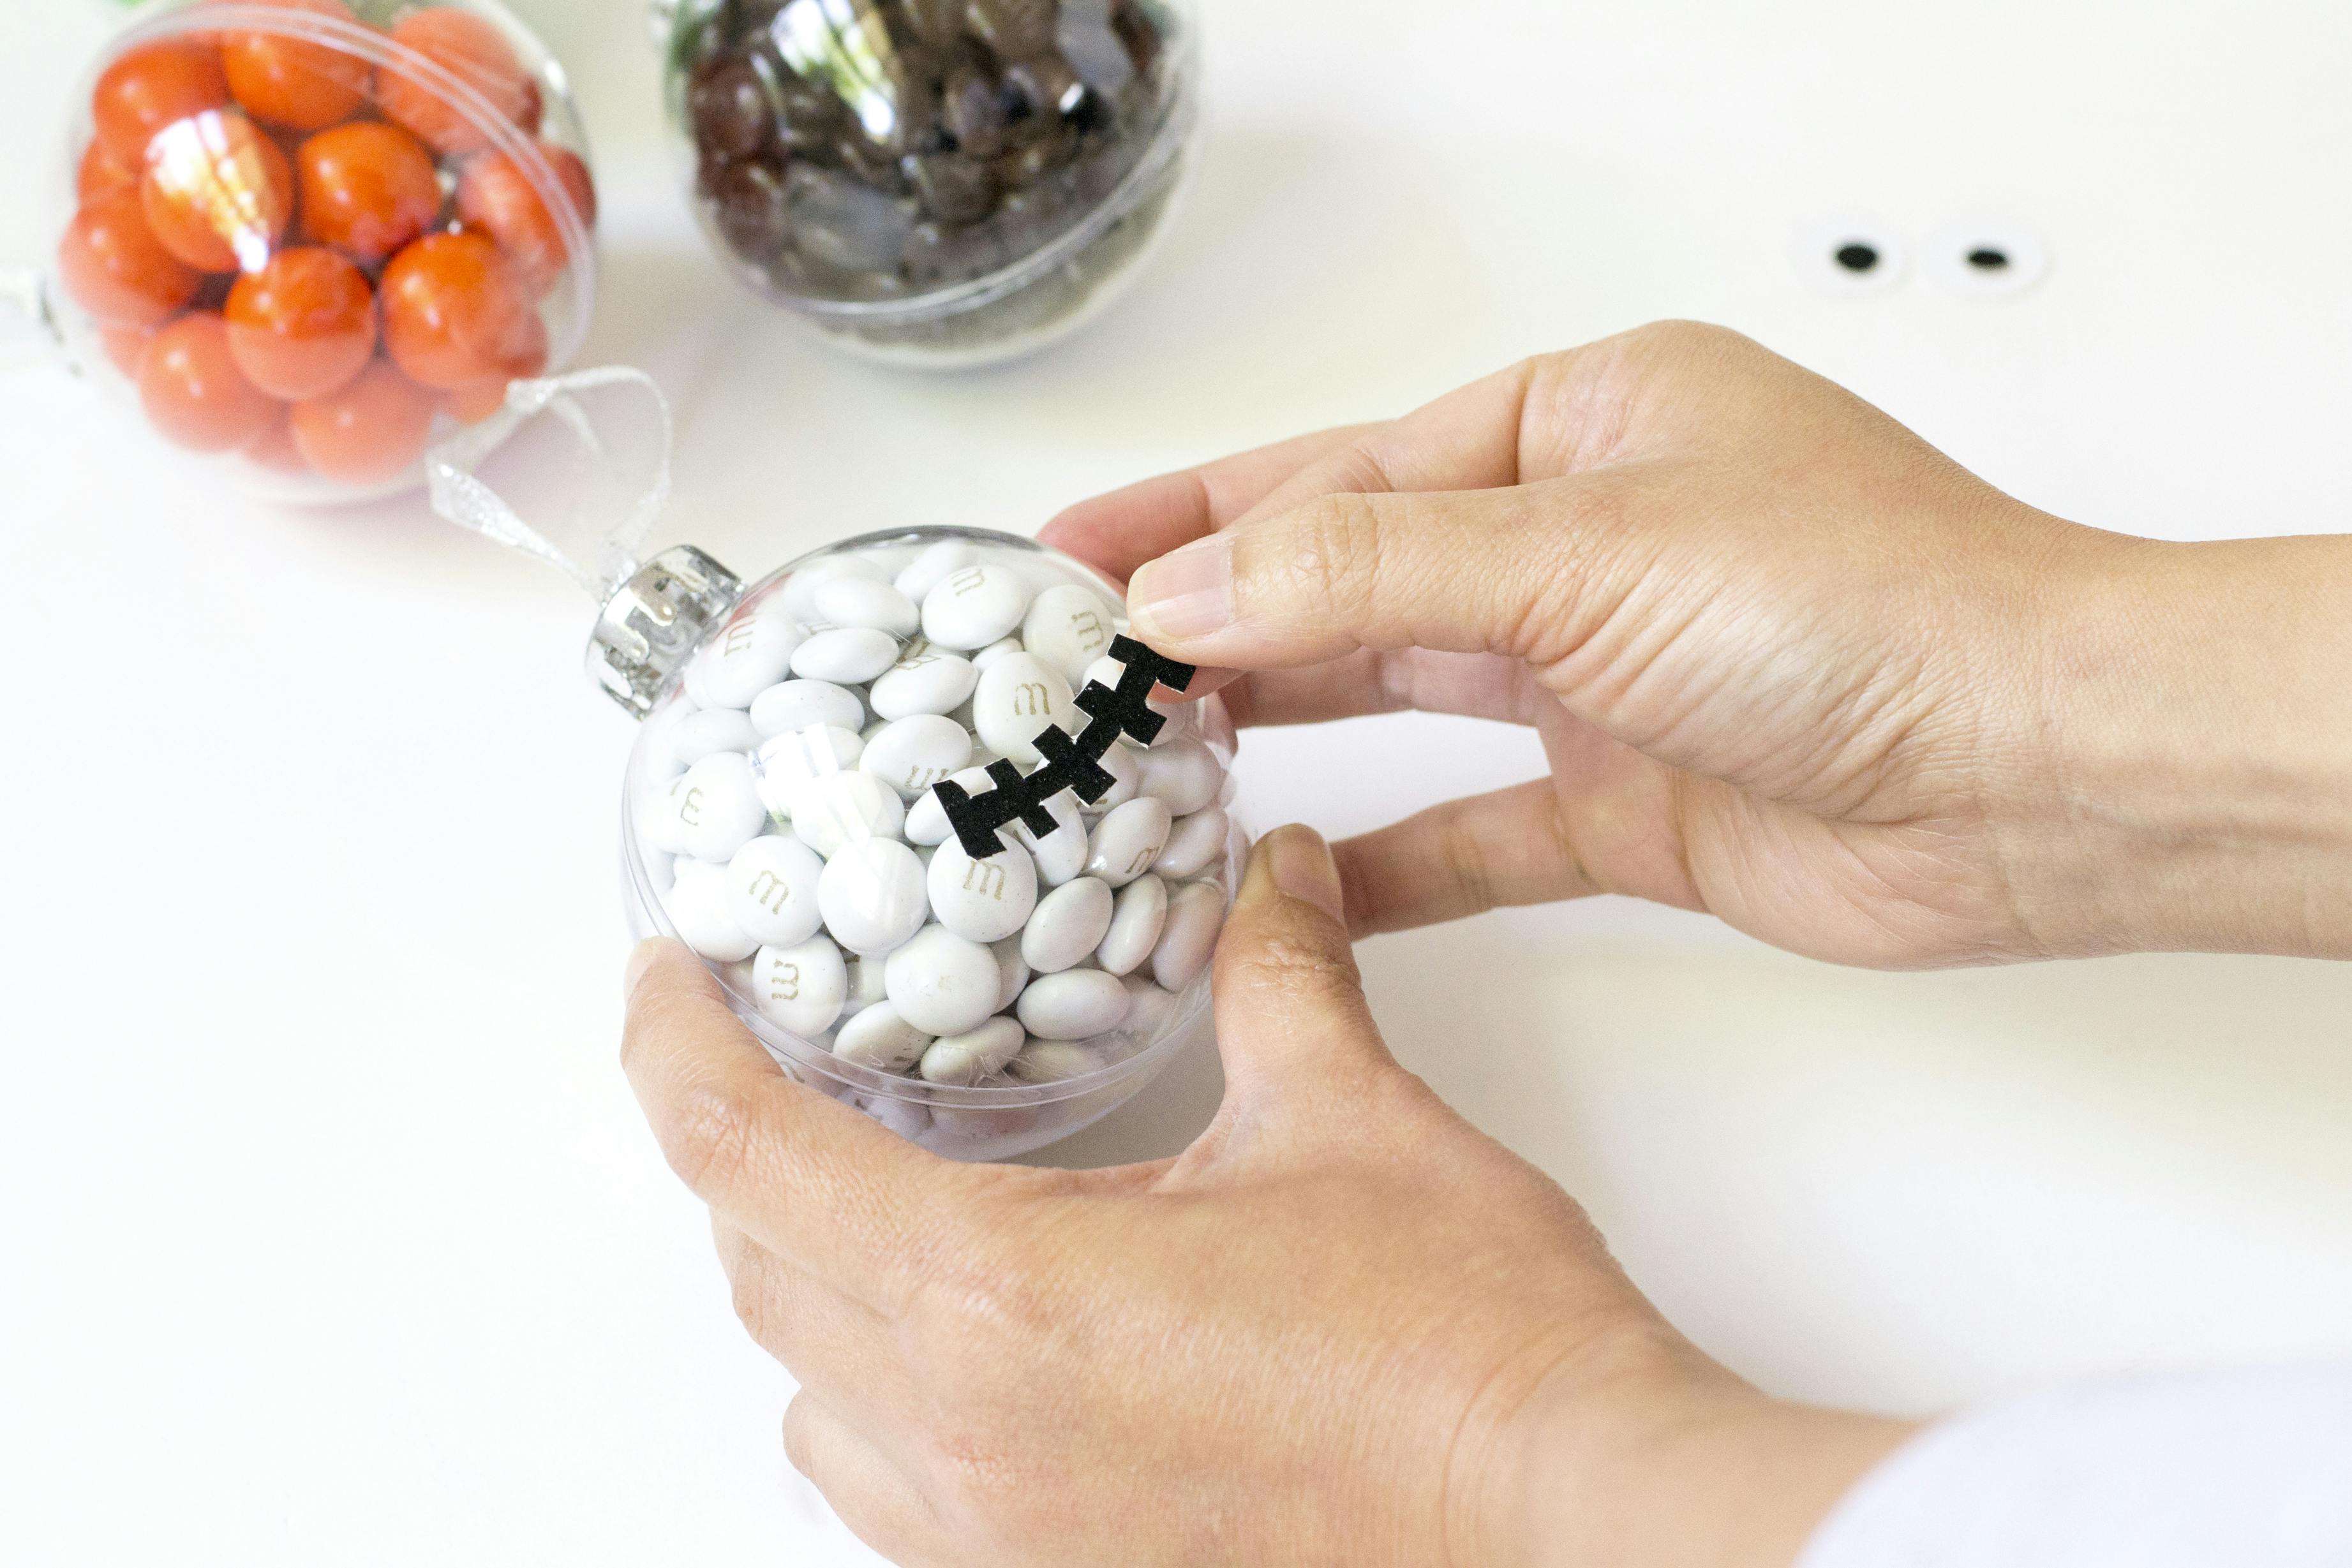
Fill each bauble with lollies of a single colour.
Step 2
The candy-filled baubles can be quite heavy and may begin to open, so seal the bottoms (and around the sides if necessary) with clear tape.
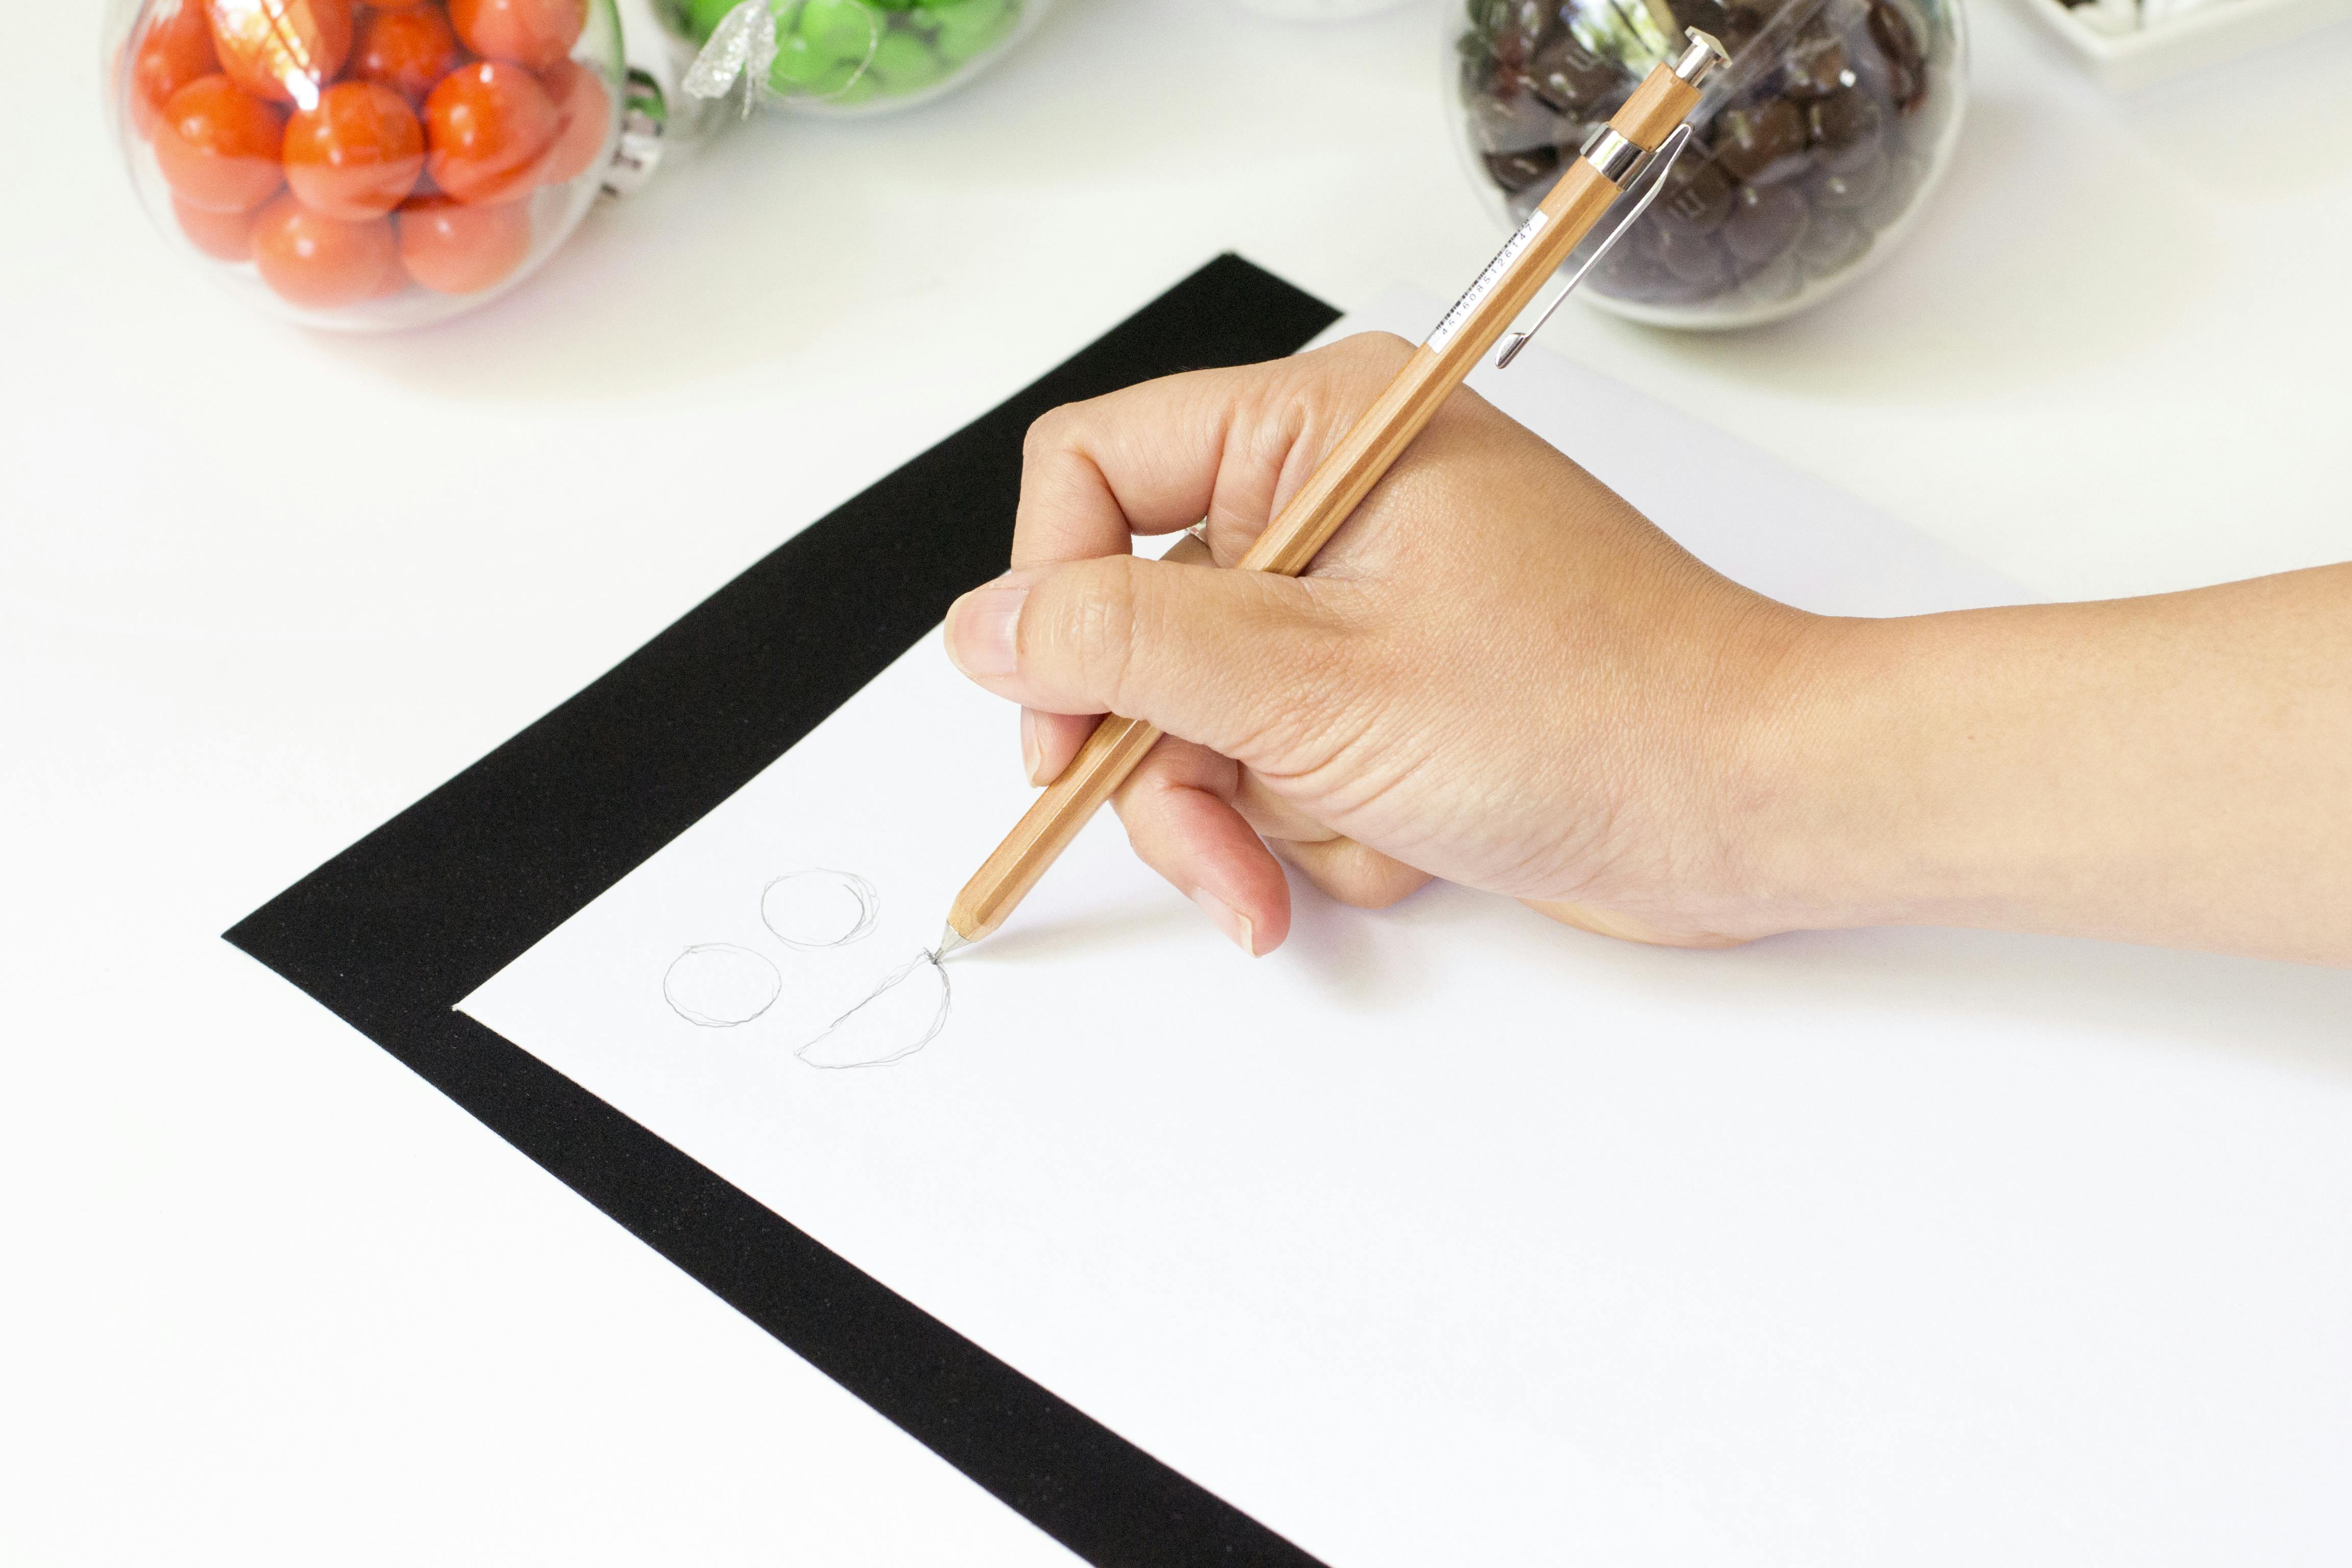
Step 3
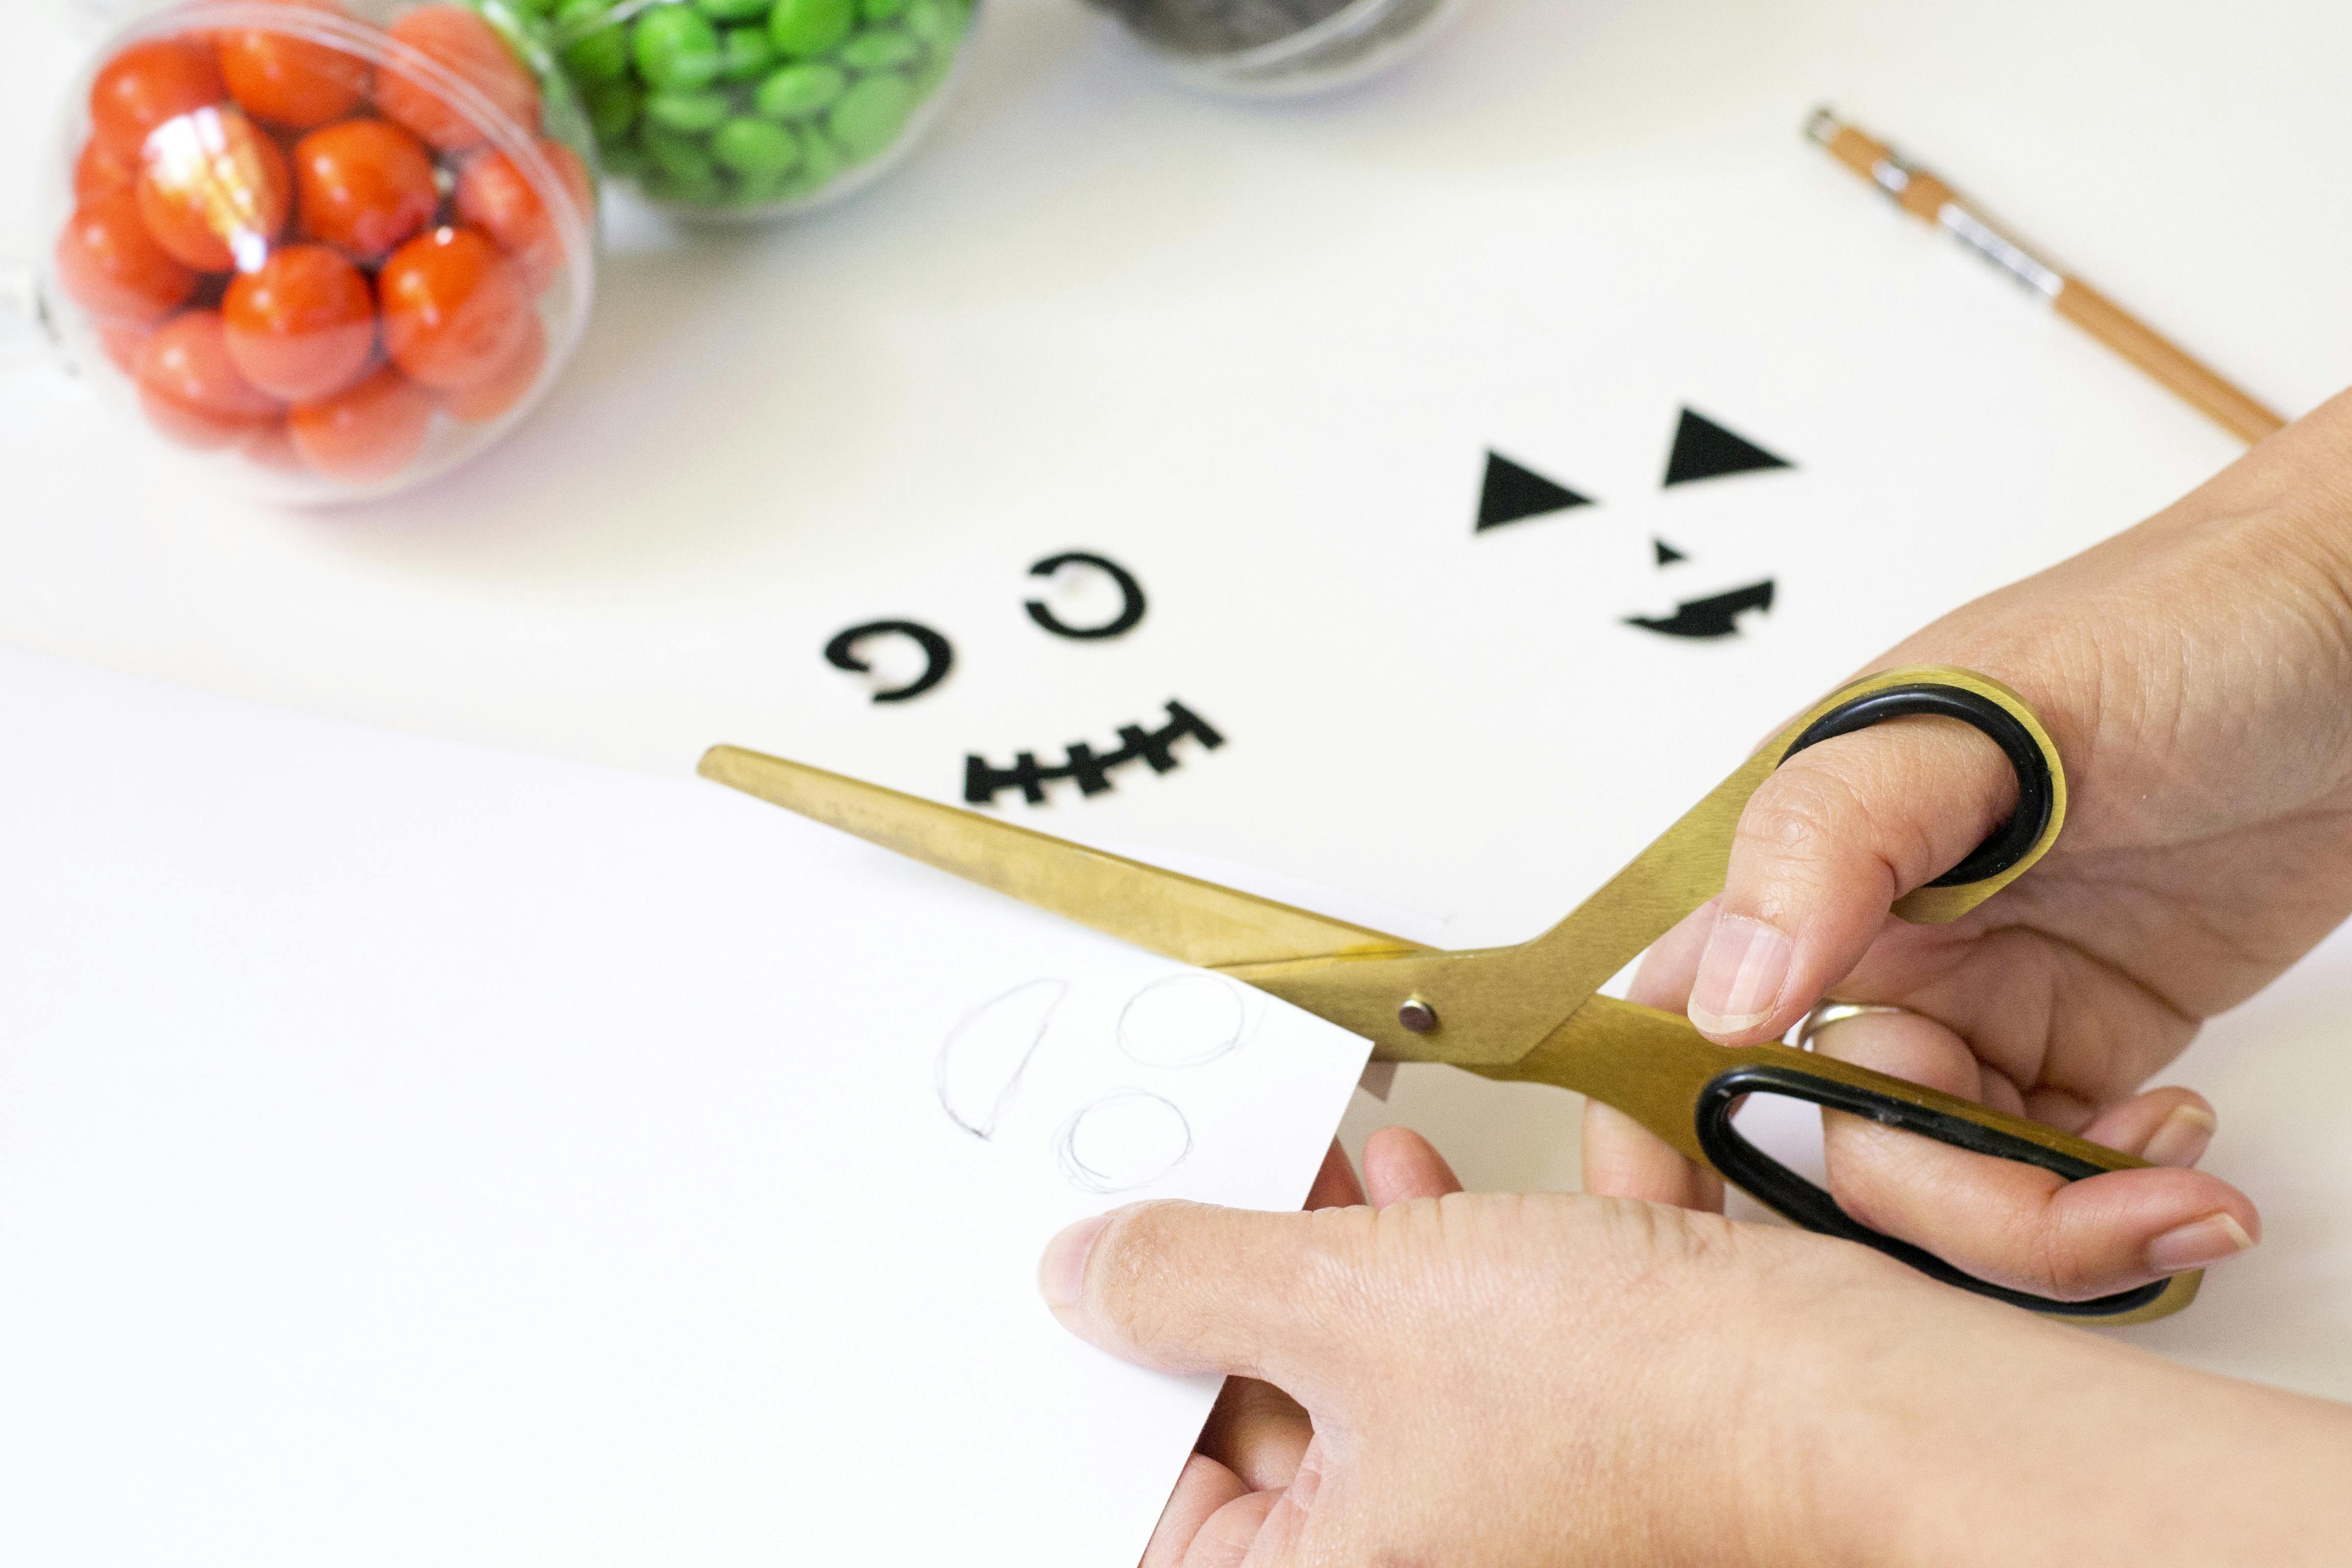
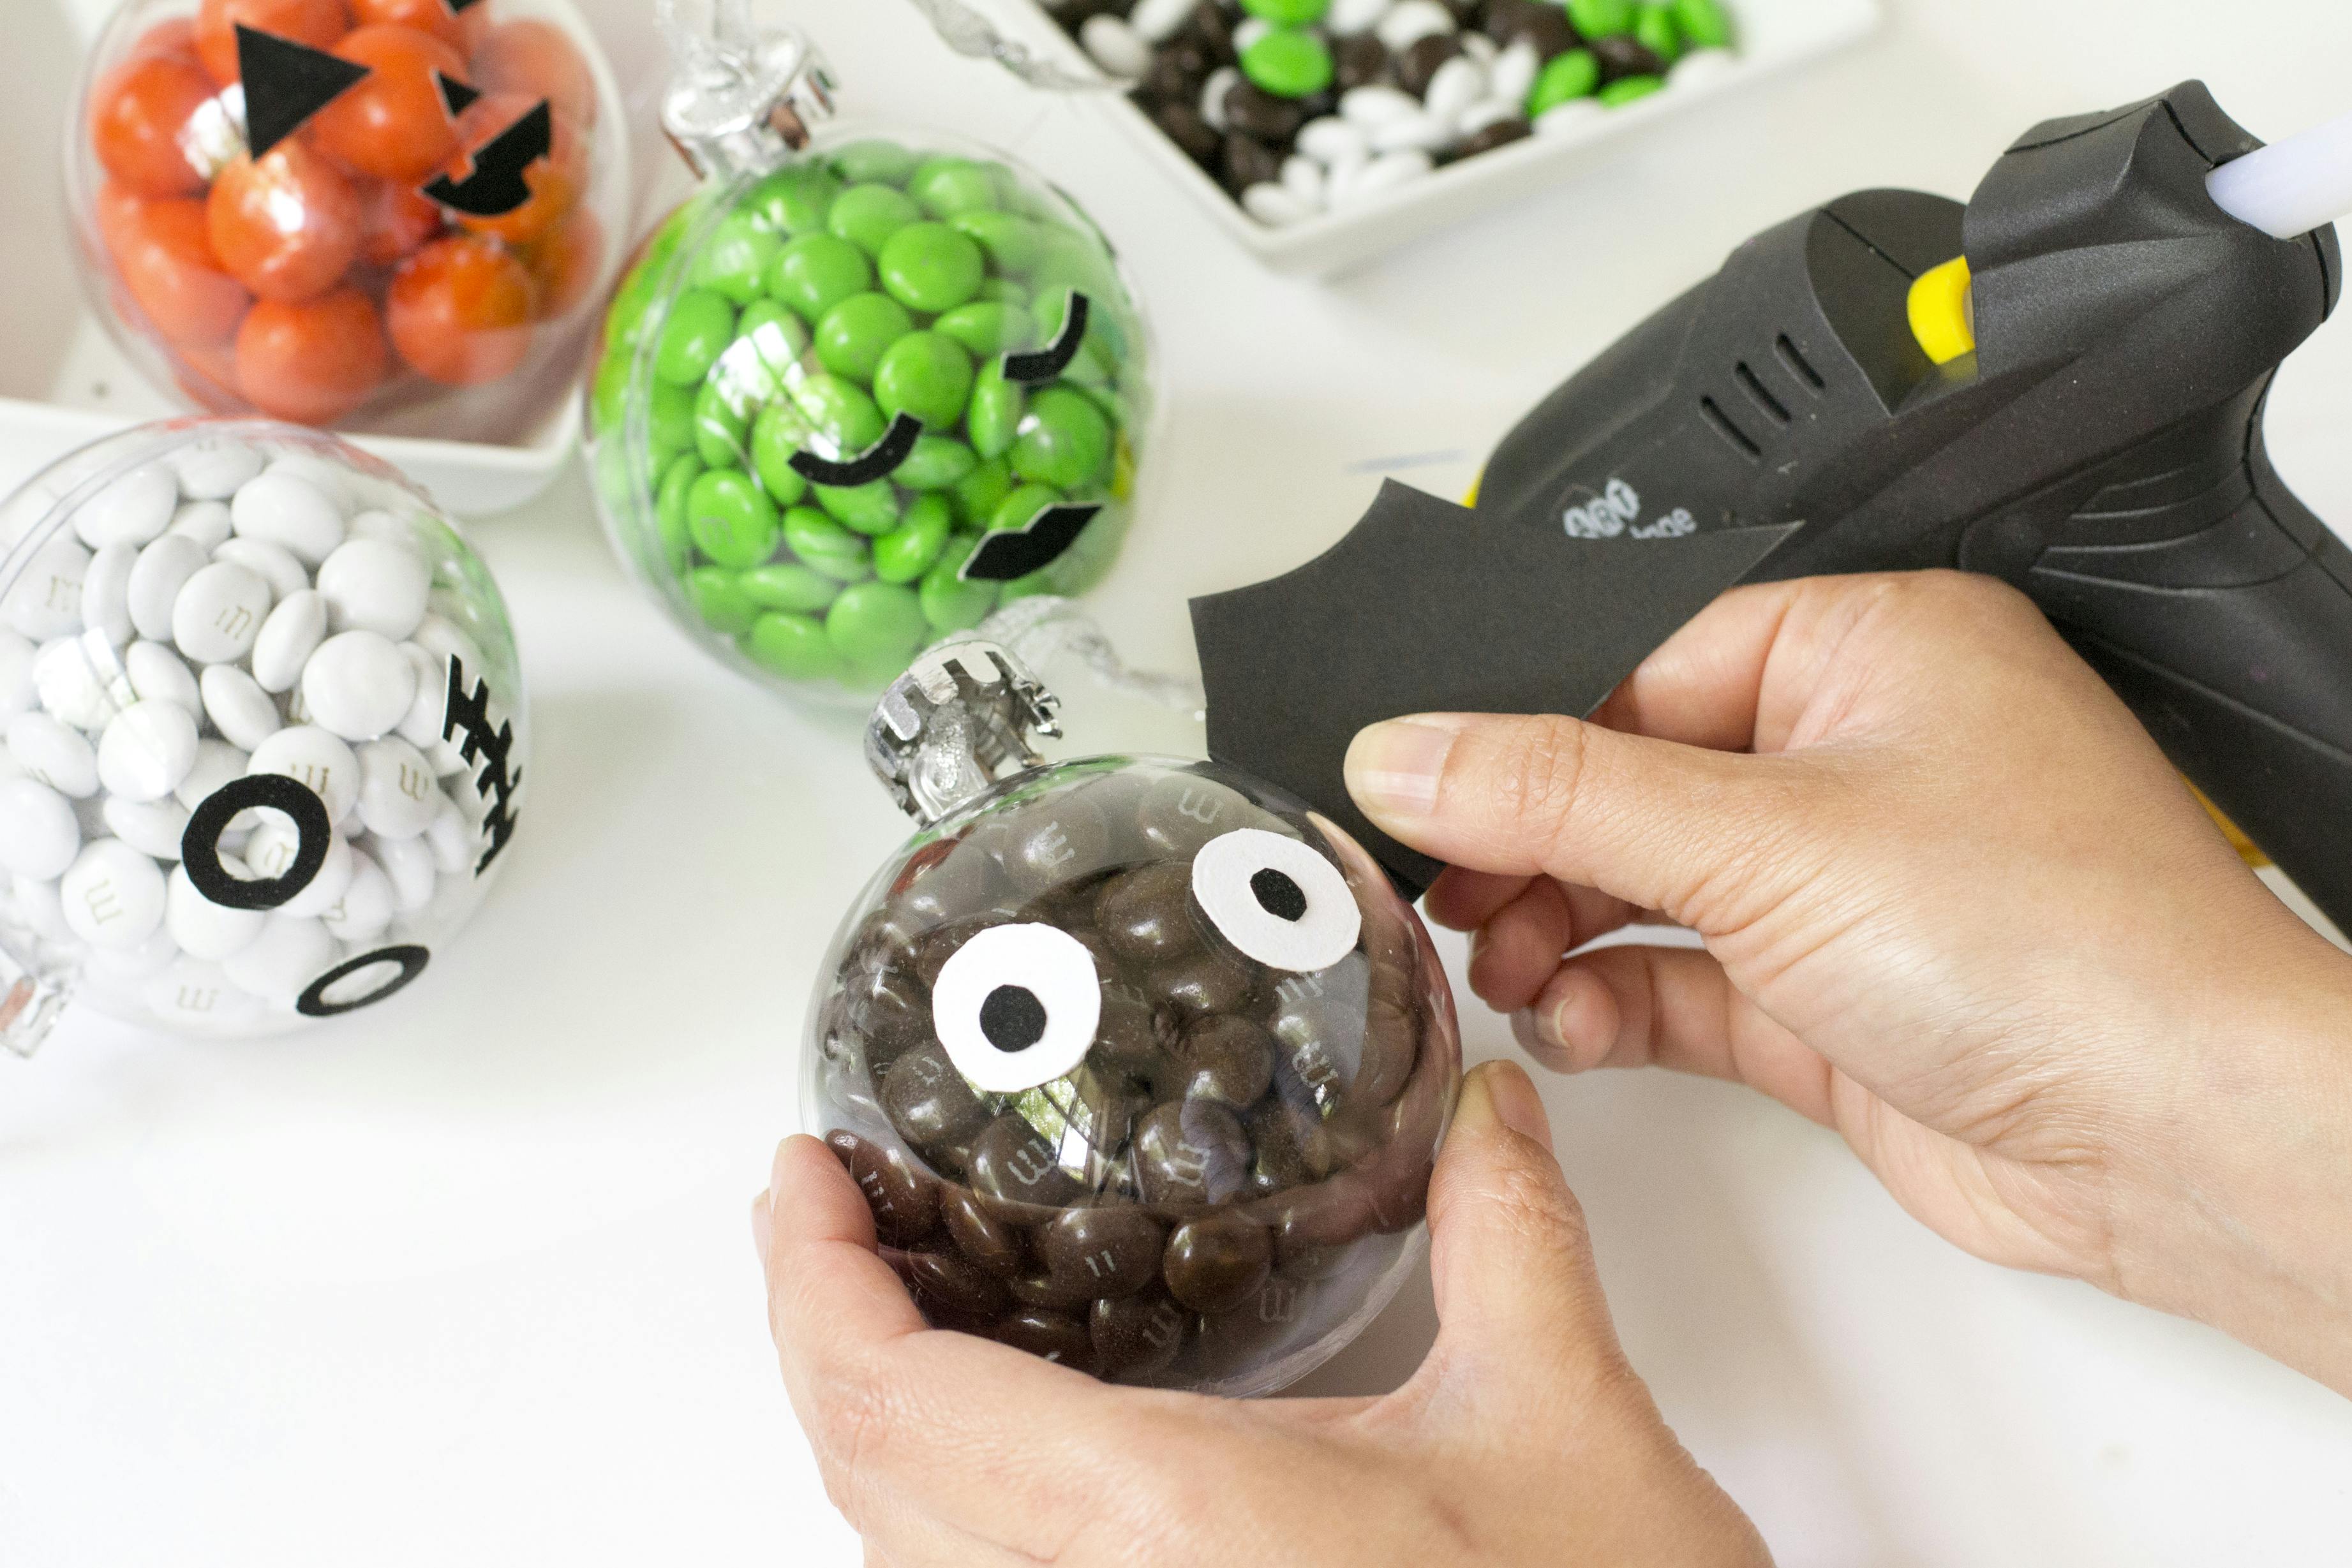
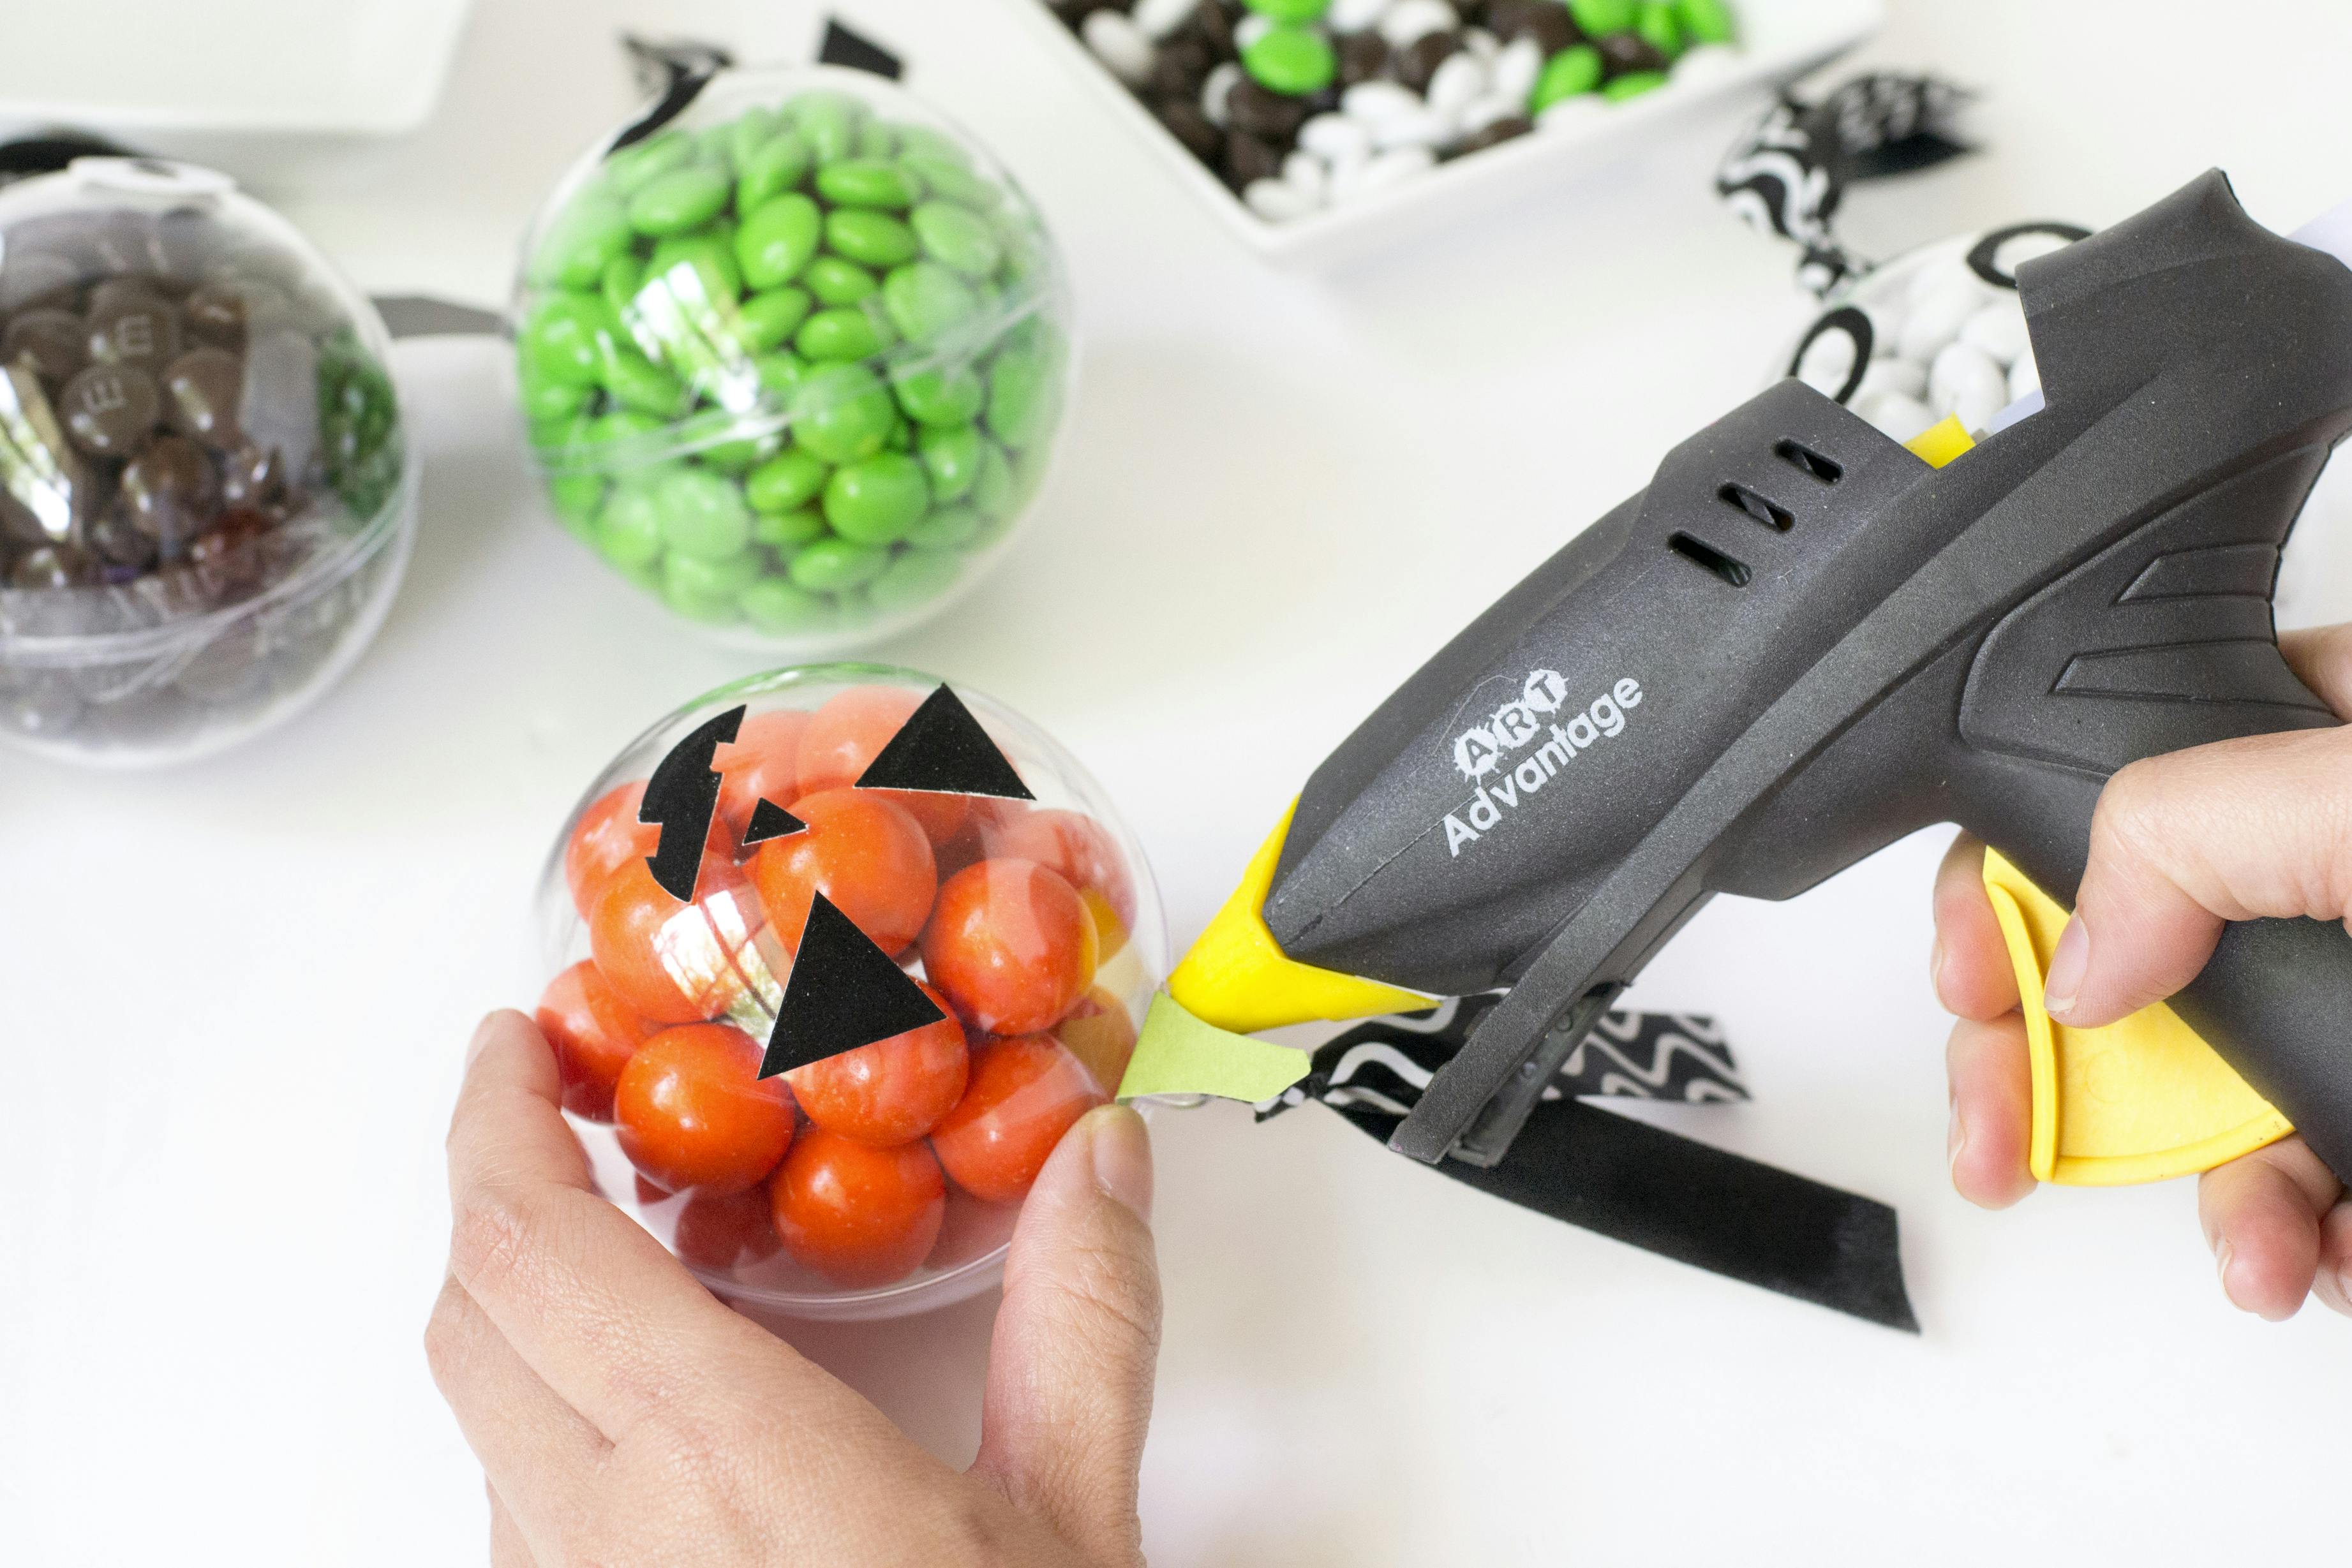
Draw eyes, nose and mouth shapes on the back your black and white adhesive paper. Feel free to get creative and invent your own expressions, but if you’d like to follow mine, the shapes I used are below:
- Pumpkin: 2 large triangles for the eyes, a small triangle for the nose and a semi-circle for the mouth (with a couple of squares cut out for the ‘teeth’)
- Skull: 2 circles (with centres cut out) for the eyes, and a cross-hatched arc for the smile
- Witch: 2 small arcs for the closed eyes and a pair of pouty lips
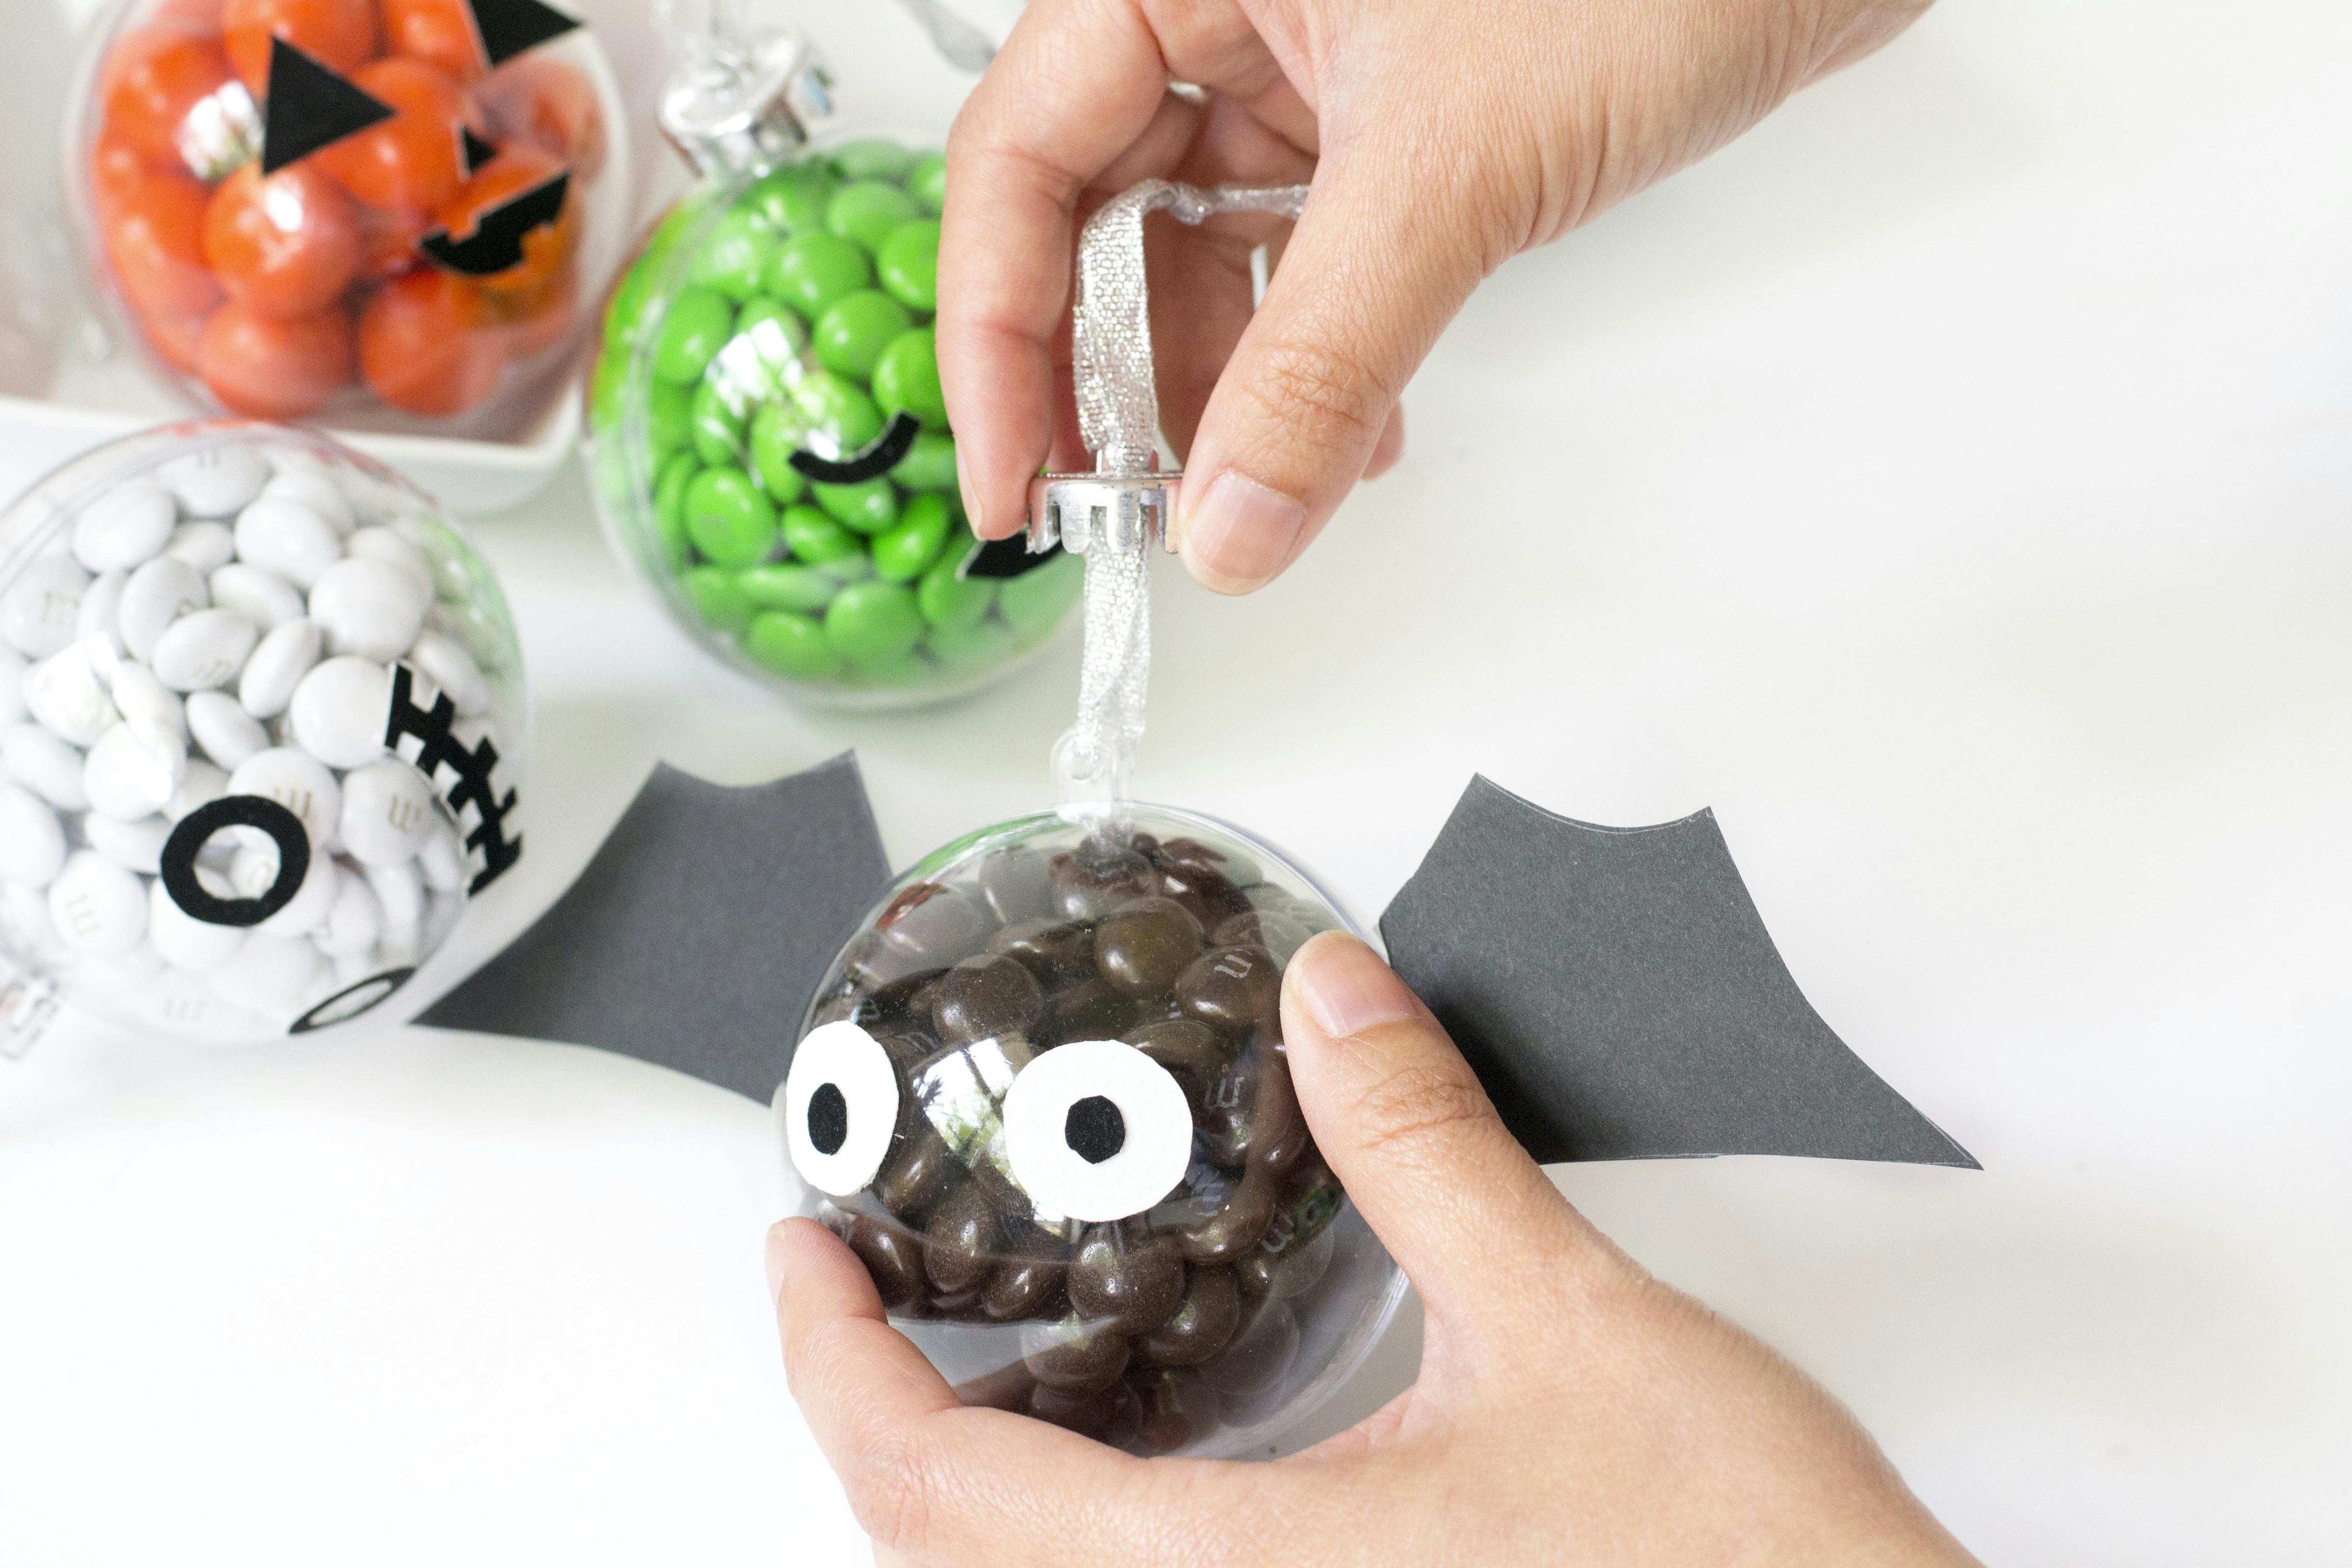
- Bat: 2 large white circles and 2 small black circles for the eyes
Step 4
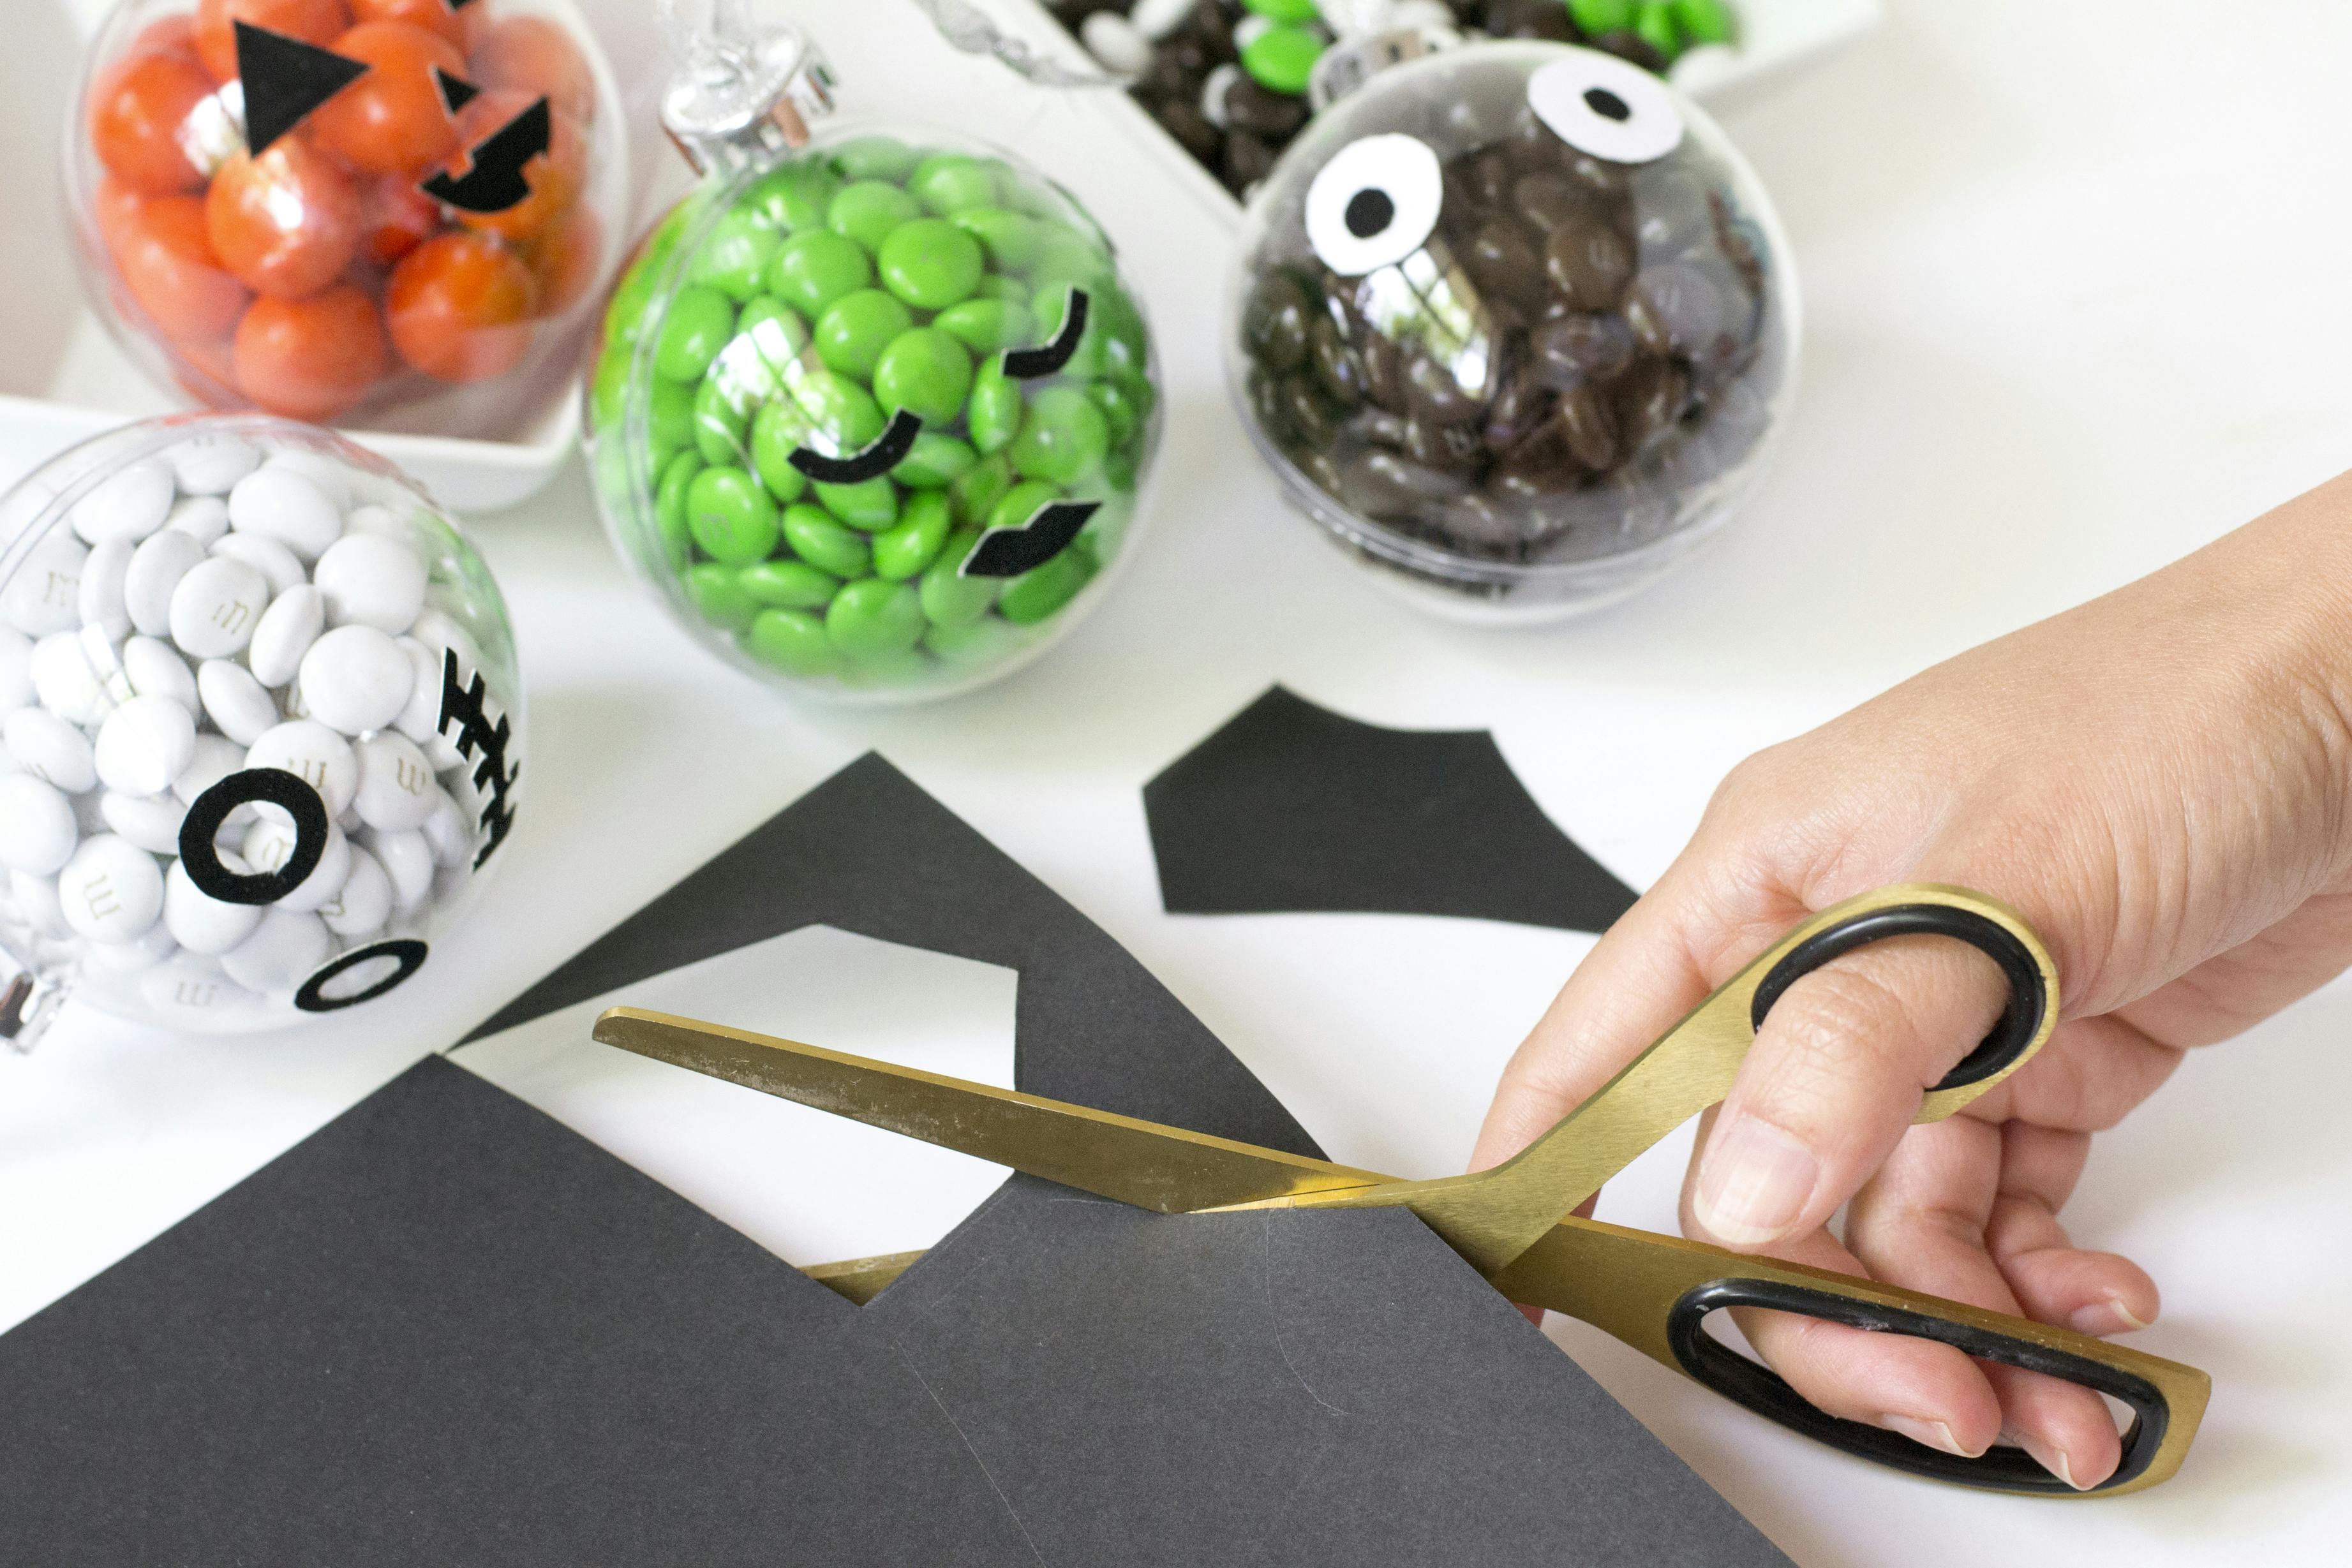
Cut out each of the shapes you drew in Step 3.
Step 5
Peel the backing off your adhesive paper and stick the eyes, nose and mouth shapes to your baubles.
Step 6
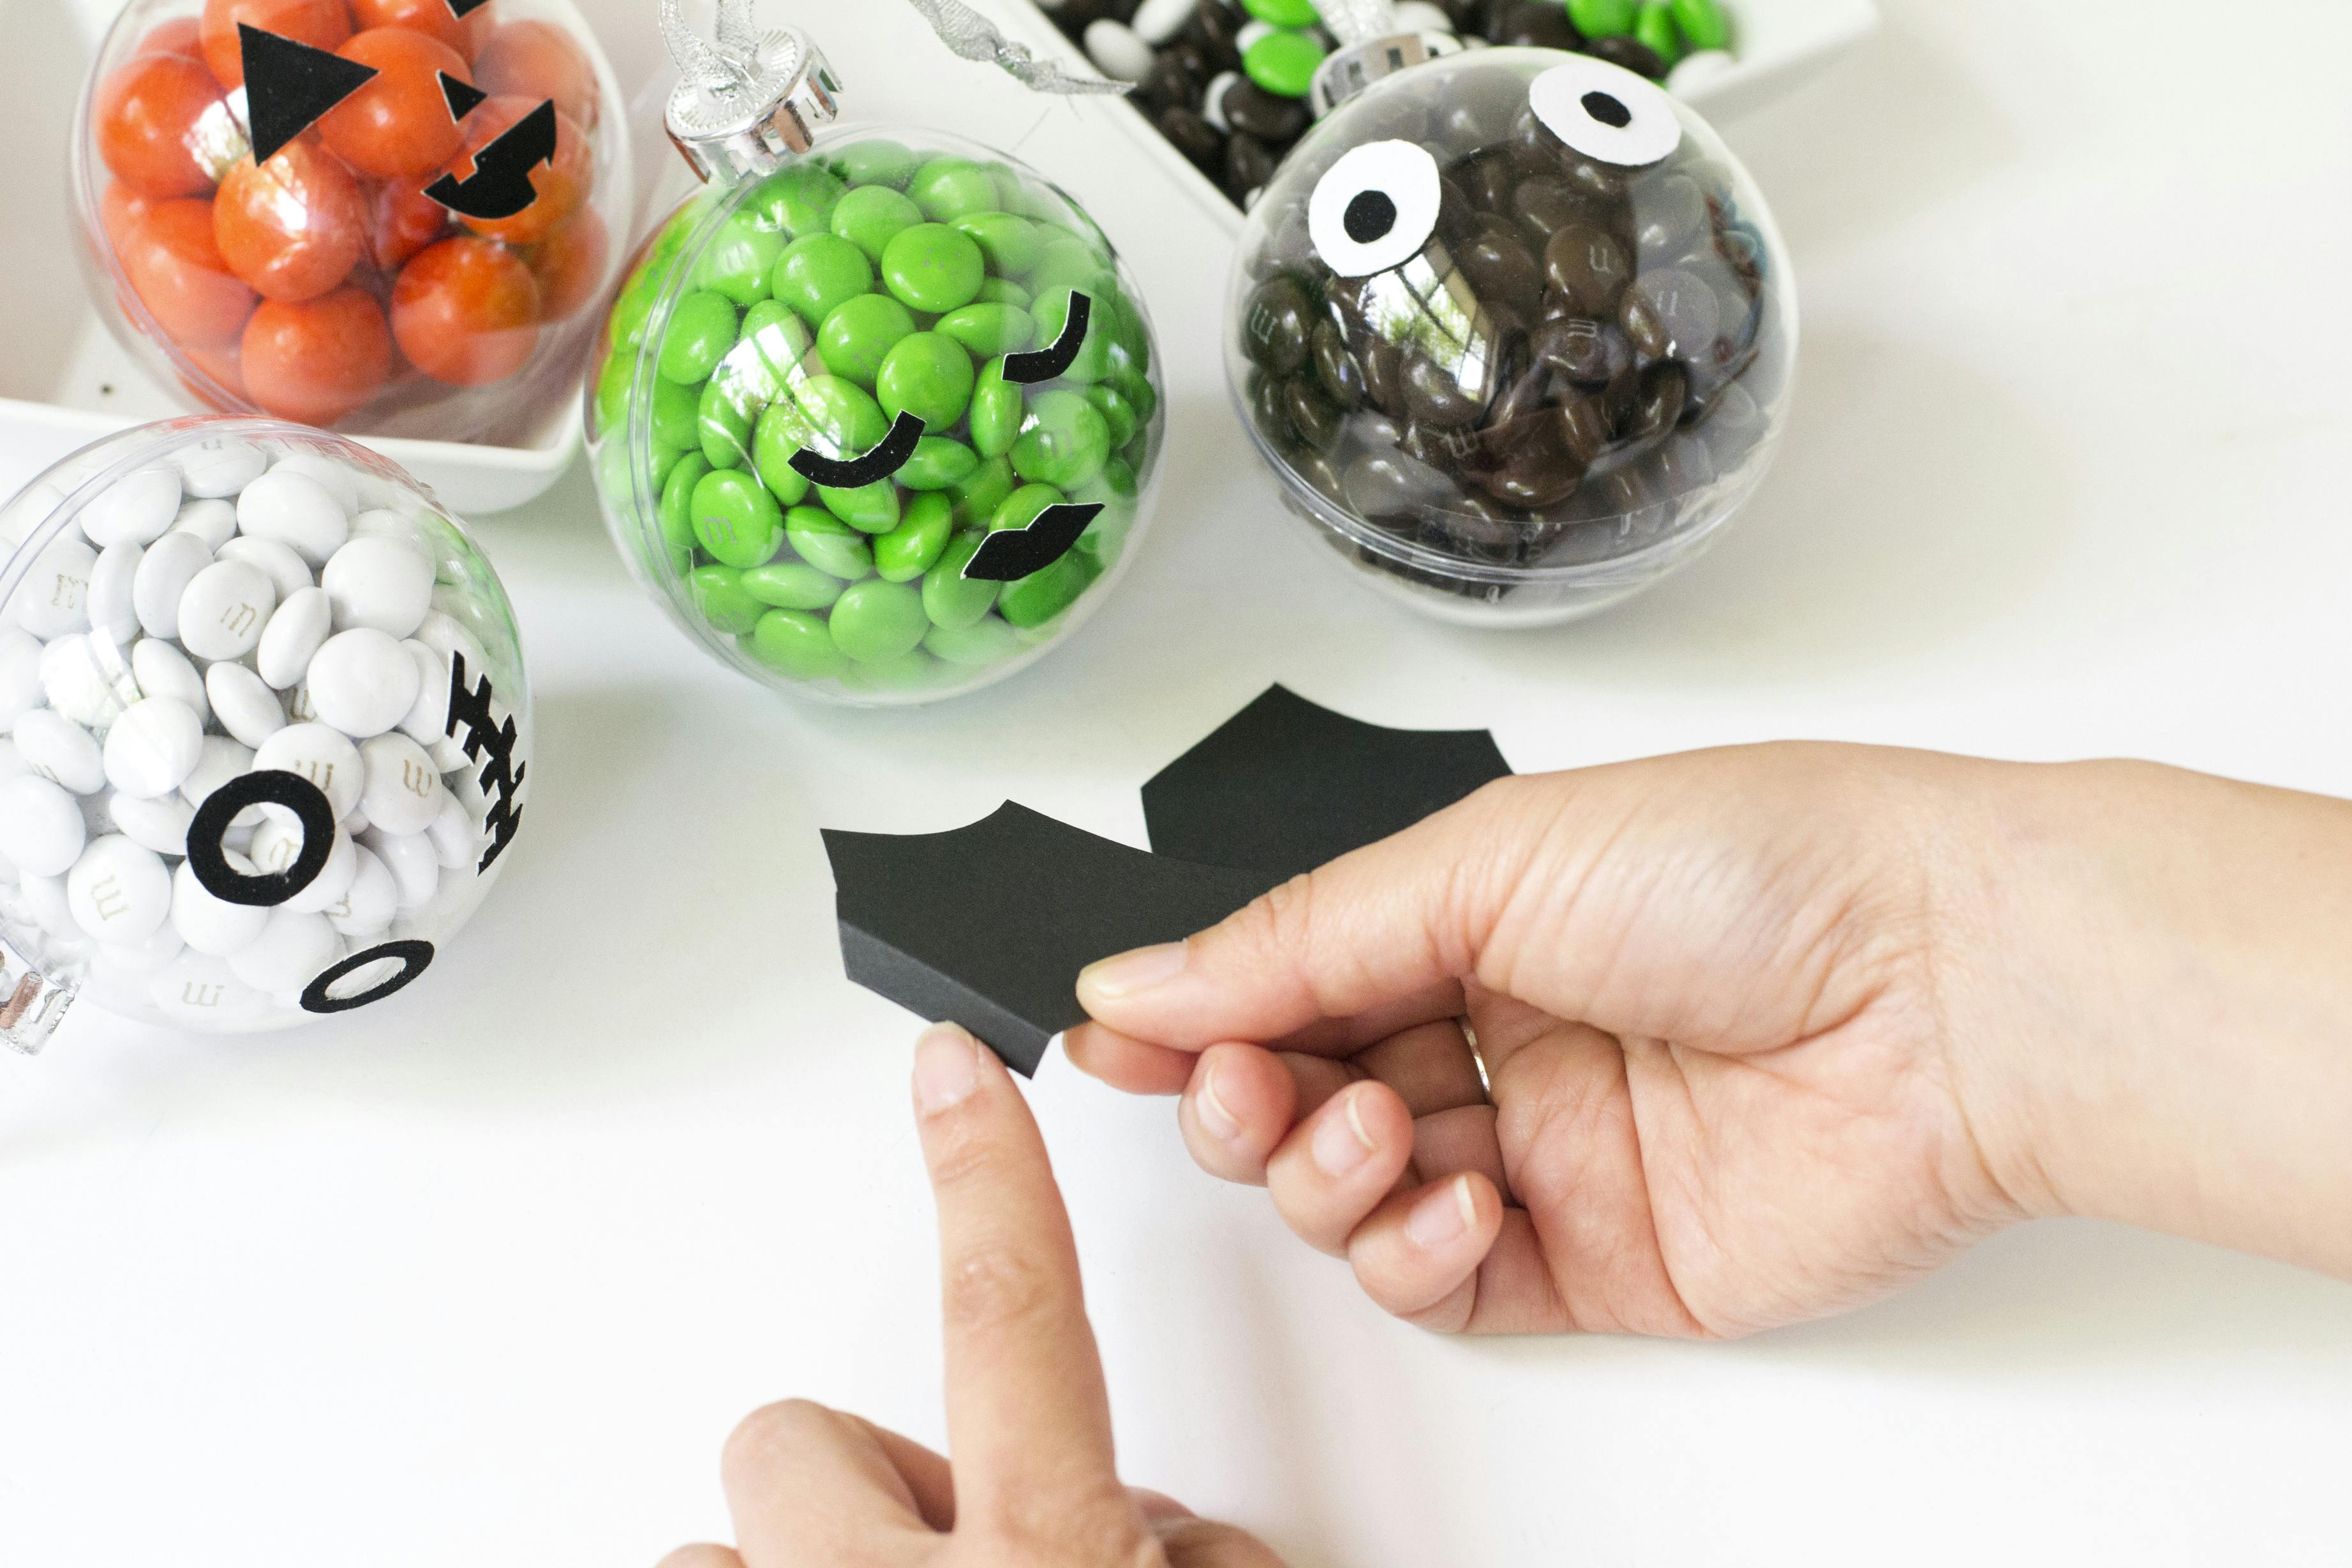
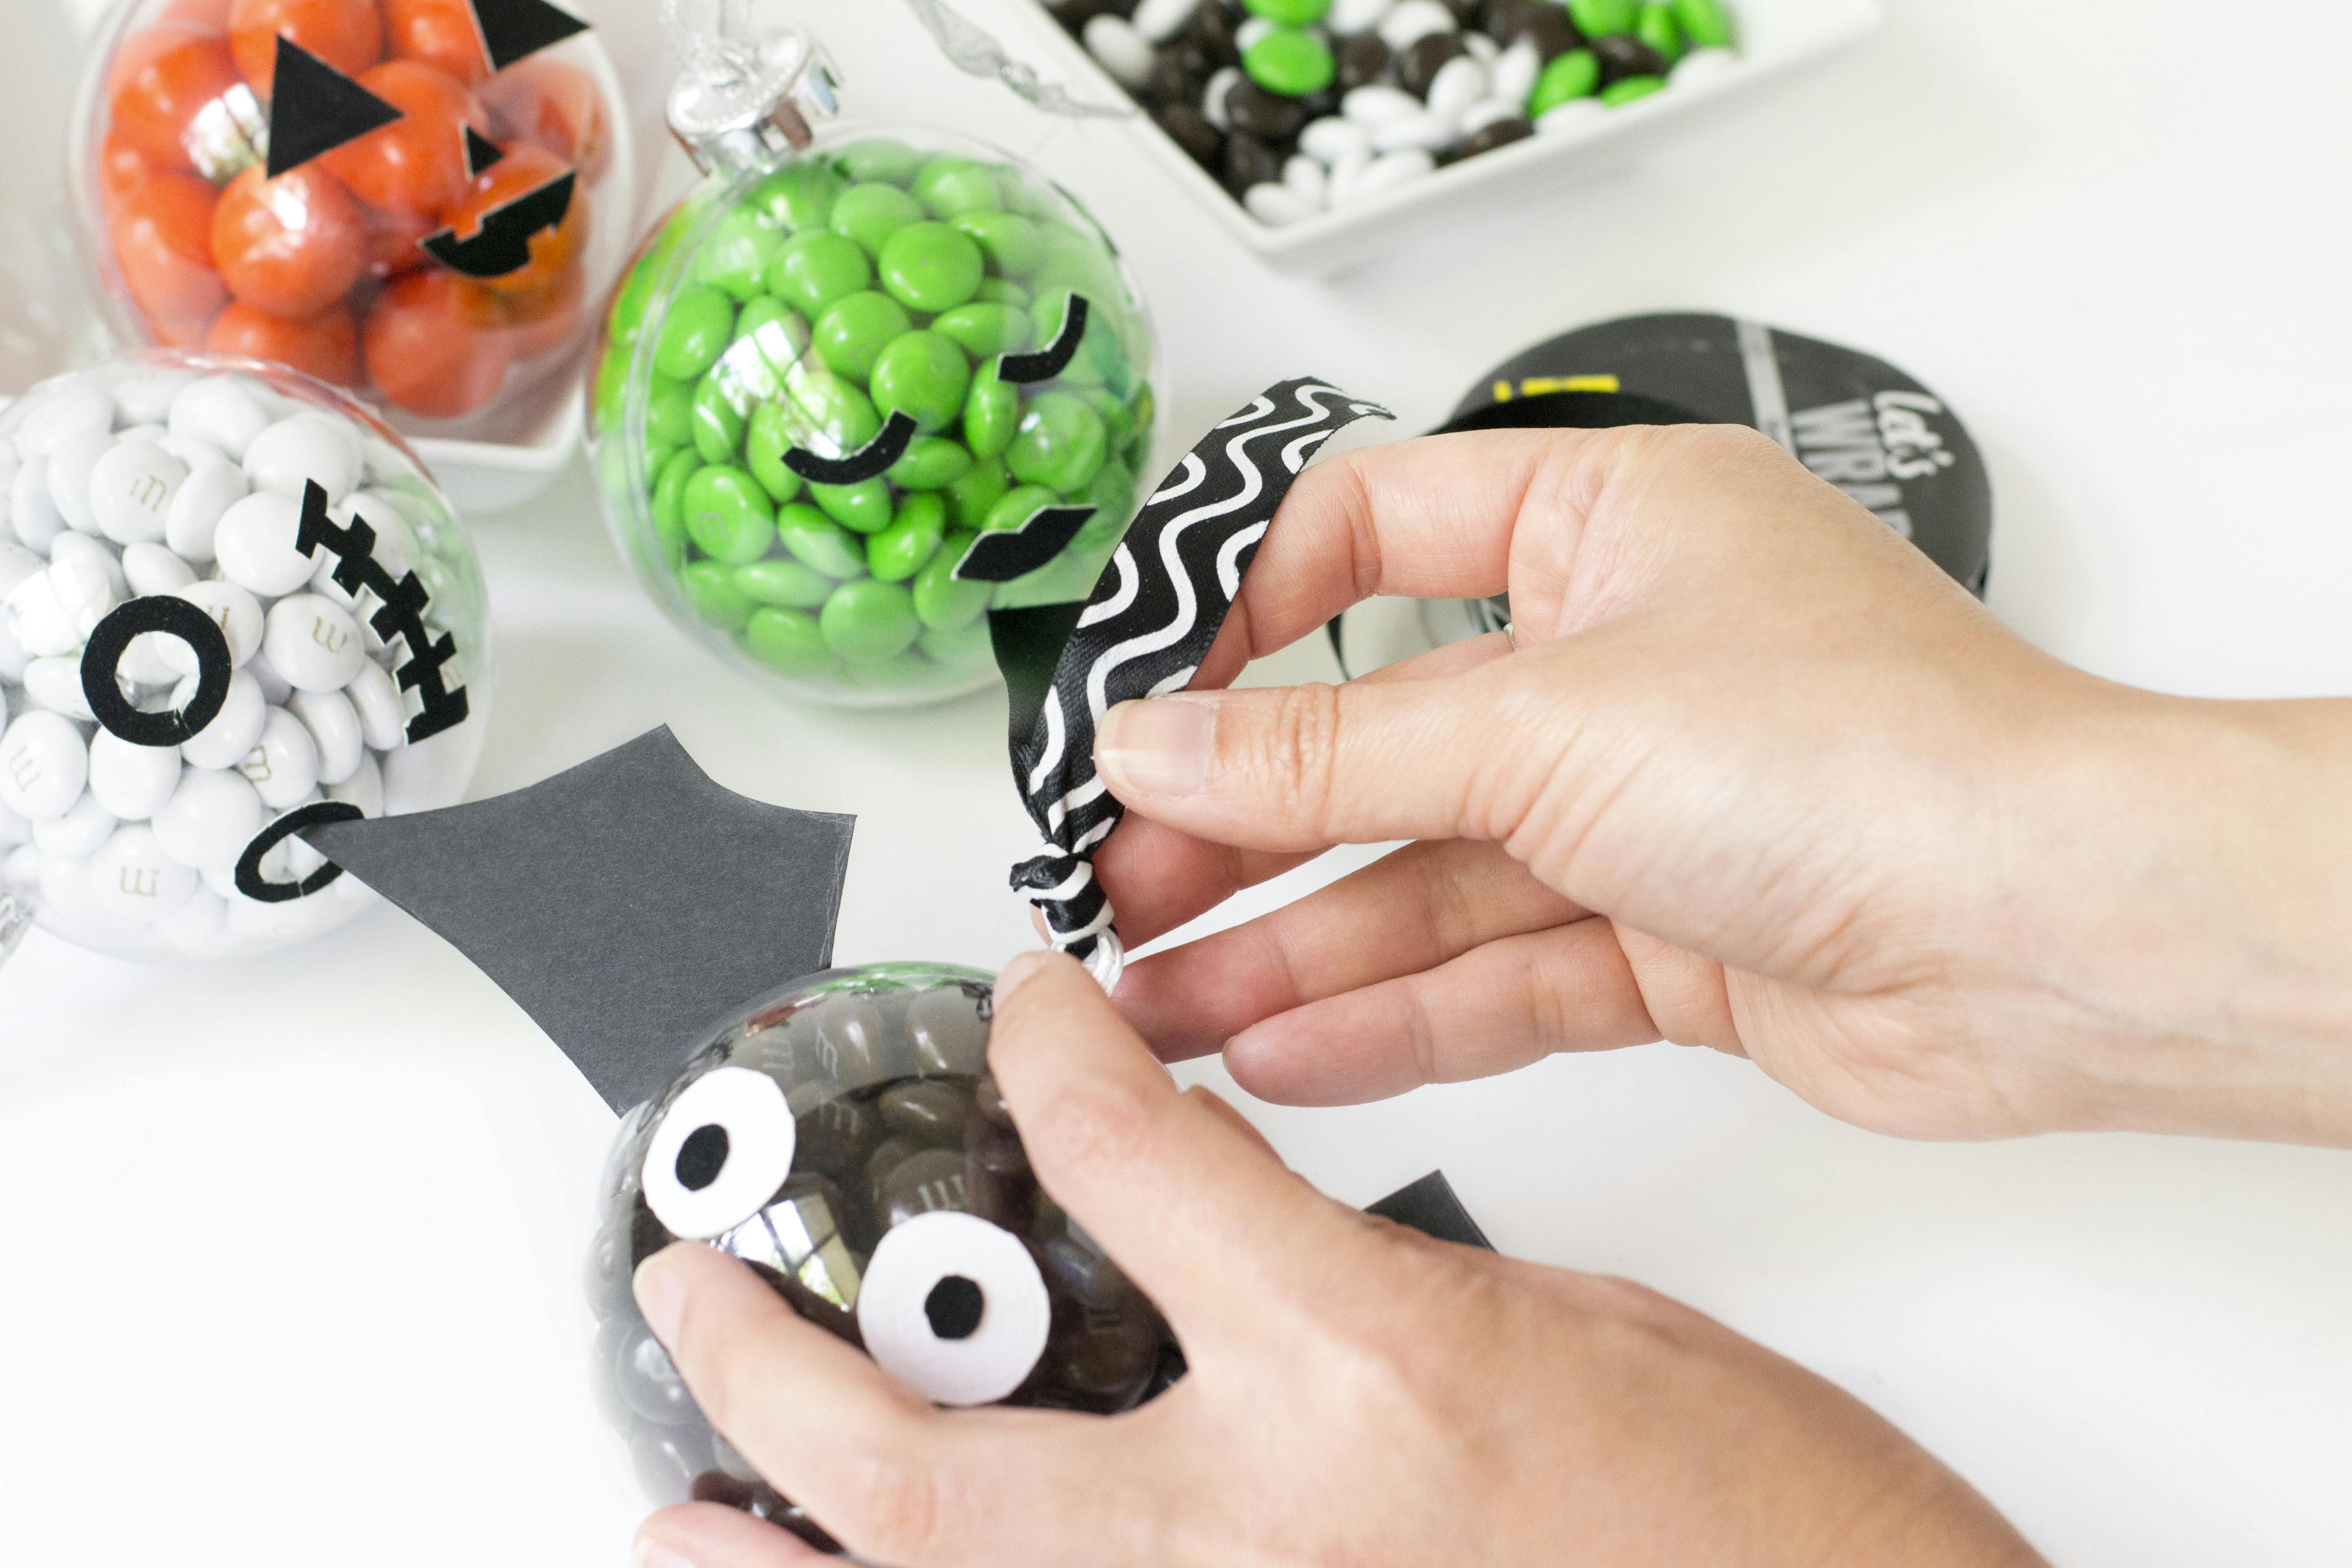
Draw a pair of bat wings onto black cardboard and cut them out. Then fold the wide end of each bat wing inwards to create a small tab.
Step 7
Use a hot glue gun to attach the wings to your bat bauble.
Step 8
Remove the silver ribbon and silver plastic top from each of the baubles.
Step 9
Select a ribbon colour that best suits your baubles and a thread piece of that ribbon through the hole at the top of each bauble.
Step 10
Cut a small stem shape from green cardboard and use hot glue to attach it to the top of your pumpkin bauble.
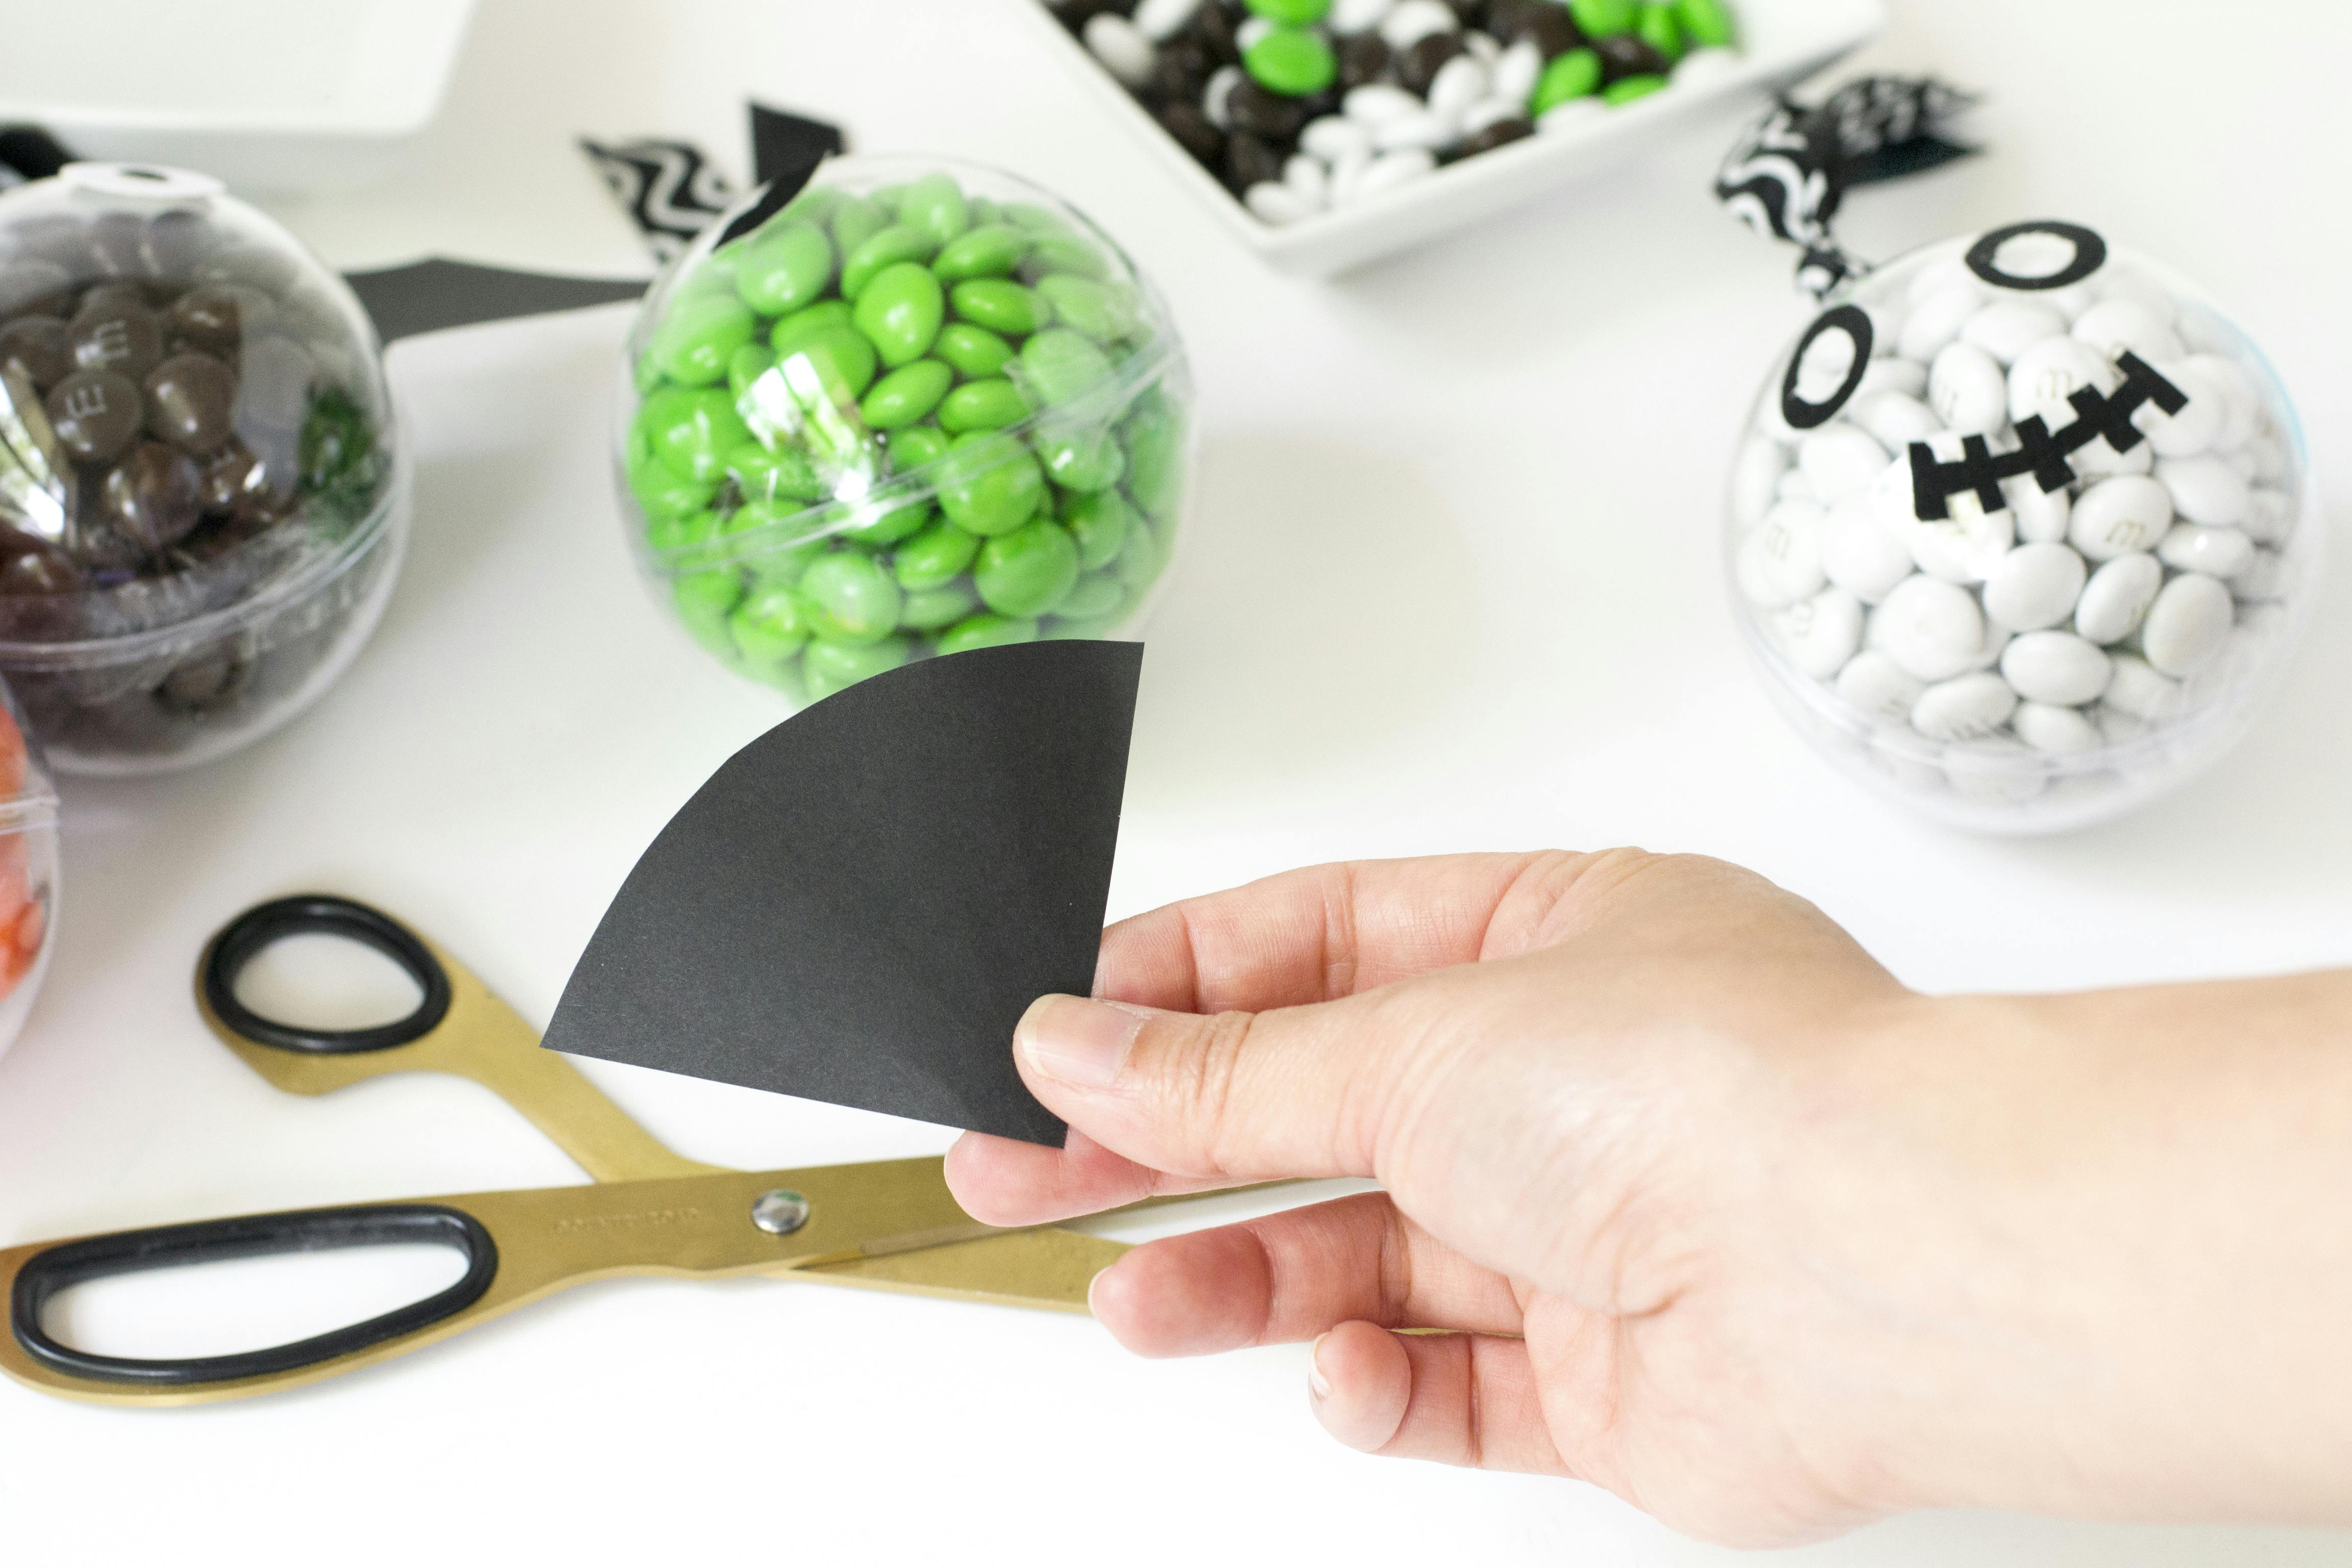
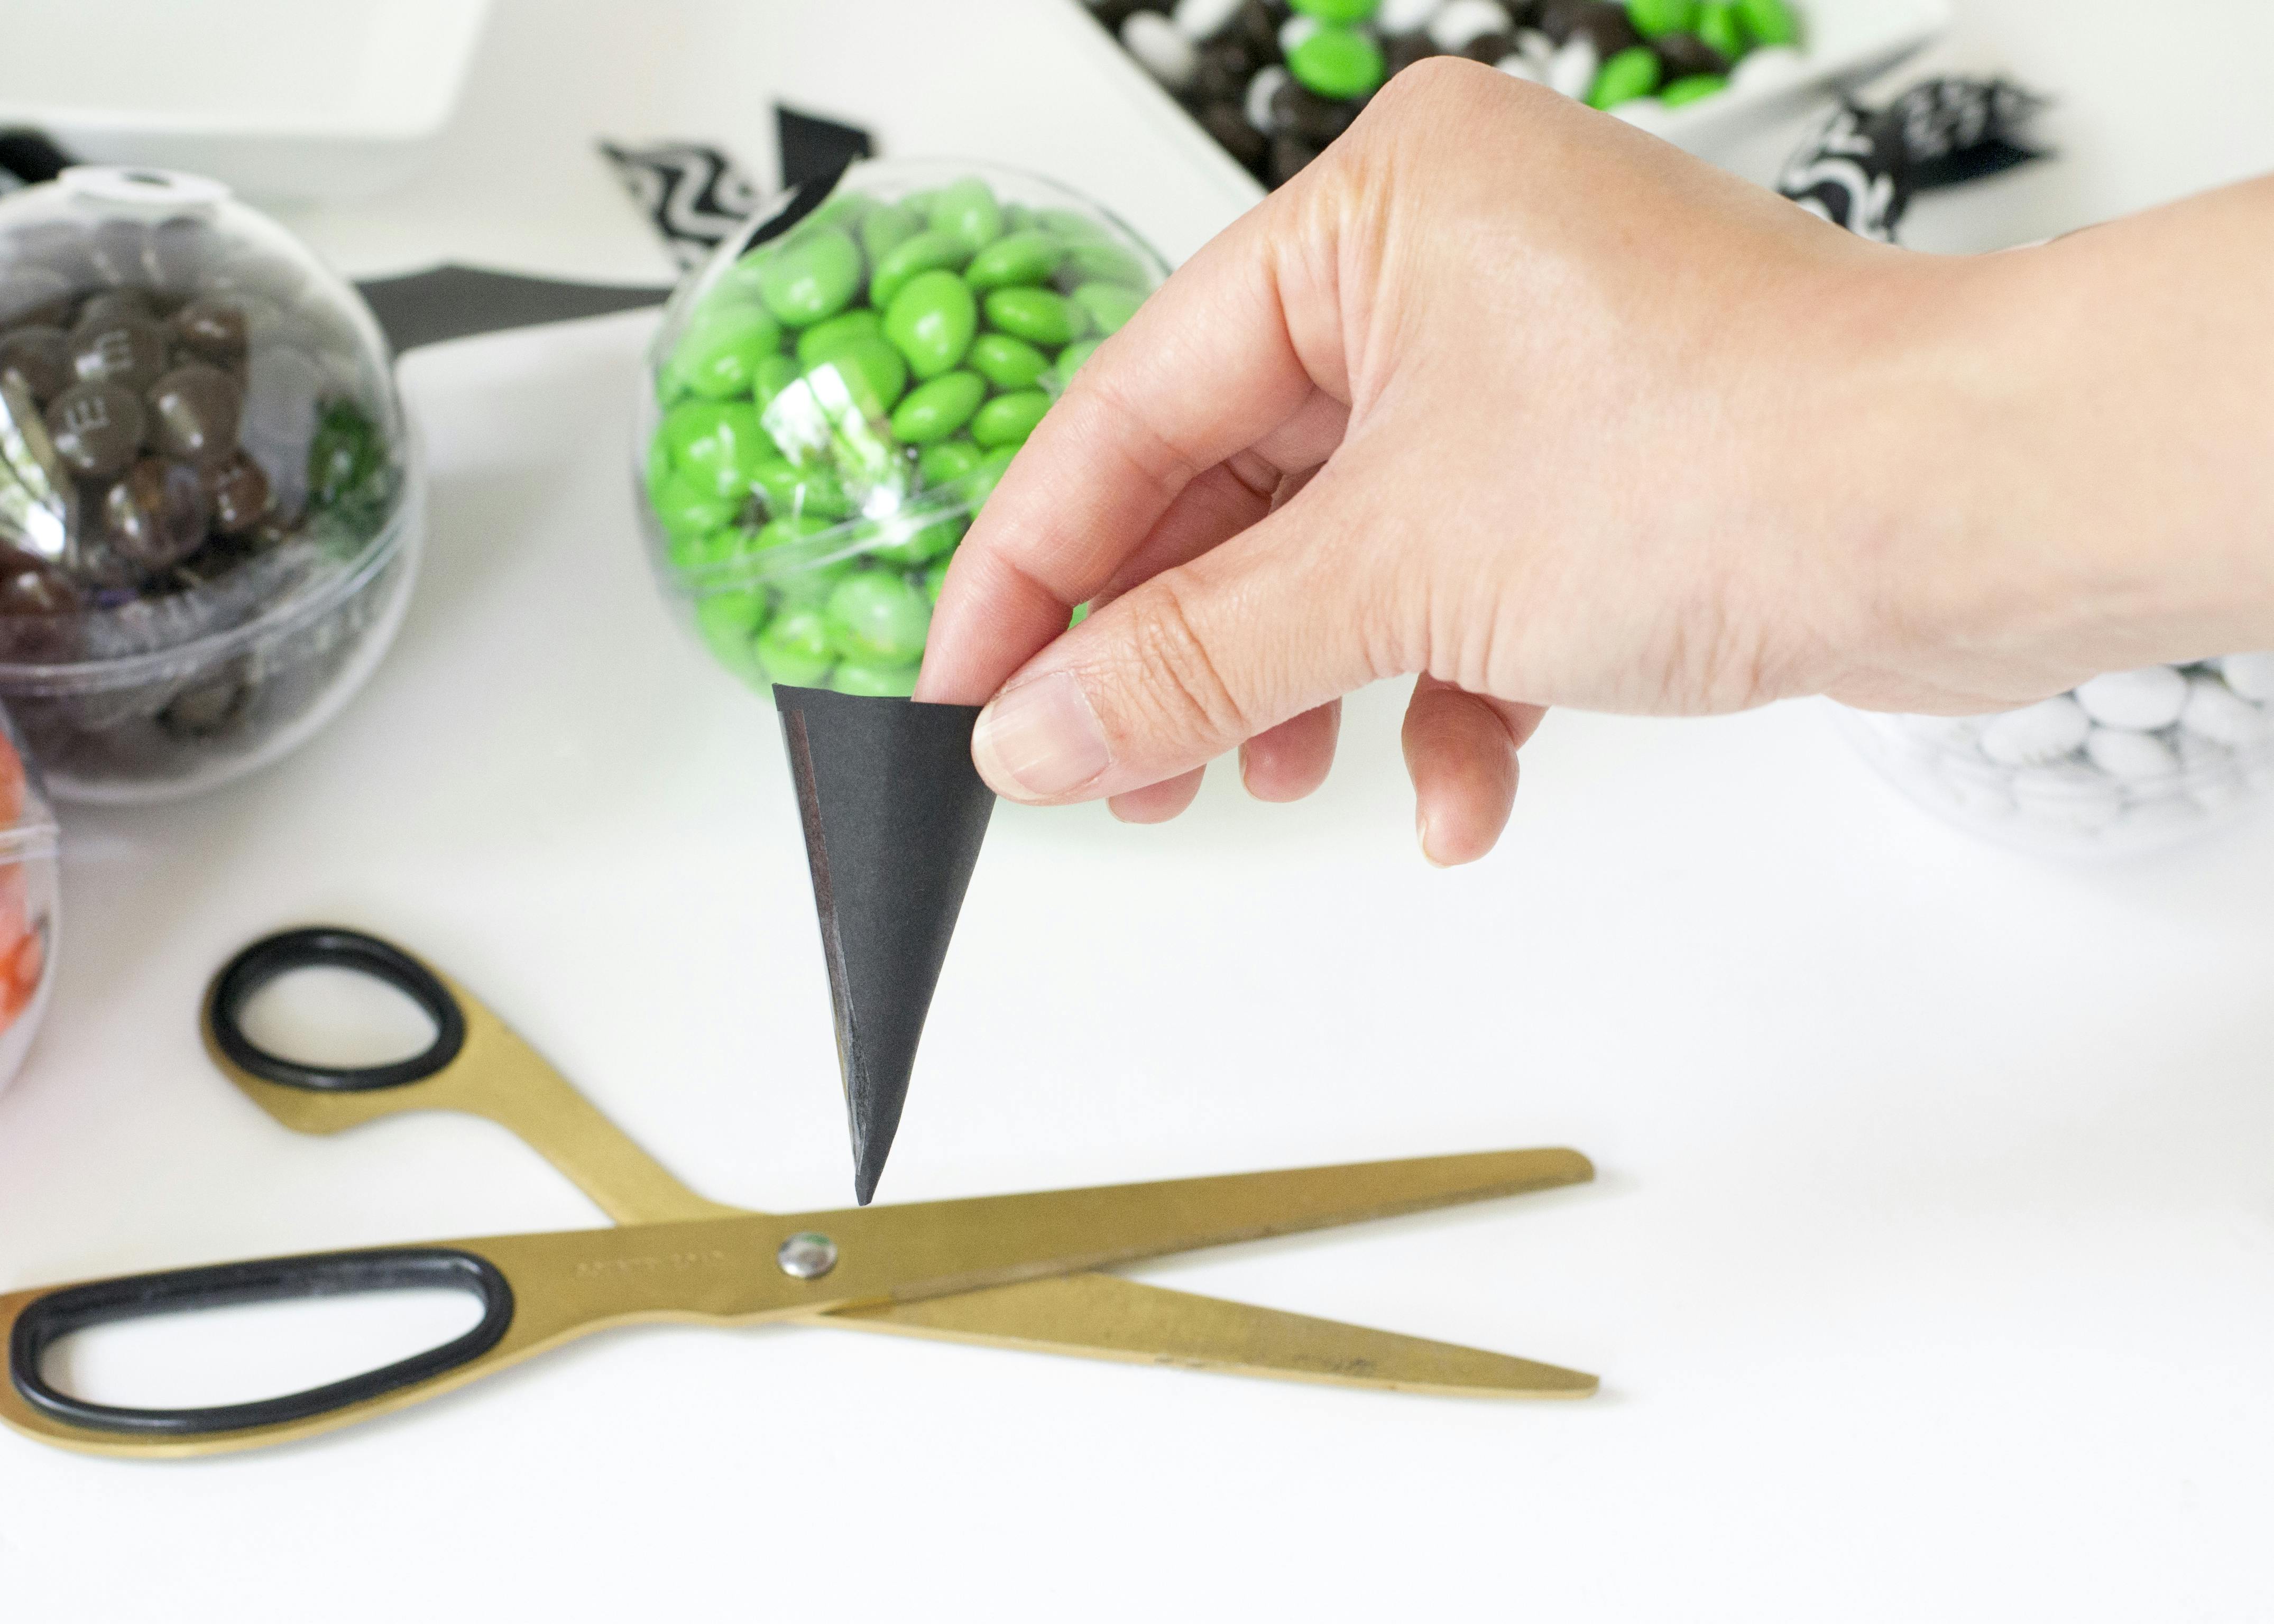
Step 11
Cut a triangle from black cardboard. Make sure one edge of the triangle is curved. Fold the cardboard triangle into a cone so that the curved side forms the open end of the cone, then stick the edges of the cone together with piece of tape.
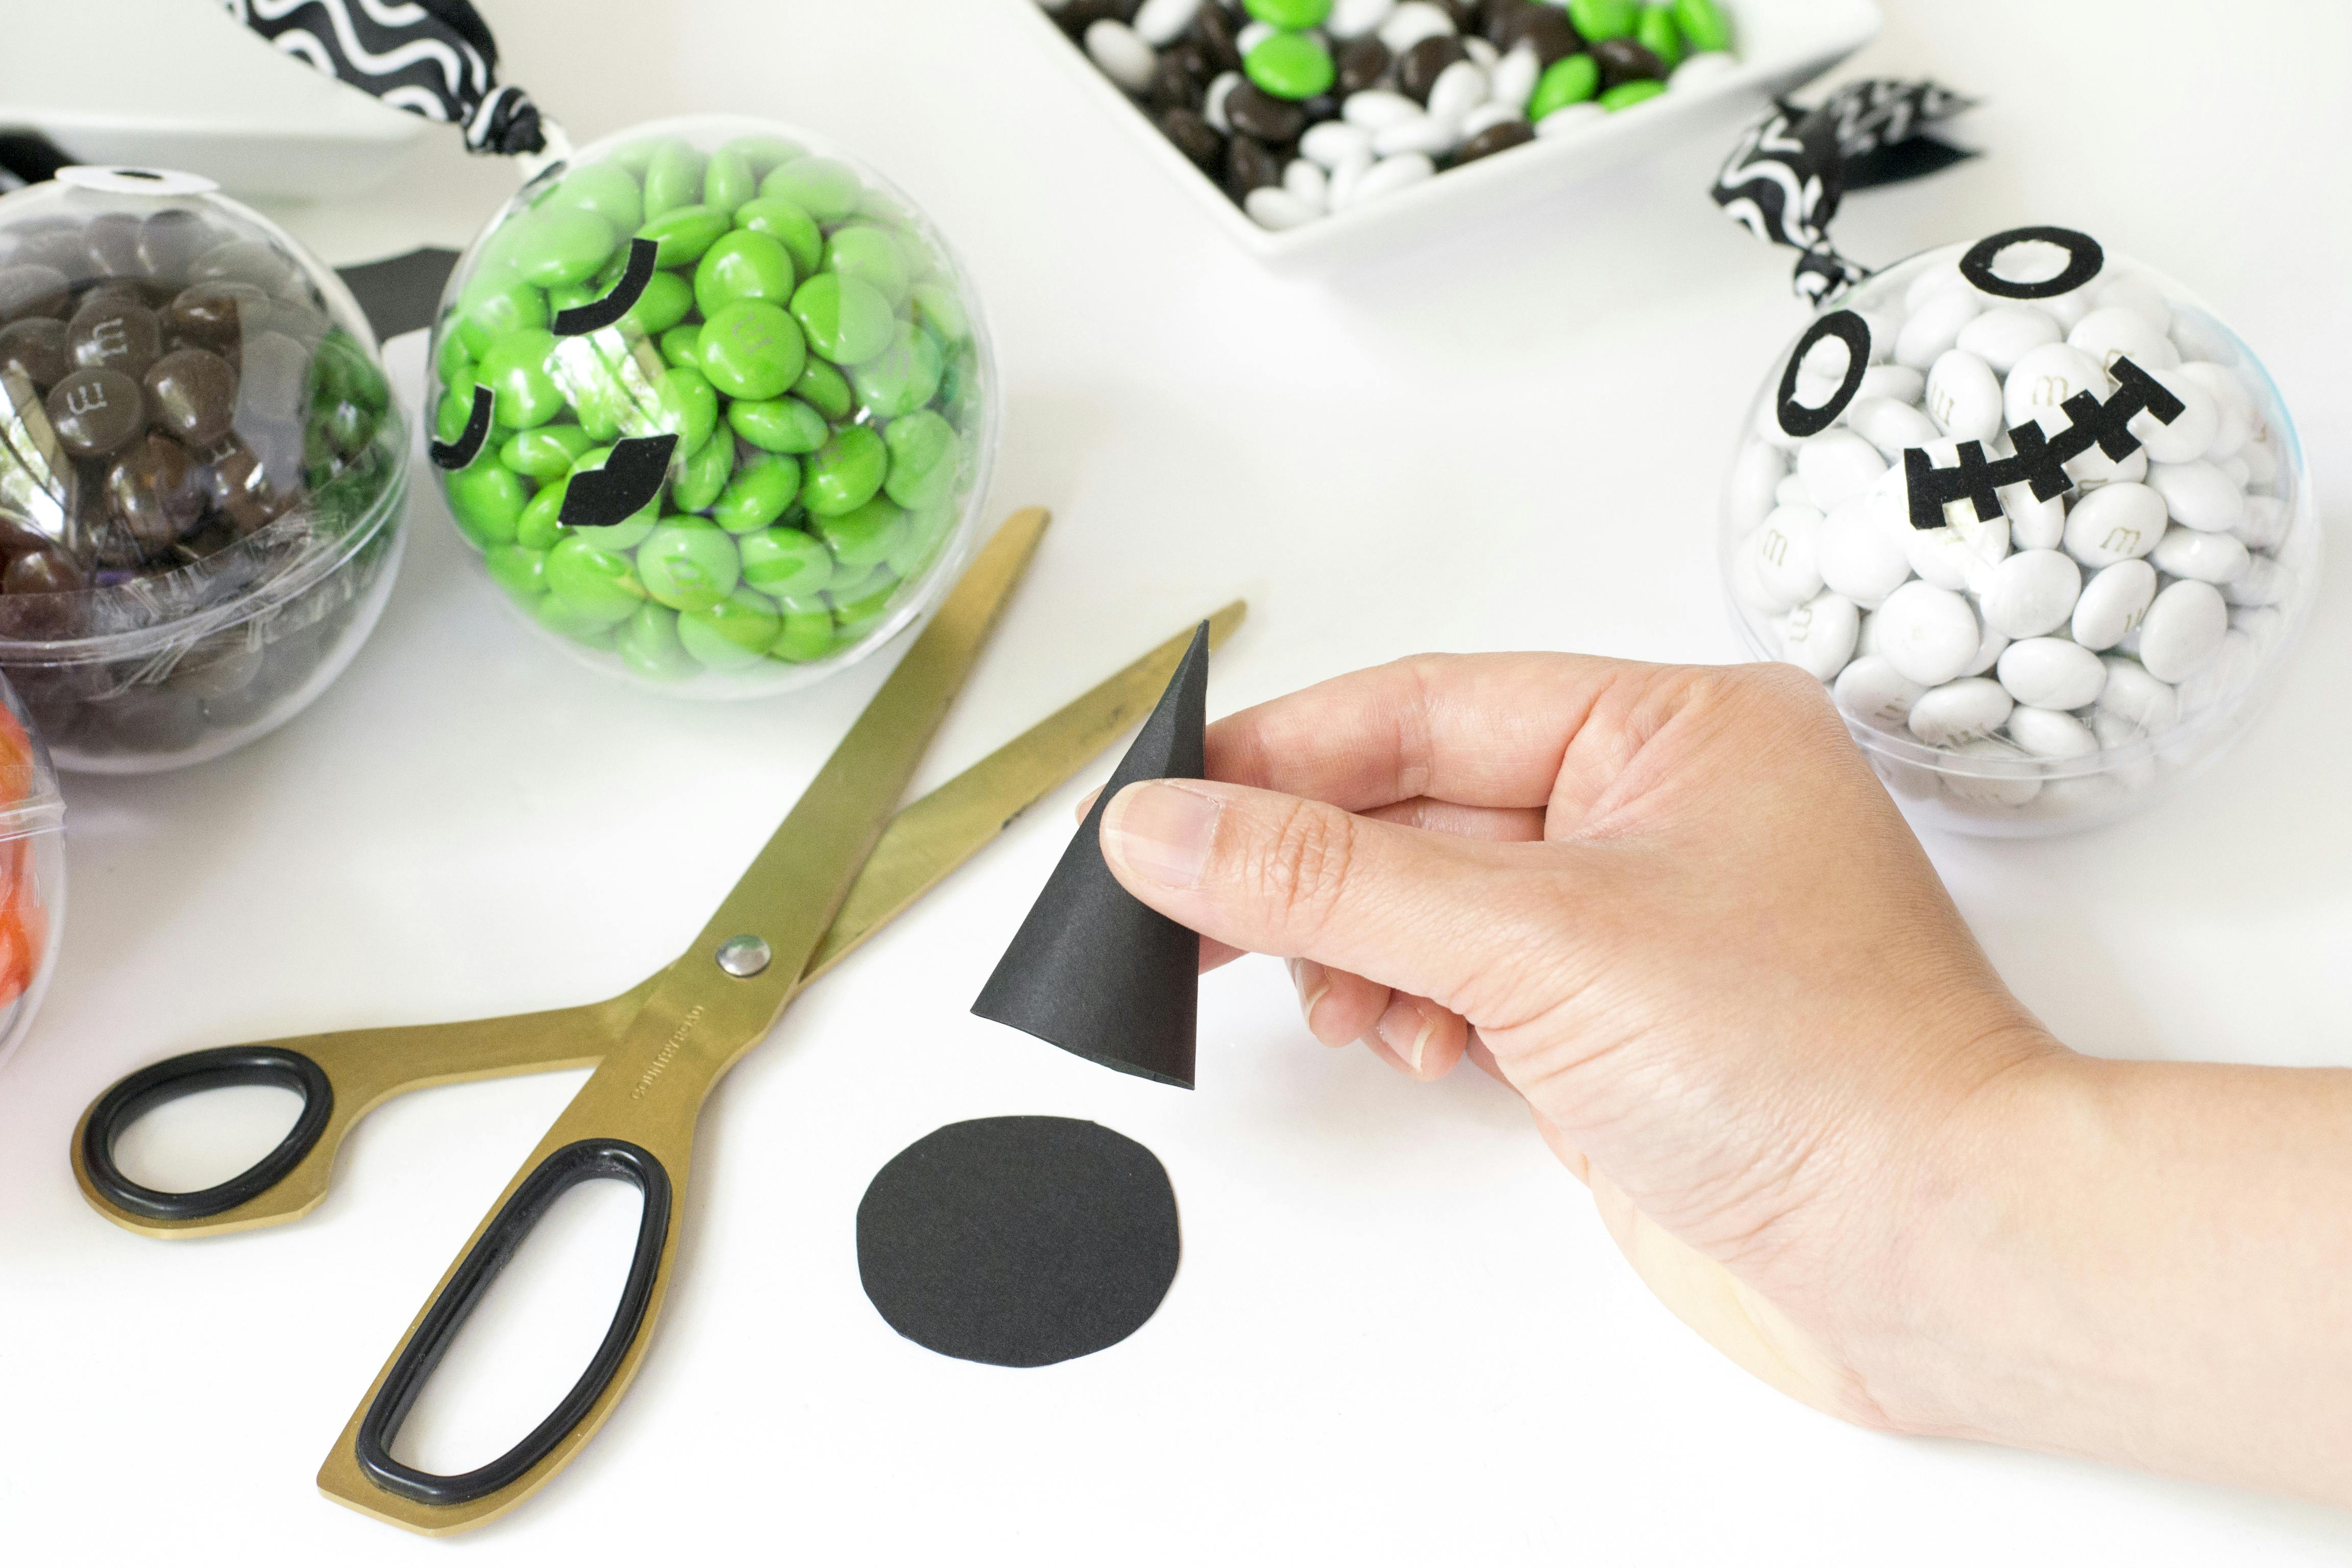
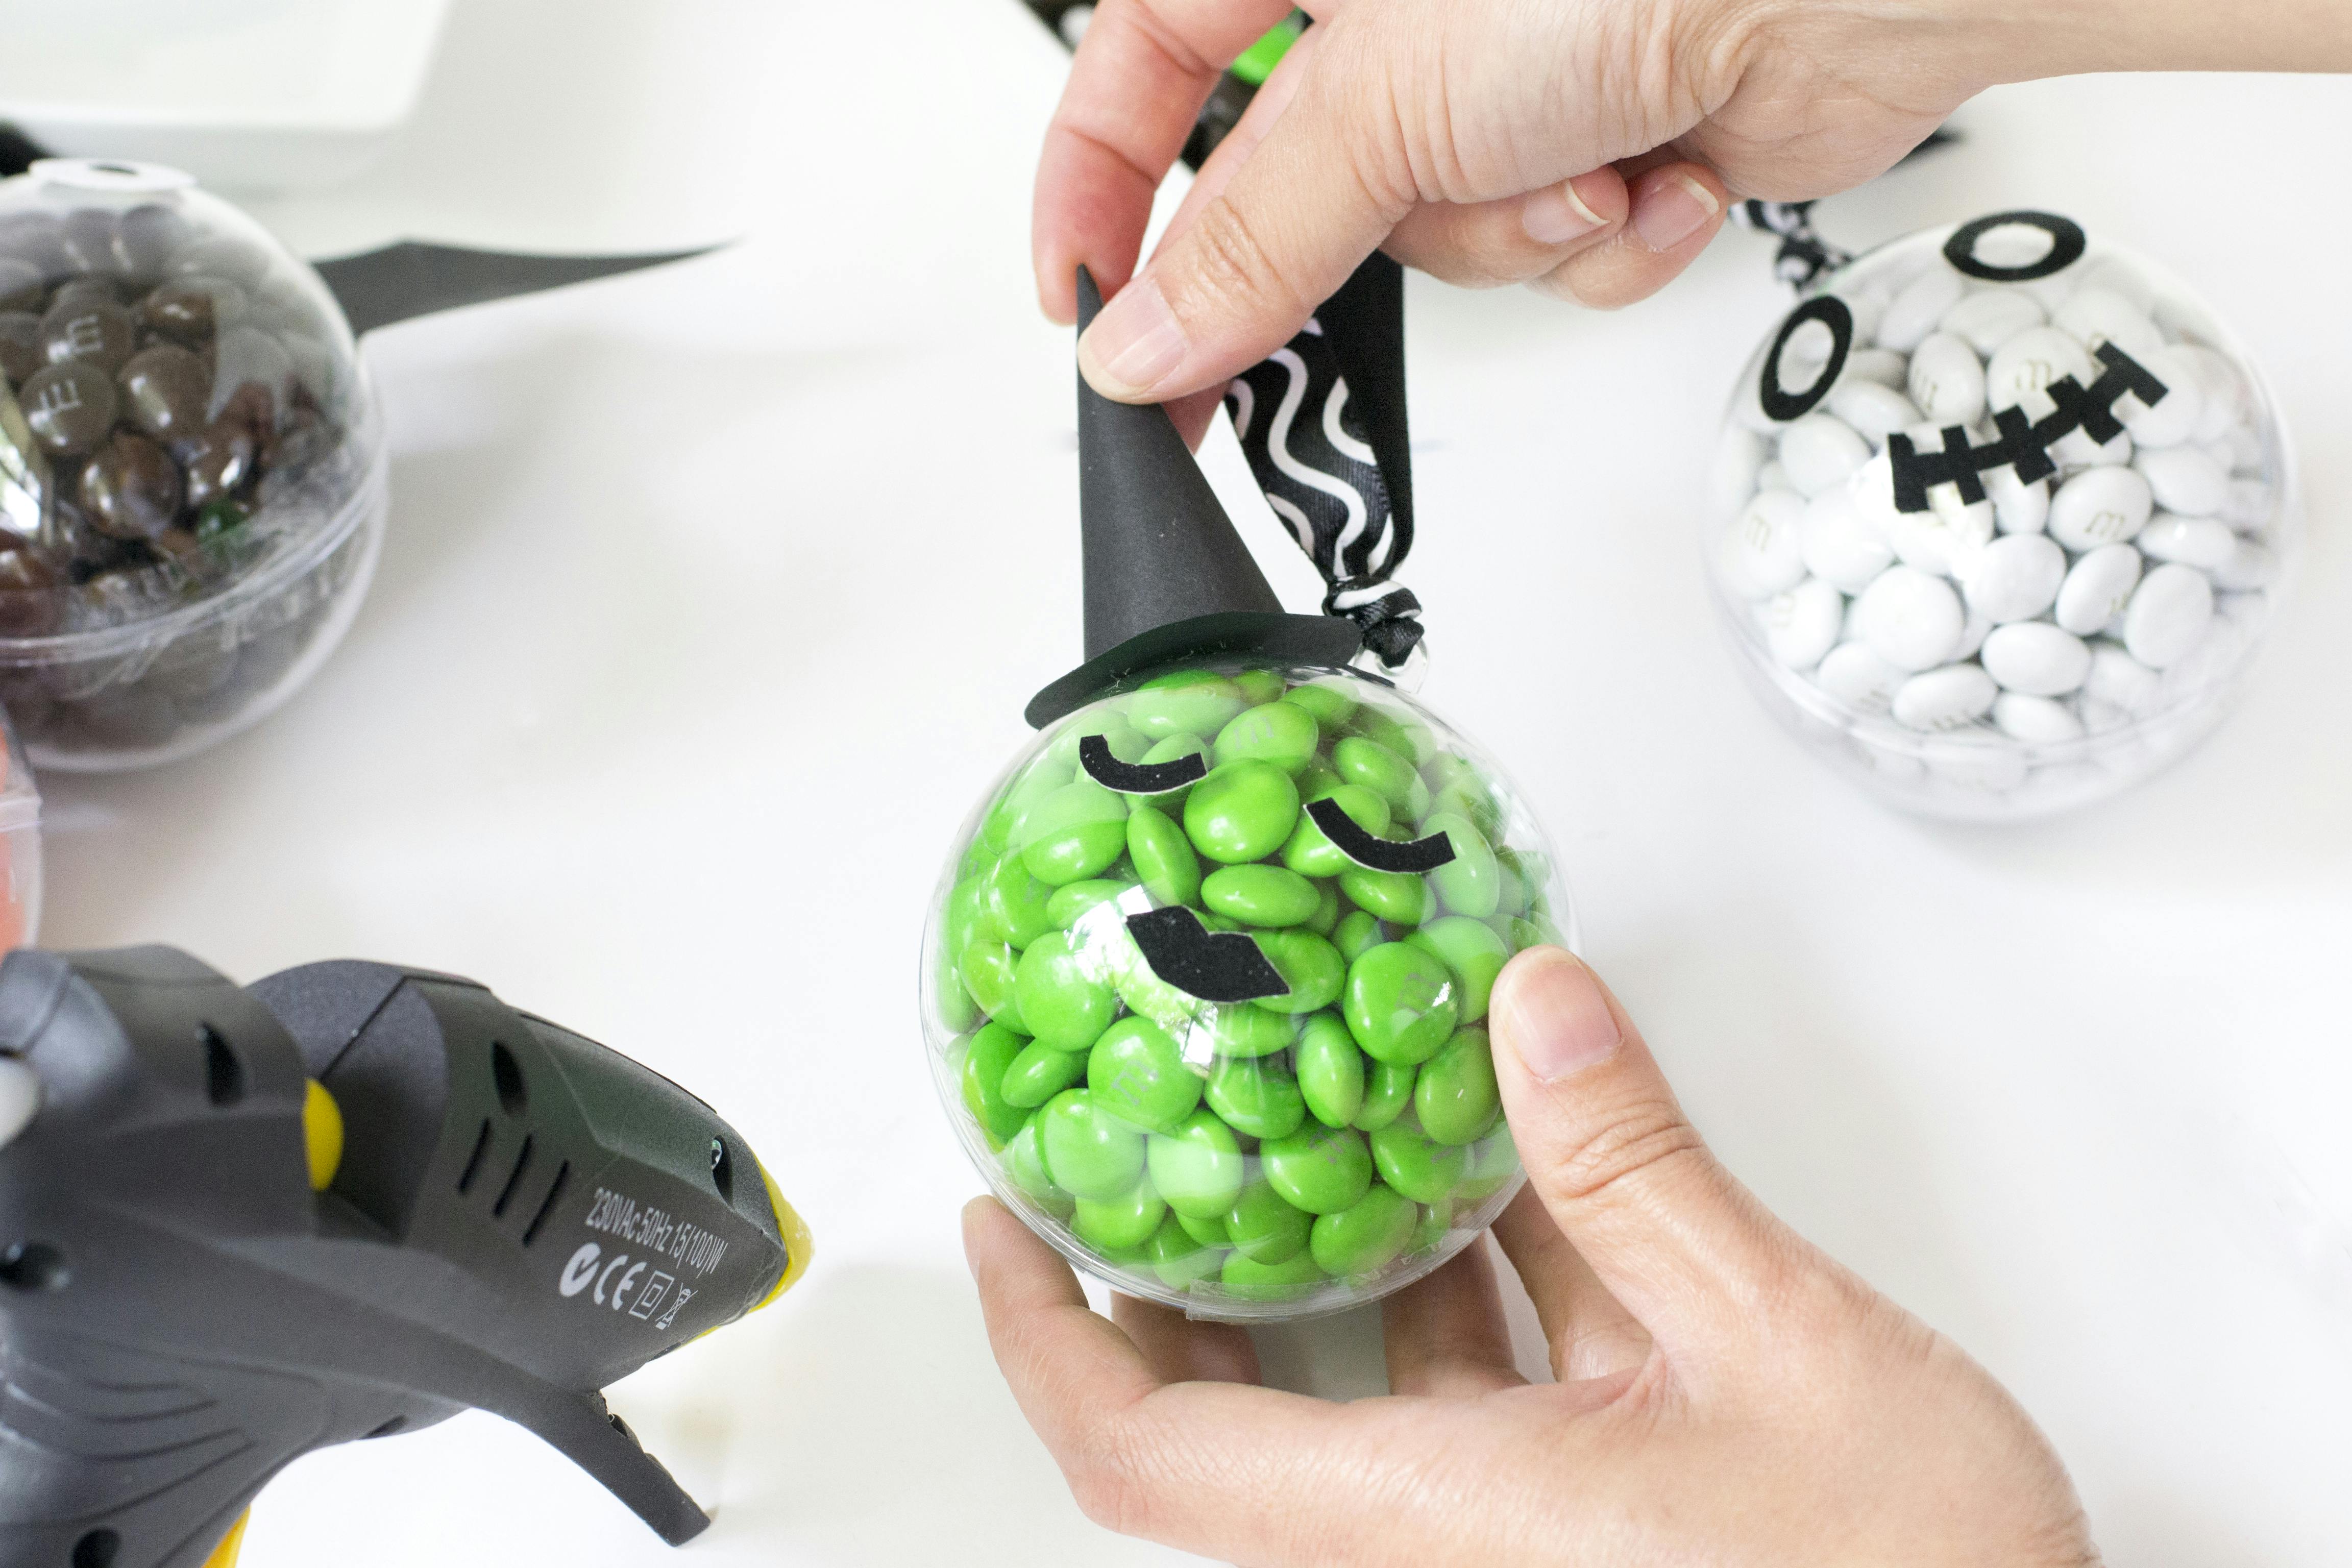
Step 12
Cut a circle from black cardboard and use hot glue to stick the cone to the circle. Lastly, use hot glue to stick your newly made witch’s hat to the green witch bauble.
And there you have it, a fun and easy trick or treat idea that is sure to be a hit with the kids!

This post is sponsored by The Reject Shop. All images, opinions and words are from Make and Tell.
Sign up to receive exclusive offers, VIP invites and all our hints & tips