Gift Ideas, Guides
DIY Tie Dyed Gift Wrap
We are CRAZY for amazing wrapping paper and we thought, wouldn’t it be awesome if you could reuse your wrapping paper?! This idea is inspired by a Japanese style of wrapping called Furoshiki. The recipient of your gift gets to keep the wrapping which can be used over and over again!
![featured image for [object Object]](/_next/image?url=https%3A%2F%2Fimages.prismic.io%2Ftrs-storefront%2Fda842d3f-9527-4569-b294-c5b537ab3310_blog_diy-tie-dyed-gift-wrap.jpg%3Fauto%3Dcompress%2Cformat&w=3840&q=75)
The Reject Shop
Last updated
3 Aug 2023
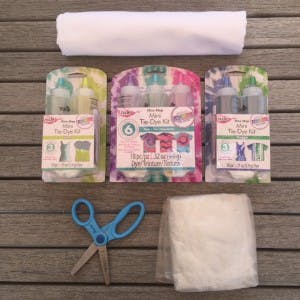
Supplies needed:
- Tulip Tie Dye Kit from The Reject Shop. The kit comes with gloves and elastic bands too.
- Fabric (40cm x 40cm per piece of wrapping cloth)
- Water
- Scissors
- Plastic bags (one per wrapping cloth)
- Paper towel
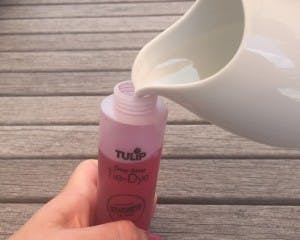
Step 1
Fill up each bottle with water and give each bottle a good shake until the dye powder is dissolved.
Step 2
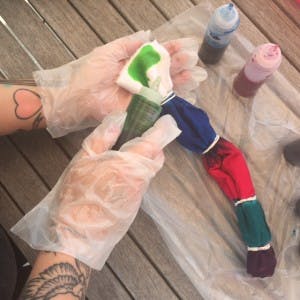
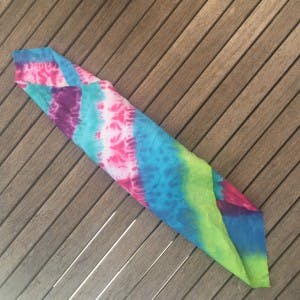
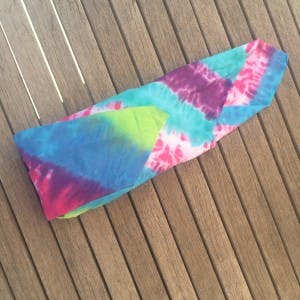
Pop on your fancy gloves (included in the kit). Lay your fabric out flat, fold it in half and roll it up. Use the elastic bands in the kit and wrap them tightly along your rolled fabric. This particular technique is inspired by the Shibori technique.
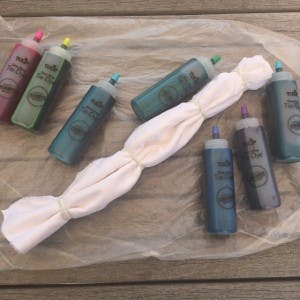
Step 3
Apply the dye by gently pouring it on to each section of your rolled fabric. Turn your fabric as you apply the dye to ensure that it reaches each layer.
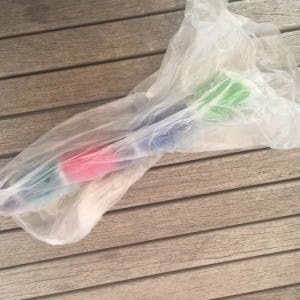
Step 4
After you have applied the dye to each section, place your fabric into a plastic bag and let it set for 6 - 8 hours.
Step 5
After 6 - 8 hours, take your plastic bagged fabric to your laundry sink. Remove the fabric from the plastic bag and cut off the elastic bands. (You can put on another pair of your FANCY plastic gloves again if you wish, as it does get a bit messy!) Turn on your cold water (not too high) and unfold your fabric and rinse your colourful wrapping cloth until the water runs clear. This will take a few minutes.
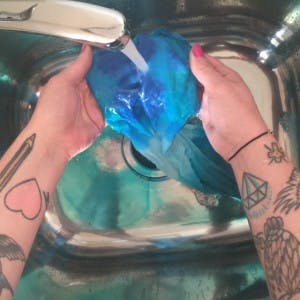
Hang your AMAZING wrapping cloth out to dry.
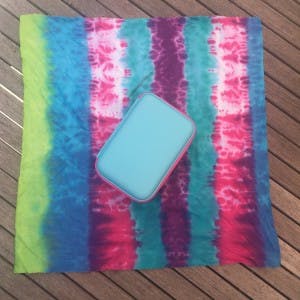
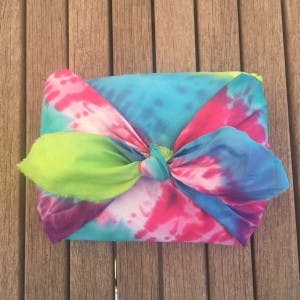
Furoshiki Wrapping Instructions:
Step 1
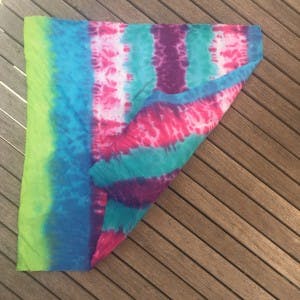
Lay your fabric out flat. Place your gift in the centre of the fabric.
Step 2
Take the button corner and fold it into the centre, tucking the corner under the gift.
Step 3
Repeat the above step for the opposite corner.
Step 4
Fold each corner towards the centre of the gift.
Step 5
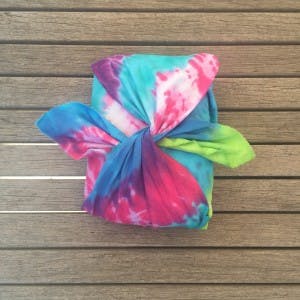
Tie a knot in the centre.
Step 6
Tie another knot and pull out the bow and YAYE! You have a beautiful gift wrapped in reusable wrapping.
Now for choosing a special friend and gift them with your craftiness!
This post is sponsored by us. All images, opinions and words are from See Make Play
Find more fun activities on their blog: http://seemakeplay.com.au/
*The Tie Dye Kit is available in stores now but for a limited time only.
Sign up to receive exclusive offers, VIP invites and all our hints & tips