Craft, Valentines Day
3D Card And Gift Wrap For Valentine's Day
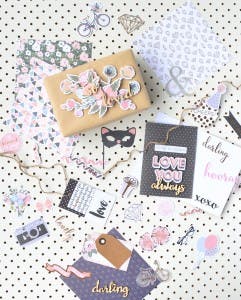
With Valentine's Day just around the corner it's the perfect time to try something a little crafty with your gift giving. Not only is it super fun, but giving a handmade touch just makes a gift extra special. It can be as simple as decorating with a few stickers, crafting a handmade gift tag or hand painted wrapping paper. But with the new range of card making supplies now in store at The Reject Shop it's even EASIER to craft something fun for a loved one.
![featured image for [object Object]](/_next/image?url=https%3A%2F%2Fimages.prismic.io%2Ftrs-storefront%2Fb9ae2b79-cb72-4a47-a230-15aec202ec52_blog_3d-card-and-gift-wrap-for-valentines-day.jpg%3Fauto%3Dcompress%2Cformat&w=3840&q=75)
Fiona from Craft Hunter
Last updated
31 Jul 2023
Supplies needed:
- Plywood Embellishments Words
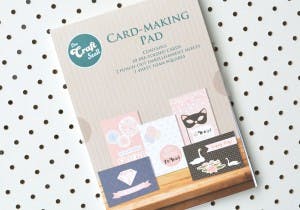
- Card-making Pad
- Cardboard Die Cuts
- Clear Die Cut Stickers
- Brown wrapping paper
- Glue Stick
- Sticky Tape
(All items available from The Reject Shop)
Steps:
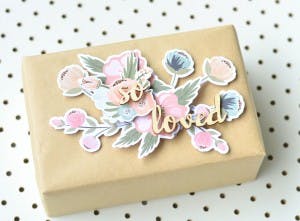
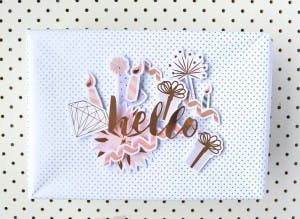
To make your 3D gift wrap, start by wrapping your gift with the brown paper and sticky tape.
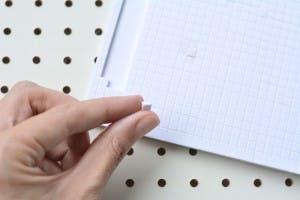
At the back of your Card-Making Pad there is a sheet of double sided foam tape which is pre-cut into little squares. These are what give your cardboard cut outs the 3D effect, especially when you start layering them on top of each other.
Start with one of the singular flower shapes. Place a foam sticker on the back of the card and place on top of the gift, with the stem pointing towards the middle. Repeat this step with a few more singular flowers and also a grouped flower piece. For any shapes bigger than a 50c coin I recommend applying 2 pieces of foam so that it stays put.
Now to start layering higher. Place a tape square onto the back of a new shape and place on top of one of your existing pieces, somewhere closer to the middle than the first layer.
Finish by sticking two of the plywood words on top. I seriously love this mix of wood and pink flowers!
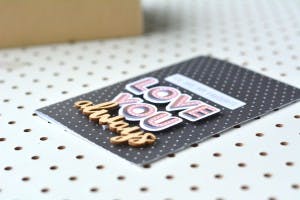
For the 3D card, I used a sheet of card from the Card-Making Pad which is already cut to size and folded down the middle so it's super simple to put together. When decorating, start by gluing your first piece "you're my favourite" in place with a glue stick. Then from there add your words with foam tape pieces to make it pop out a bit.
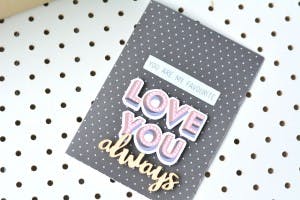
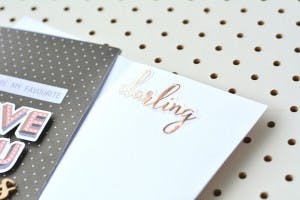
I glued some words inside the card too.
Here's another quick gift wrap I put together with all of the cardboard die cuts! So much fun. Your friend could even keep this piece of the wrap paper and frame it as a keepsake.
Hope this has inspired you to put a crafty touch on your gift giving this Valentine's Day!
This post is sponsored by us. All images, opinions and words are from Fiona from Craft Hunter
For more simple crafty ideas check out www.crafthunter.com.au
Sign up to receive exclusive offers, VIP invites and all our hints & tips