Easter, Craft
Craft Ideas for Easter
Are you looking for some creative ways to celebrate Easter this year? Here are three easy projects which you can complete in one to a few hours. Your children can help out if you give them a hand on the more difficult steps.
![featured image for [object Object]](/_next/image?url=https%3A%2F%2Fimages.prismic.io%2Ftrs-storefront%2F31cde4af-ba70-4cc7-aa20-694864f9f104_DIYBasket_Eggs.png%3Fauto%3Dcompress%2Cformat&w=3840&q=75)
The Reject Shop
Last updated
31 Jul 2023
Maybe it’s the big kid in me coming out to play, but I can’t resist making treat baskets at Easter. Most people I know don’t bother with Easter gifts anymore (maybe because none of us have kiddos to spoil?), but every year, I somehow get drawn into the gorgeous pastel colours, adorable bunnies and super fun patterns and I can’t help but join in the fun!
If you’re playing Easter bunny this year, these printable baskets and rabbit eggs will come in super handy and are guaranteed to impress both littles and grown-ups alike. Simply assemble the basket, fill it with your rabbit eggs and other Easter treats and you’ll be everyone’s best friend!
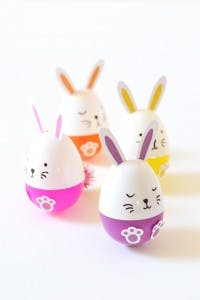
BUNNY EASTER EGGS
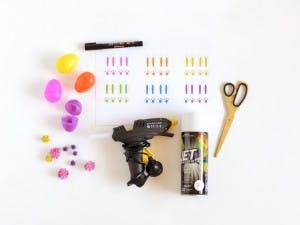
Materials
⁃ Printable Bunny Ears and Paws file
⁃ Large plastic Easter eggs (they come in packs of 12)*
⁃ White spray paint
⁃ White cardboard
⁃ Pom poms (they come in various colours)*
⁃ Black marker*
⁃ Hot glue gun and glue*
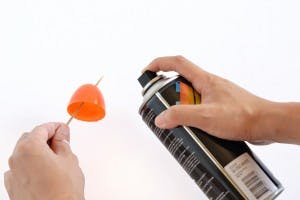
Step 1
Pull apart the plastic eggs into halves, and spray paint the tops white.
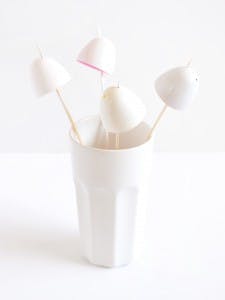
Handy tip: If you find the tops move too much when you’re trying to spray them, put them on skewers first (there’s a hole at the top of each one that you can poke the skewer through). Then simply stick the skewered egg halves into a cup filled with rice and leave them to dry.
Step 2
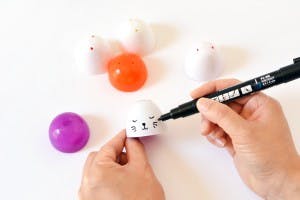
Once your egg halves are dry, draw on bunny faces and whiskers with a black marker (I used an acrylic paint pen, but I think a Sharpie would work just as well).
Step 3
Print out the Bunny Ears and Paws file onto white cardboard and cut out each of the ears and paws.

Step 4
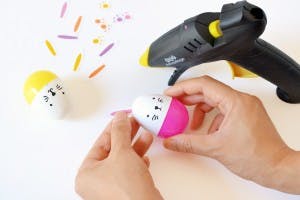
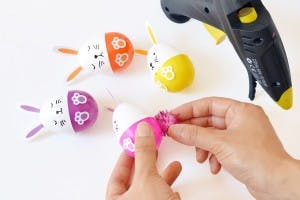
Put a white top on each of your coloured egg bottoms and stick the ears and paws on with a hot glue gun.
Step 5
Add a pom pom to the back of each egg to make a tail and hey presto - your bunny eggs are done!
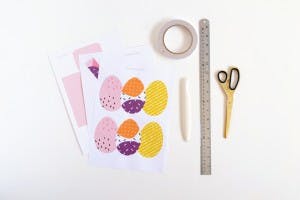
PRINTABLE EASTER EGG BASKET
Materials
⁃ Printable Easter Egg Basket file
⁃ 3 sheets of white A4 cardboard*
⁃ Glue* or double-sided tape
⁃ Scissors*
⁃ Bone folder
⁃ Ruler
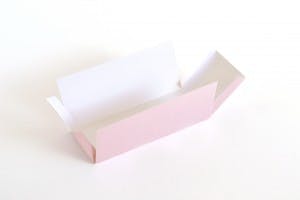
Step 1
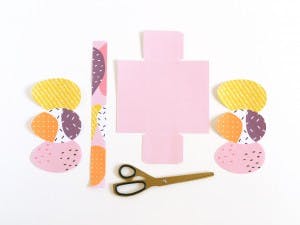
Download the Printable Easter Egg Basket file. There are six pages in the file - three to make up a pink basket, and three to make up a blue basket. Choose a basket colour and print the pages for that basket onto white cardboard. Then cut out each of the pieces with a pair of scissors.
Step 2
On the piece that’s labeled ‘basket body’ score along faint white lines that mark out the sides of the basket and the tabs.
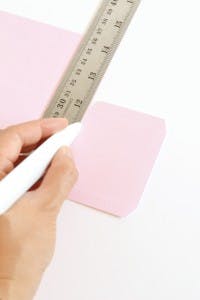
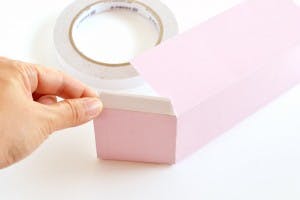
Step 3
Fold the basket body along the lines you just scored. Then use glue or double-sided tape to affix the tabs on the square sides to the insides of the rectangular sides.
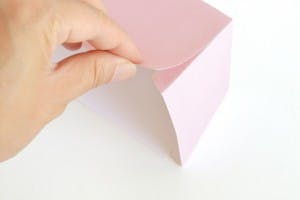
Step 4
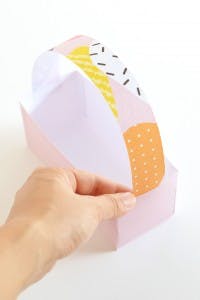
Using glue or double-sided tape, attach the handle to the two square sides of the basket body.
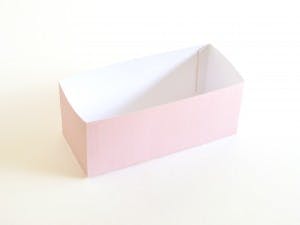
Step 5
Flip the egg pieces over so the print is face down and apply glue or double-sided tape to the backs. Then attach them to the two rectangular sides of the basket.
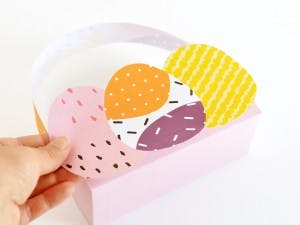
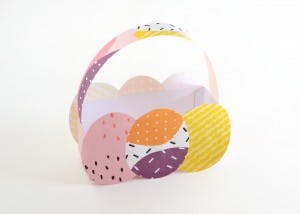
And that’s it - your project is complete! Now all that’s left to do is fill your basket with chocolate goodies (and your bunny eggs of course), and give them away to your kiddos, friends and family!
This post is sponsored by us. All images, opinions and words are from Steph from MAKE AND TELL
For more creative DIY projects, check out her blog: http://makeandtell.com/
*All products or variations are found in store.
Sign up to receive exclusive offers, VIP invites and all our hints & tips