Easter, Craft
DIY Easter Bunny Piñata
Indya from The Small Adventurer blog shares her DIY Piñata skills, just in time for some fun Easter craft activities! "Today I am lucky enough to be bringing you an adorable Easter themed piñata that I made solely from products that you would find either laying around your house, or from The Reject Shop! The total cost of this piñata ended up being only $2.75, can you believe it?! You can't get much more savvy than that! So if you'd like to learn how to make your own adorable bunny piñata for next to nothing, then keep reading!"
![featured image for [object Object]](/_next/image?url=https%3A%2F%2Fimages.prismic.io%2Ftrs-storefront%2F07aa09a4-5bec-46d4-8da0-b2e439e29d3c_blog_diy-easter-bunny-pinata.jpg%3Fauto%3Dcompress%2Cformat&w=3840&q=75)
The Reject Shop
Last updated
31 Jul 2023
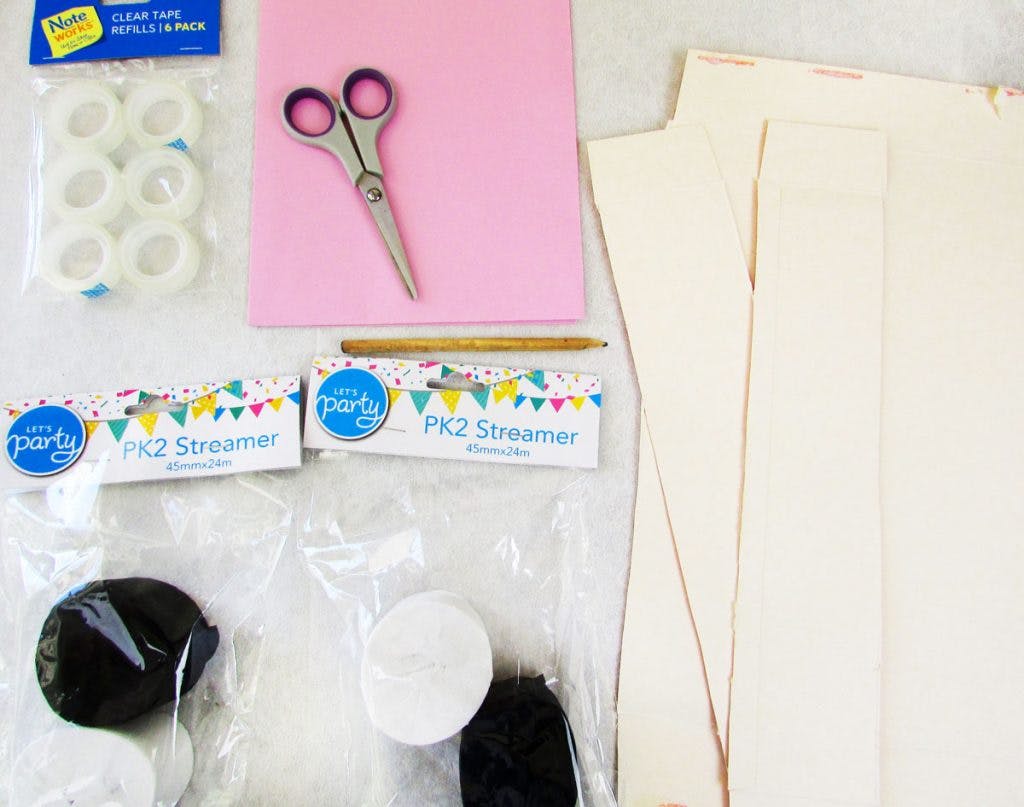
Supplies:
FROM YOUR HOUSE:
- Cardboard (I use leftover cereal boxes as they are easy to bend!)
- Pencil
- Scissors
FROM THE REJECT SHOP:
- Tape, pack of 6 for $1.25
- Black and white streamers, $1 (I bought two just in case, but one pack is more than enough!)
- Pink wrapping paper, 50c
Directions:
Step 1.
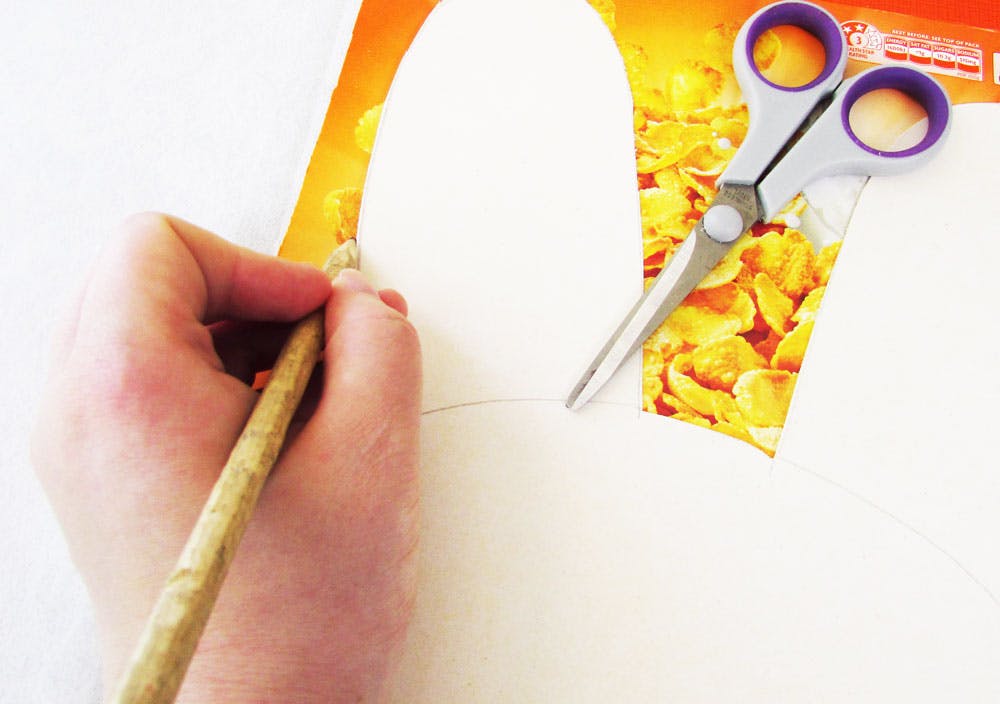
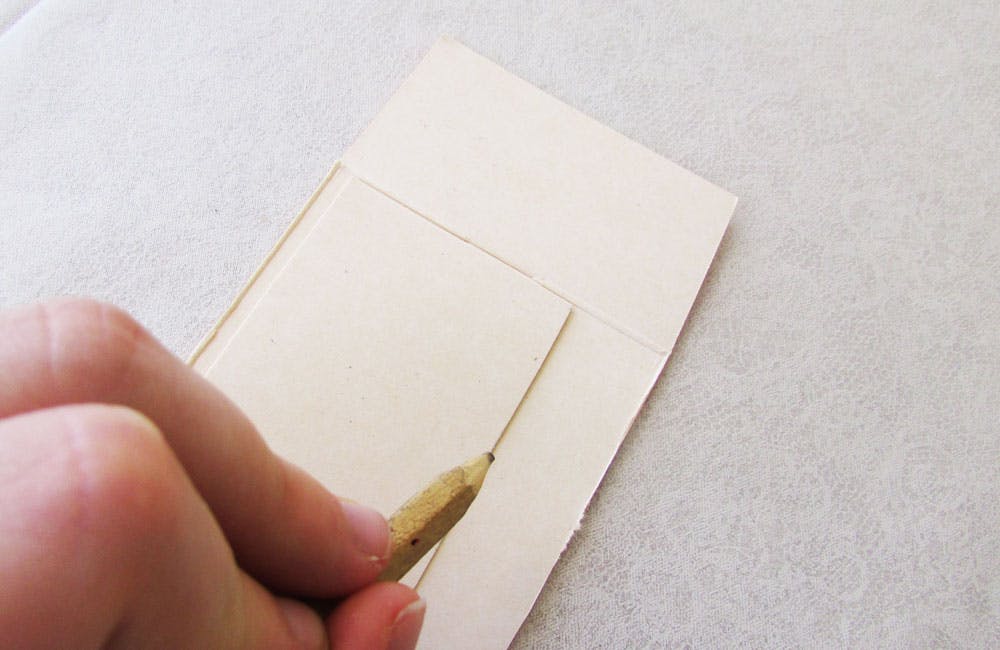
Cut your cereal box up so that the front and back rectangles and two side strips are all separate. On the inside of one of the rectangle pieces, draw your bunny head. When you're happy with your design, cut it out!
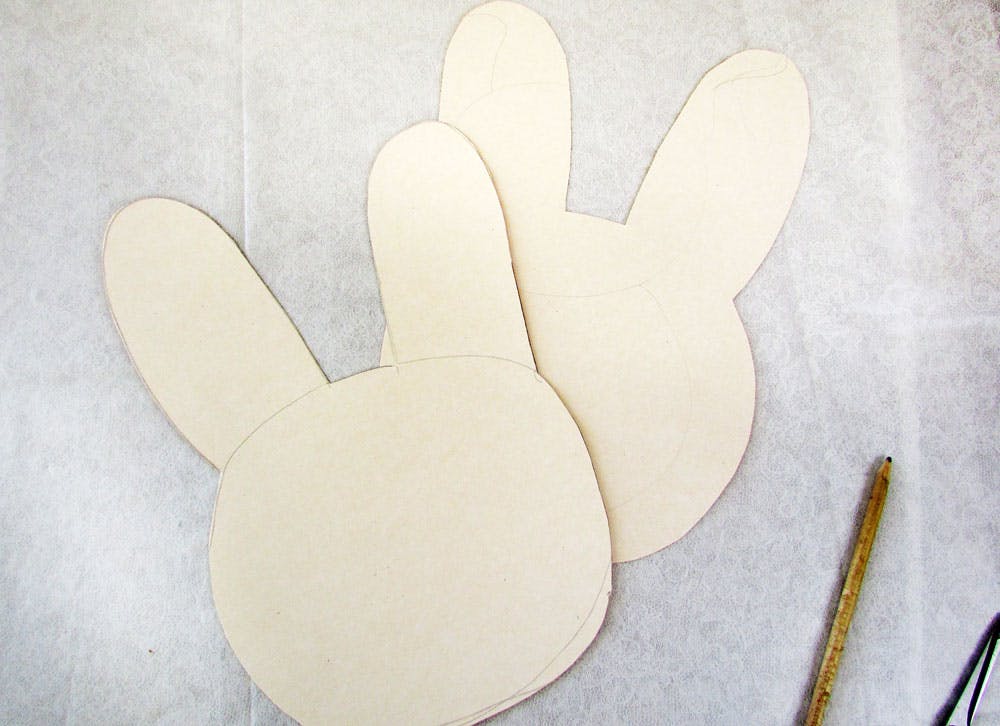
Step 2.
Get your second rectangle cardboard piece and face the white side DOWN. Place your bunny head on top and trace around with a pencil, then cut it out.
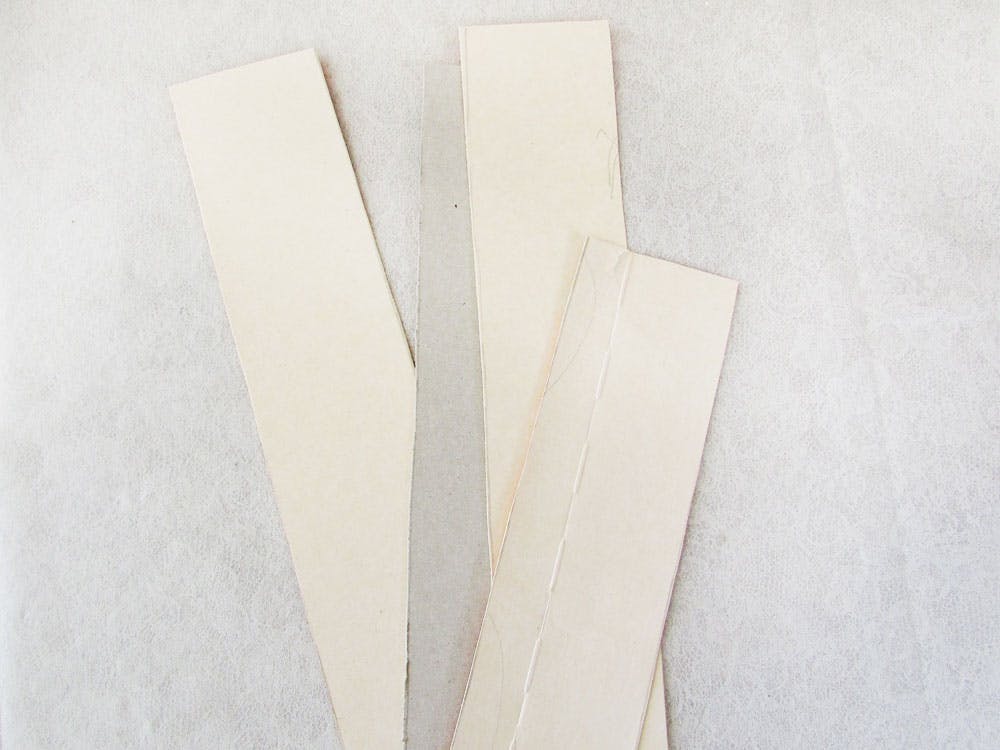
Step 3.
Cut your side strips so they are 4-5 cm wide. If you're worried about drawing a straight line, just use your other side strip as a ruler. Use any other excess cardboard you have to make as many 4-5cm thick strips as you can. Their length doesn't matter as we'll be cutting them later anyway!
Step 4.
This is the more difficult part, but trust me that it gets easier as you go! You're going to take one of your side strips and stand it up on the edge of the bunny with the white part facing outwards, and sticky tape it so that it stands up around the edge of the bunny.

My best advice for this part is tape is your best friend! When in doubt, just keep adding more tape until it stays in place. Add another strip where that first one ended, making sure that you tape the ends of strips together as well. Continue doing this all around the edge of the bunny until you're left with a bunny-shaped bowl.
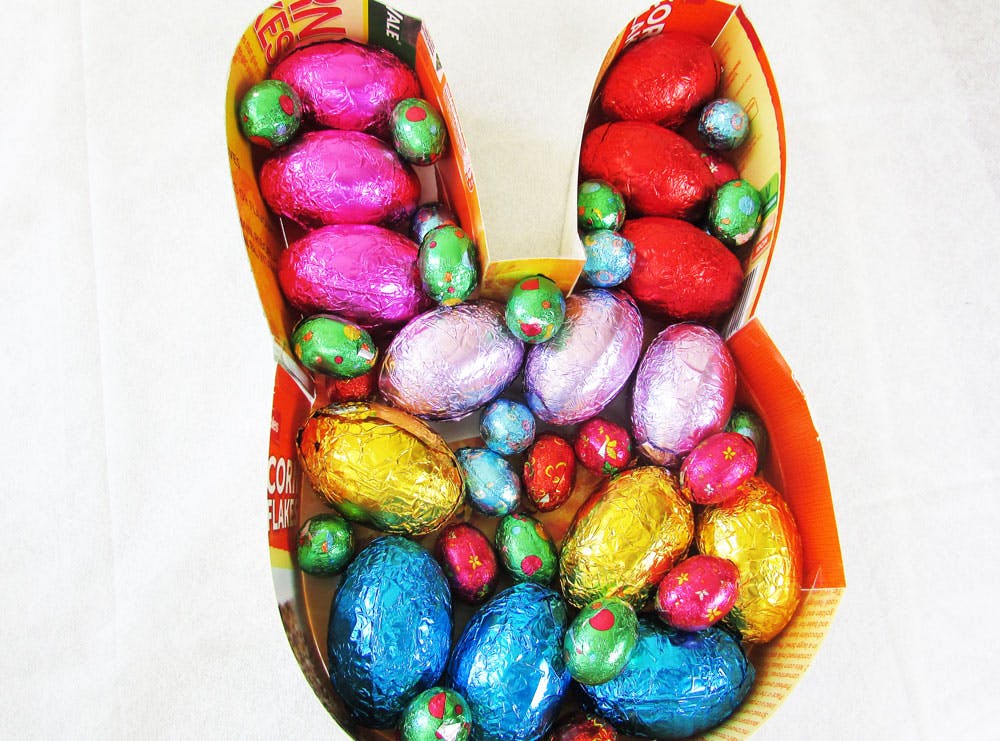
Step 5.
Now that you have a bowl, fill it with chocolate! I bought a pack of 15 Easter eggs for $5, and a packet of mini eggs for $2.50 - both from The Reject Shop - for my piñata. I would recommend going easier on the solid chocolate eggs as they weigh the piñata down and may bend it out of shape. A few here and there won't hurt, but I would mostly stick with the larger, hollow eggs! Once your piñata is full, tape the second bunny head on top with the white side facing upwards.
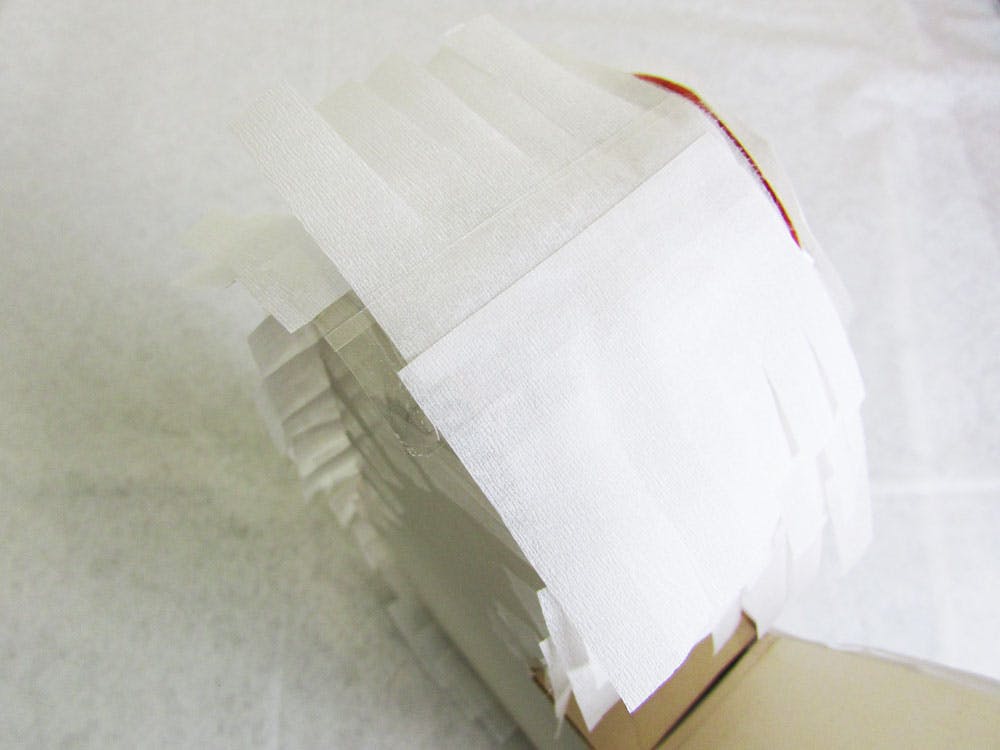
Step 6.
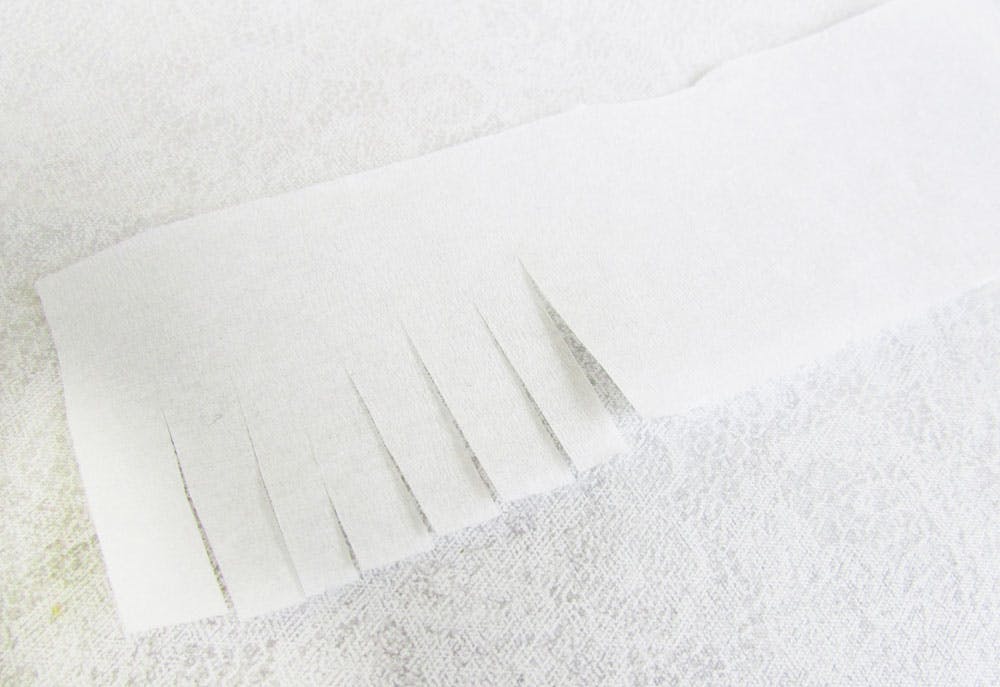
We're up to my favourite part of making piñatas now - the fringing! Starting at the bottom of your bunny, measure out a strip of white streamer so that it sits about halfway over the edge.
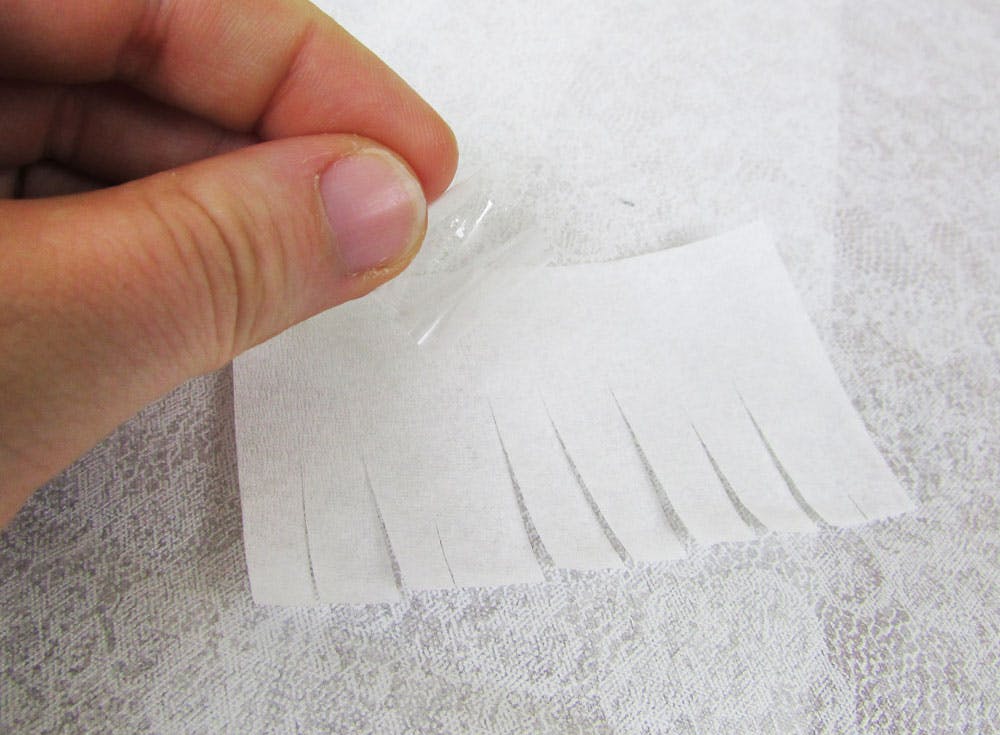
When you're happy with the length, cut it off the roll of streamer, fringe the bottom 2/3 of the streamers, then sticky tape onto the piñata.
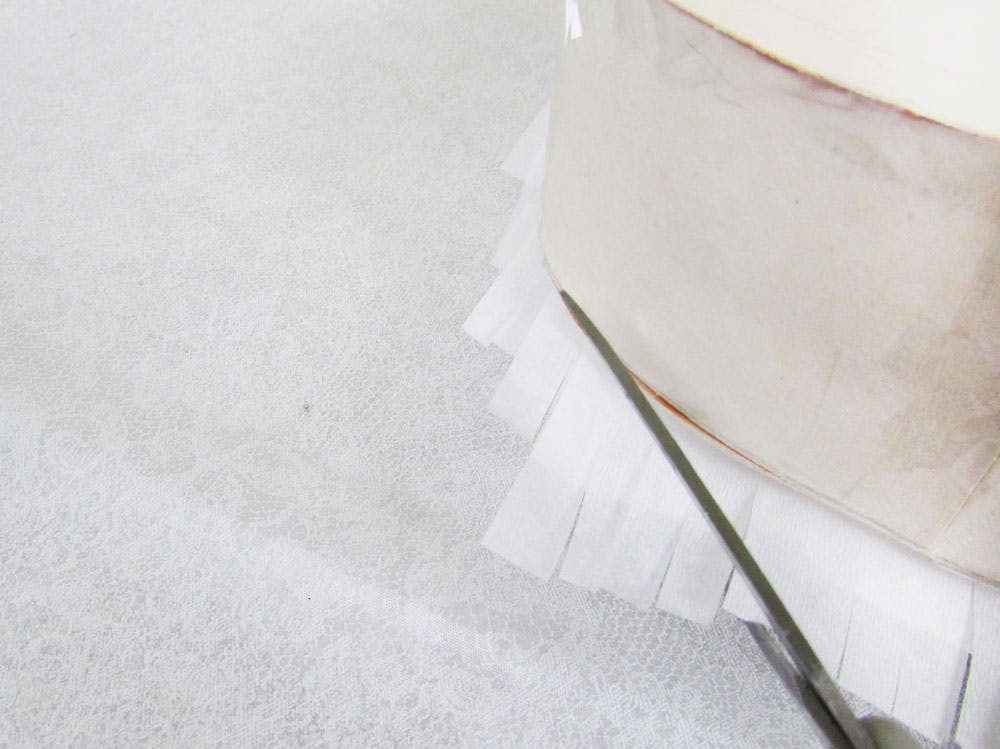
Step 7.
Continue doing this all the way up the head, switching to shorter strips once you get to the ears. Once you get to the very top strip of streamer, instead of sticking the tape on top like you have been doing, loop the tape over itself and stick that under the streamer so you can't see it. Remember: if something isn't sticking, just keep adding tape!
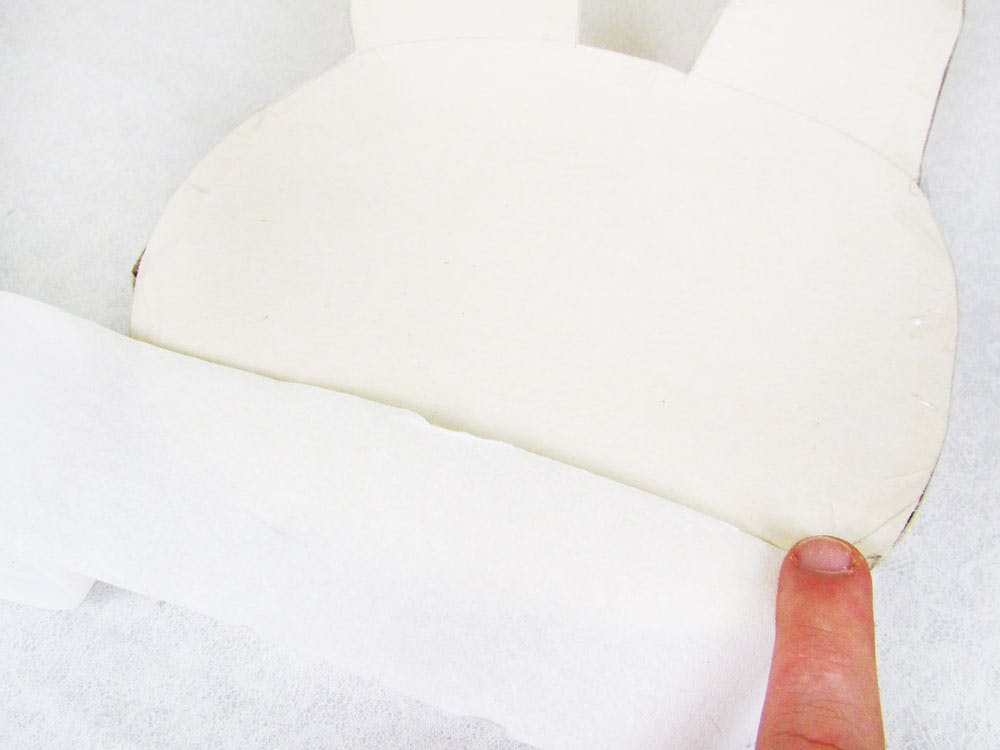
Step 8.
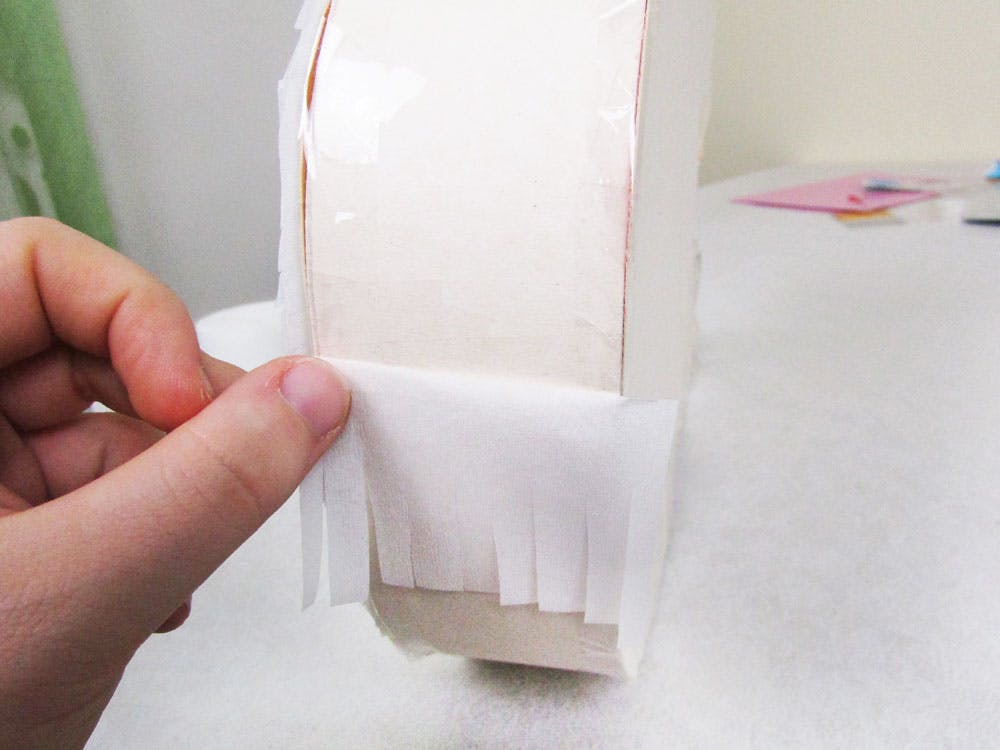
You may have noticed that the streamers hanging over the edge ruin the shape of your bunny head, which is easily fixed by flipping your bunny head over and trimming the excess bits of streamers. Your piñata will be quite heavy at this point so be gentle when moving it around!
Step 9.
Now it's time to fringe the side of the piñata. Start from the bottom, measure, fringe and stick small strips of streamer up the left side of the bunny, but stop once you get to the top of the left ear. Then, start at the very bottom of the bunny again, do the same up the right side, and stop once again when you reach the top of the right ear.
Step 10.
Measure out a small piece of streamer to sit in the space between the two ears and stick it down with looped tape, then start at the bottom inside of your left ear and measure, fringe and stick streamers up until the top of the ear, then do the same to the right ear. Trim off any excess pieces, then carefully flip your piñata over and cover the back the same way you did for the front.
Step 11.
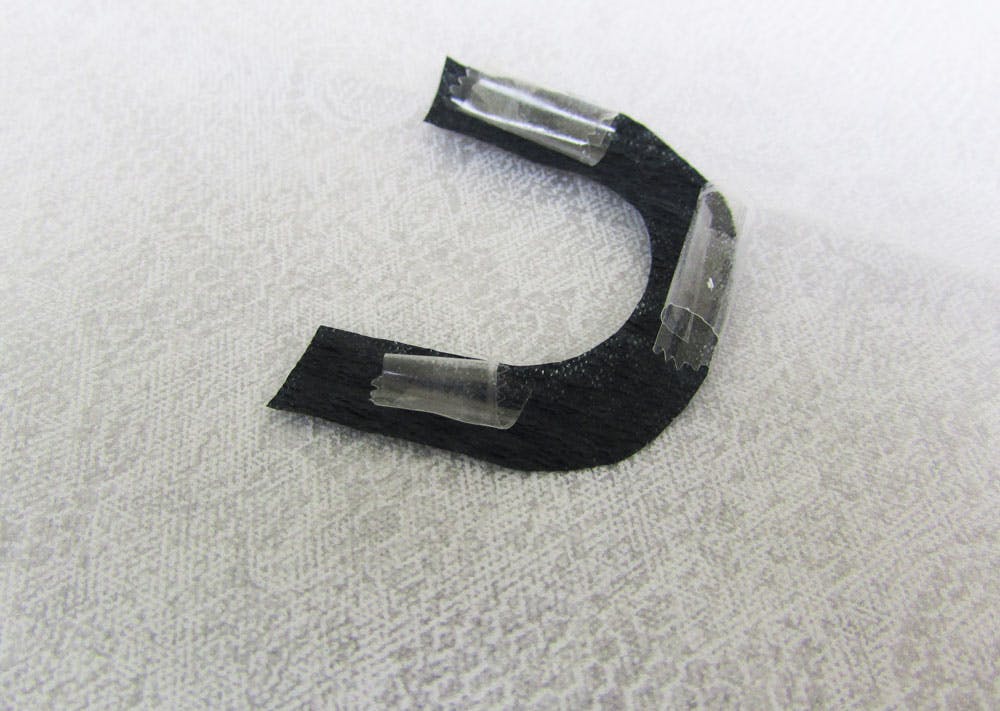
Draw your desired inner-ear shape onto your pink wrapping paper. Cut it out, then use that piece to trace the second ear shape and cut that one out too. Stick them down with lots of looped tape. Draw a small heart or nose shape on the same paper, cut it out, and stick that down with looped tape as well.
Step 12.
The last piece of the puzzle: the eyes! I went for "smiling eyes", so I cut out two small semi-circle shapes from the black streamer and stuck them on with very thin looped pieces of tape. It would have been a lot easier if I had given the bunny open eyes, but it's completely up to you!
Once you've stuck your eyes down, you're done! Now you can take as many photos of your creation as possible before it is ultimately destroyed ?
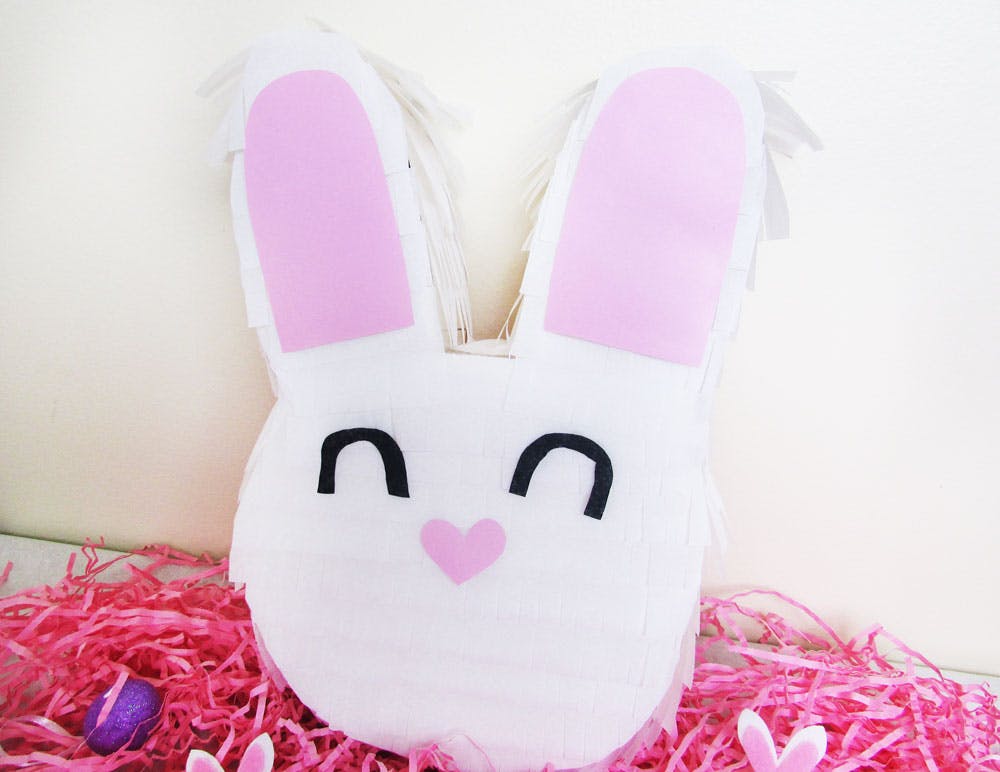
Everything you see in the photos of the finished product is from The Reject Shop! The gorgeous glittery eggs, pretty pink shredded paper, and the too-cute-to-handle mini bunnies were all only $2 each!
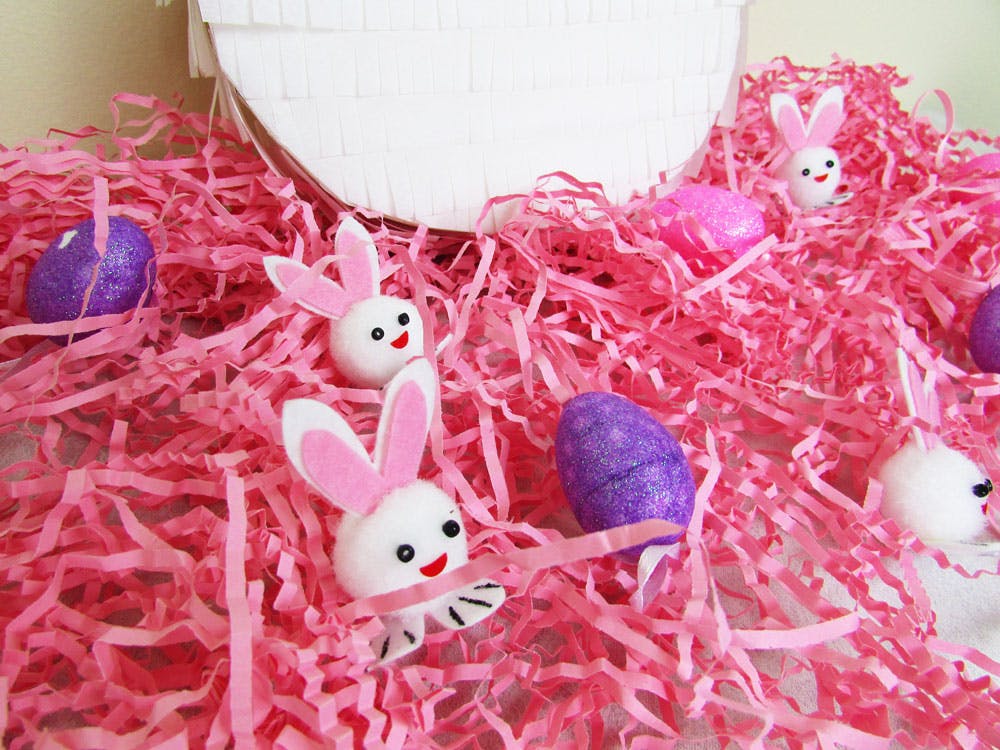
No need to go anywhere else for your Easter items, The Reject Shop has everything you need, all at amazing prices ? Hope you all have a very "hoppy" Easter!
Sign up to receive exclusive offers, VIP invites and all our hints & tips