New Years Eve, Craft
DIY New Year's Eve Party Backdrop
Is your tree lacking some sparkle? Try these personalised baubles. No Martha Stewart needed here, just a spare five minutes with the kids. Perhaps you are feeling sorry for your friend who can never find their name on mugs? Be the best friend and make them feel spesh by customising their name on baubles (take note Kim Kardashian, you might want to try this for your little ones). Or perhaps you love the concept so much you want to open your own store full of phrases and pretty names.
![featured image for [object Object]](/_next/image?url=https%3A%2F%2Fimages.prismic.io%2Ftrs-storefront%2F58265e6a-2045-4f39-8dbd-464b74cc8a4e_blog_diy-new-years-eve-party-backdrop.jpg%3Fauto%3Dcompress%2Cformat&w=3840&q=75)
The Reject Shop
Last updated
31 Jul 2023
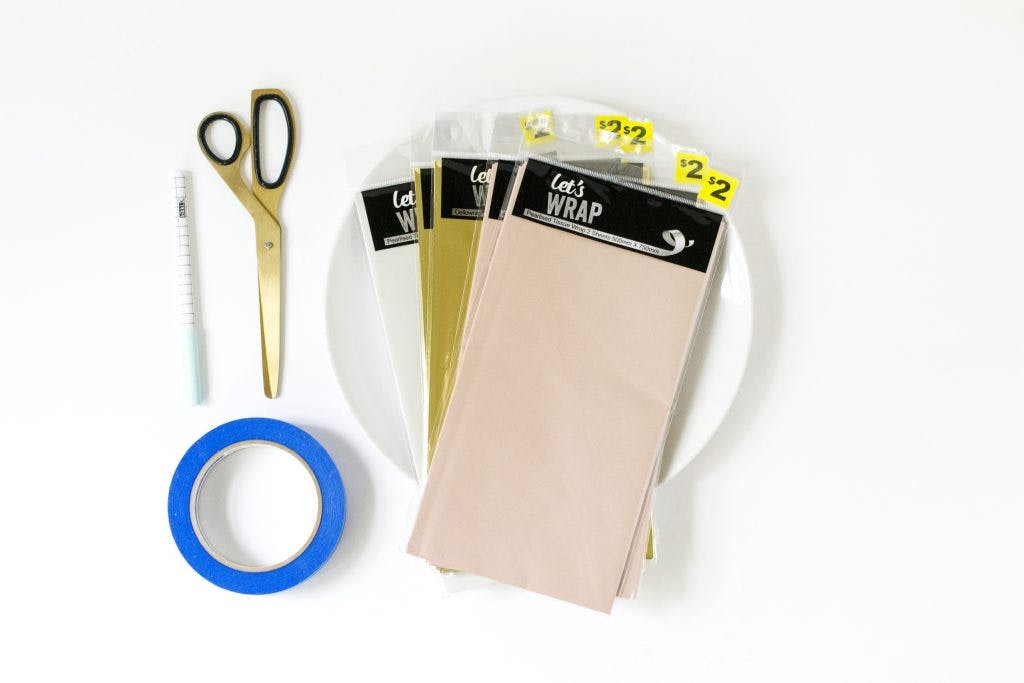
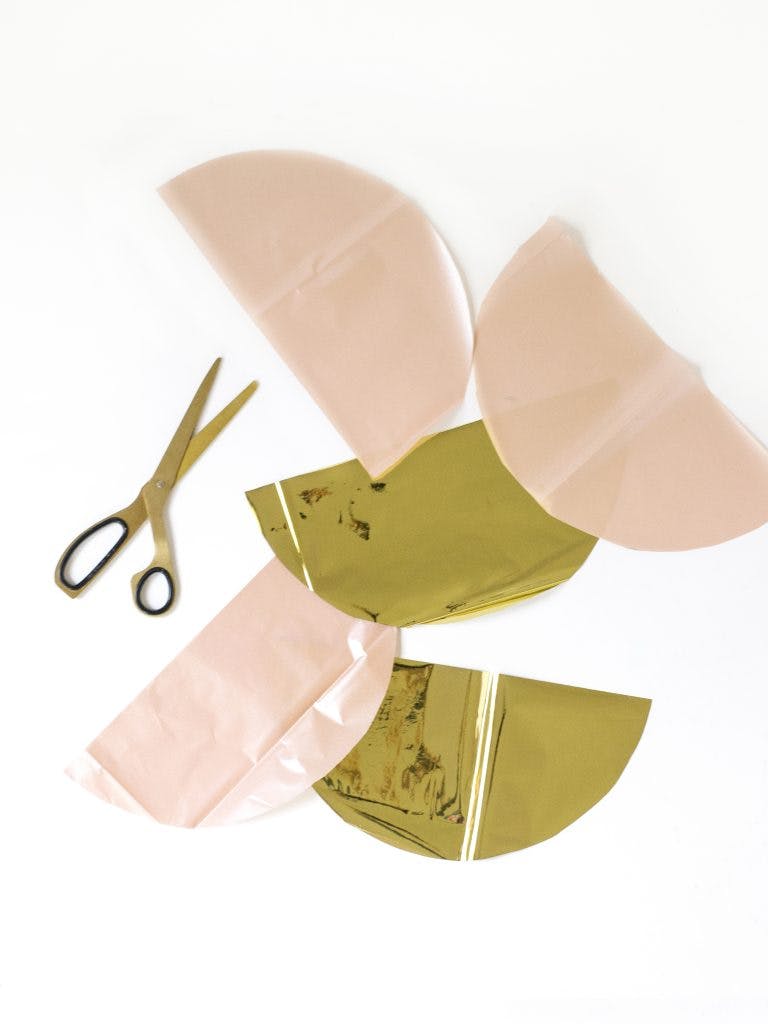
Materials
⁃ Metallic tissue paper and/or cellophane sheets in several colours from The Reject Shop
⁃ Scissors from The Reject Shop
⁃ Pen or pencil from The Reject Shop
⁃ A large round object (e.g. a bowl or similar)
⁃ Painters tape, masking tape or blu tack
(Other decorations like the photobooth props, chain garland and honeycomb balls are all from The Reject Shop)
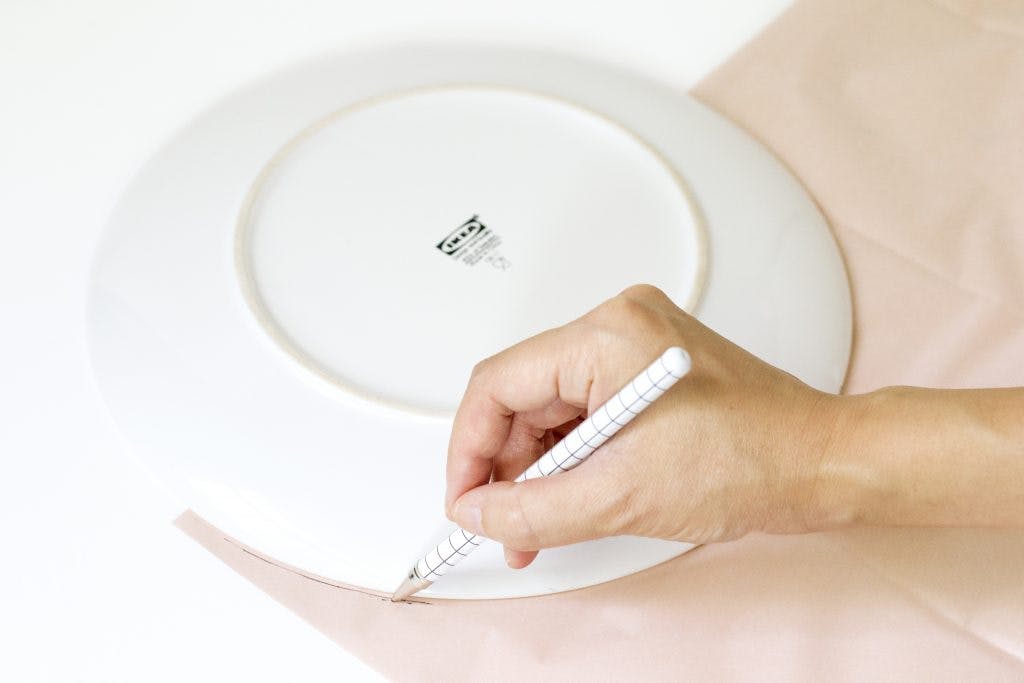
Step 1
Lay a sheet of tissue paper on a flat surface and place your round object on top of it, so that it’s halfway off the edge.
Trace around the object with a pen or pencil to mark out a semi-circle shape on the tissue paper.
Step 2
Cut out the semi-circle with a pair of scissors.
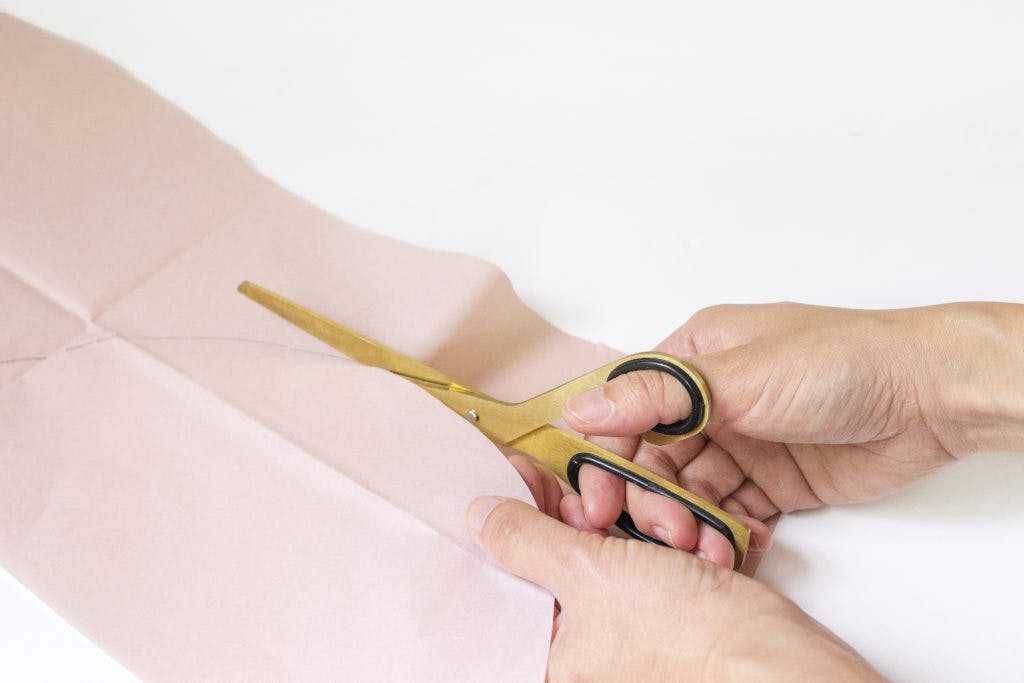
Step 3
Repeat Step 2 until you have as many semi-circles in different tissue paper colours as you think you’ll need to cover your wall (don’t worry at this stage if you underestimate the number you need - you can always cut out more later).
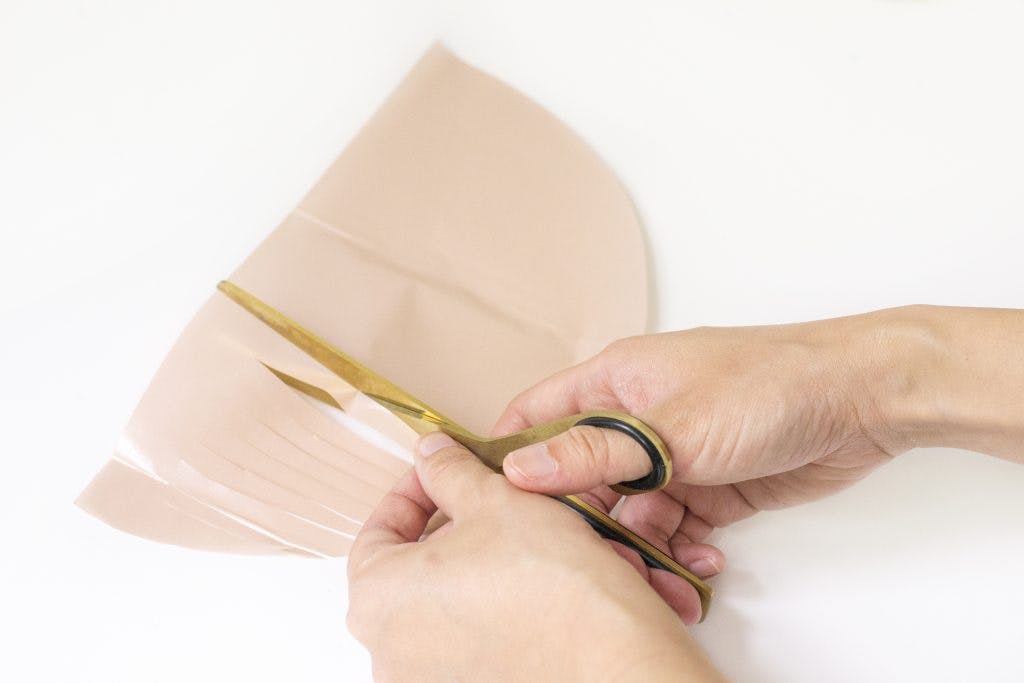
Step 4
With a pair of scissors, start cutting strips in your semi circles, but stop each cut about 2cm (1 inch) from the top of the semi circle.
This will create a fringed look.
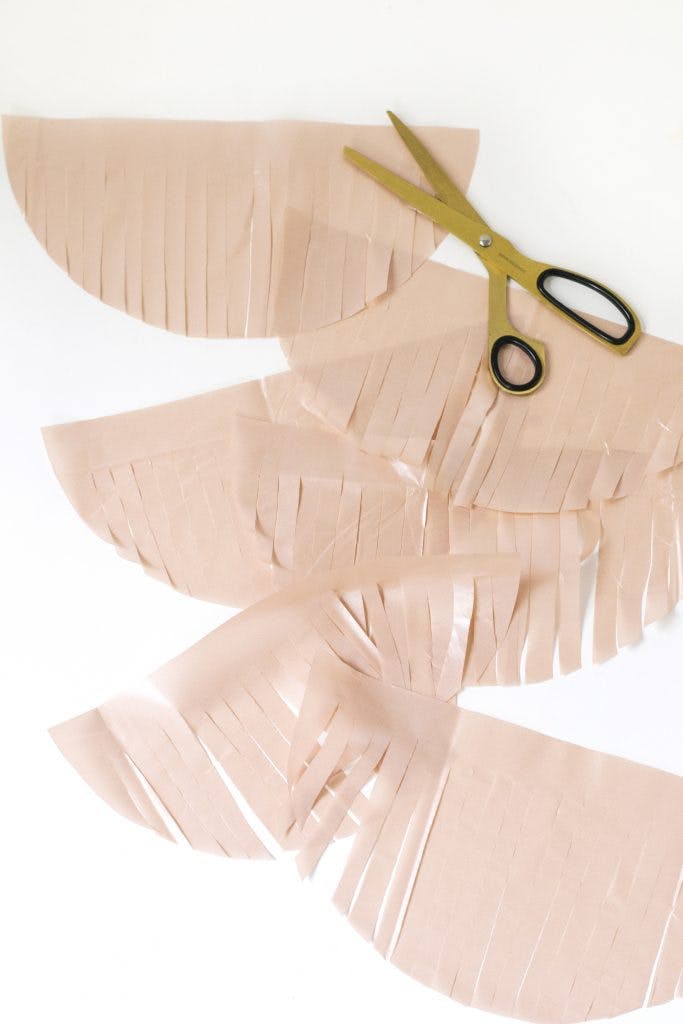
You don’t have to fringe every colour if you don’t want to - I decided to leave the gold semi-circles whole because I liked the way they looked uncut.
Handy tip: To save cutting time, layer several semicircles on top of each other, secure them together with paperclips and cut though the whole bunch at once.
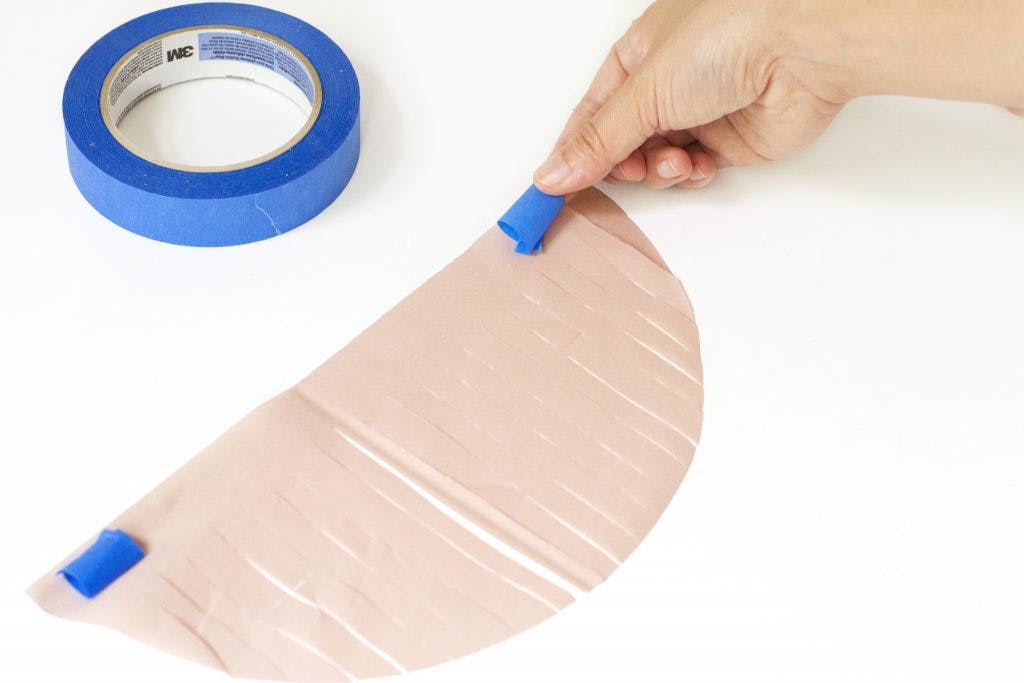
Step 5
Place a loop of masking tape/painter’s tape or a few pieces of blu tack at the back of each fringed semi-circle.
It pays to be careful with colours at this point - I started out with blue painter’s tape but later switched to masking tape because the blue showed right through the tissue paper!
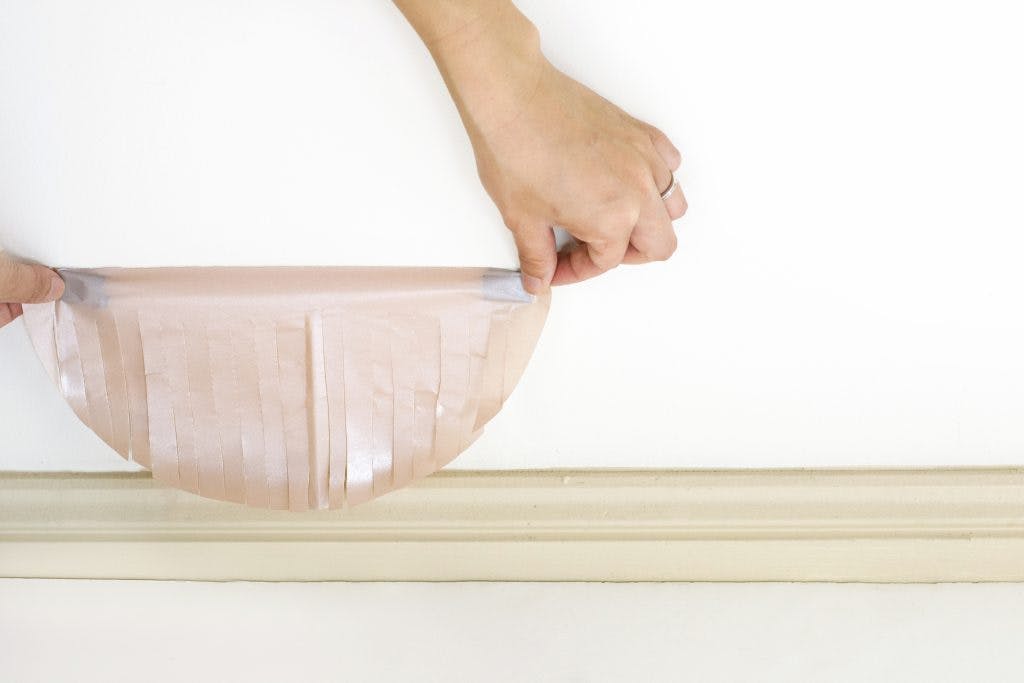
Step 6
Attach the semi-circles to your wall, placing them in a line starting from the bottom.
Alternate different tissue paper colours and try to overlap the ends of the semi-circles slightly to get a nice scalloped look.
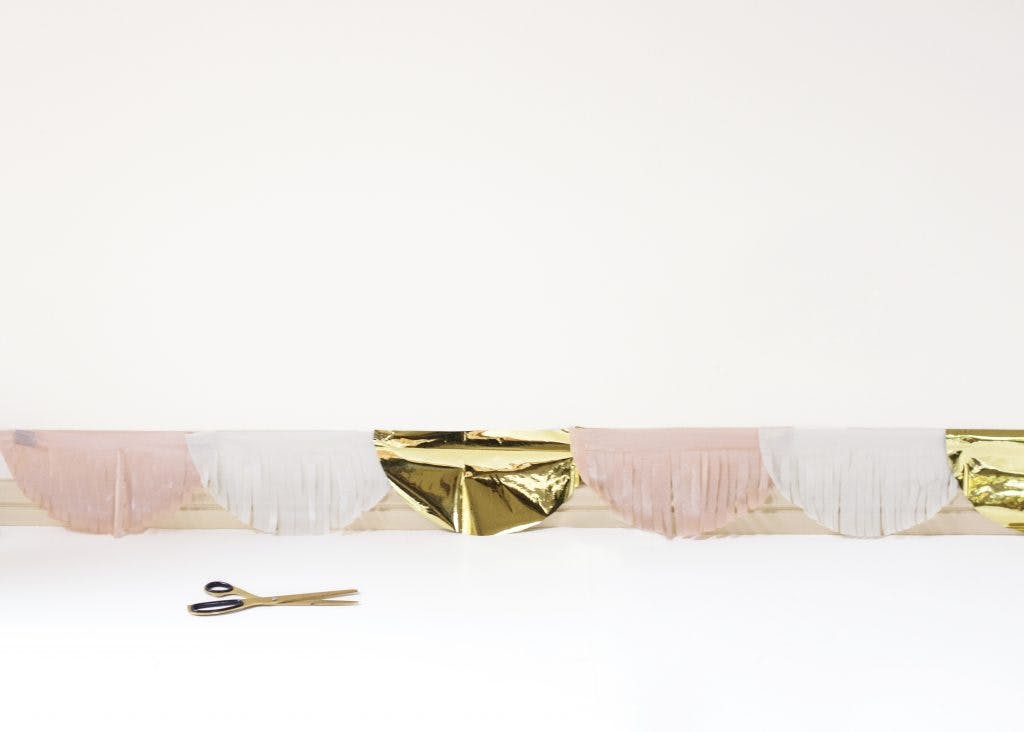
Step 7
Once you’ve completed one line, begin the next one. Make sure the second line of semi-circles overhangs the first.
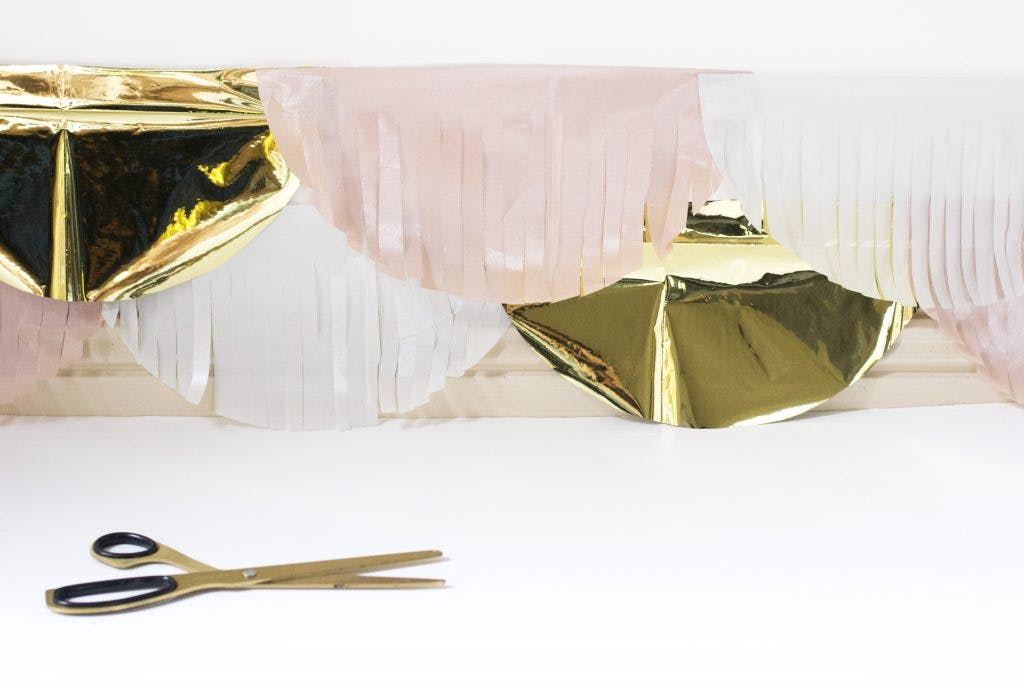
Step 8
Continue working your way up the wall, adding lines of semi-circles until the whole space is covered.
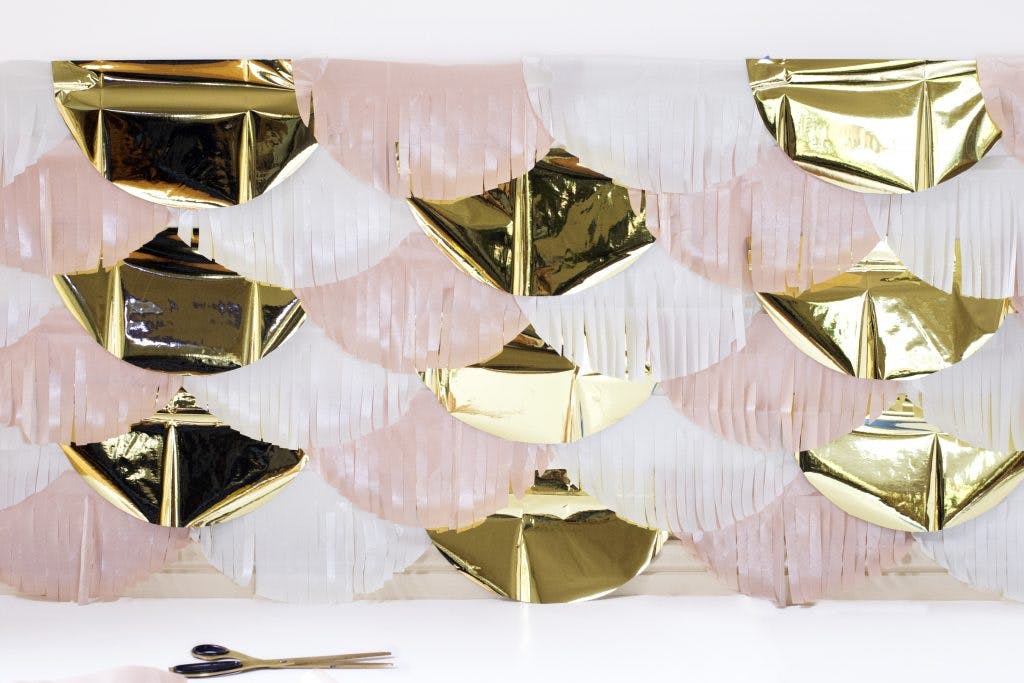
Then step back and admire your handiwork!


This post is sponsored by The Reject Shop, all images, opinions and words are from Make and Tell.
Sign up to receive exclusive offers, VIP invites and all our hints & tips