Guides, Gift Ideas, Decorating
DIY Photo Display in 8 Steps
The old photo frame is making a comeback after the whole digital photo frame affair ran its course. You know the type that you plug in and a random collection of pics is displayed? Well now they’re all in the basement bin and these are back, better than ever. Bless nostalgia.You could display memories of your first and last trip overseas before priorities changed (called kids) or even better as the whole DIY vintage vibe is in full swing, why not grab these kids and make a gorgeous photo display for the grandparents.
![featured image for [object Object]](/_next/image?url=https%3A%2F%2Fimages.prismic.io%2Ftrs-storefront%2F8feecc0f-c66e-4299-905b-47c8d847fecb_blog_diy-photo-display-in-8-steps.jpg%3Fauto%3Dcompress%2Cformat&w=3840&q=75)
The Reject Shop
Last updated
31 Jul 2023
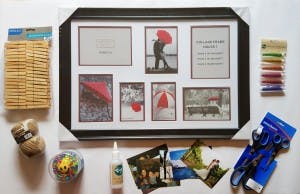
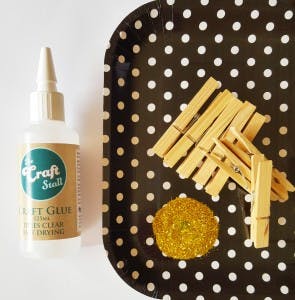
Supplies needed:
- Pegs
- Twine
- Photo Frame
- Glitter / paint (optional)
- Non toxic Glue
- Collection of touchy feely photos where you look good and the kids are actually smiling
- Scissors
- Pins
Step 1
Find an unused frame or buy a new one.
Once you have the perfect frame, remove everything from it including the glass

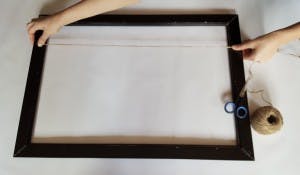
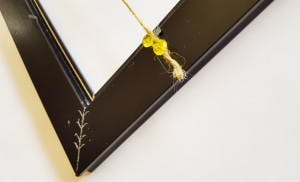
Step 2
You can either tape the ends of the twine to the back of the frame or use a pin to secure it.
Tip: For that hanging look, loosen the twine.
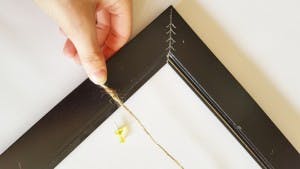
Step 3
You can either tape the ends of the twine to the back of the frame or use a pin to secure it. Tip: For that hanging look, loosen the twine.
Step 4
Cut off any extra ends of twine.

Step 5
If you want to get creative, dab some glue on the pegs and then dip one side in glitter or paint.

Step 6
Let them sit to dry.

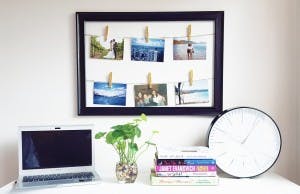
Step 7
Now display the photos you want by clipping them onto the twine with pegs.

Step 8
Hang it up or lean it against the wall and then you are done!
The best part about this project is that you can change the photos anytime you want. Snaps.
All products or variations featured can be found in store.
Sign up to receive exclusive offers, VIP invites and all our hints & tips